• Tired of adverts on RWI? - Subscribe by clicking HERE and PMing Trailboss for instructions and they will magically go away!

Project "RWI Raffle Win"... a 1675 Build

p0pperini

patr0n h0arder
Gold Patron
Certified
29/1/19
8,973
30,054
113
UK
Holy crap - OP in "Actual Project Update" Shocker!!

So, Project Raffle Win slowly inches on, and this weekend I embarked on a Herculean effort (for me) to get the watch put together. Prior to this, I've spent several comedic sessions trying to epoxy on dial feet which just fell off again, every time. Anyway, I ditched the Gorilla epoxy for some good old fashioned Araldite, and this weekend achieved a state of successful feet adhesion.

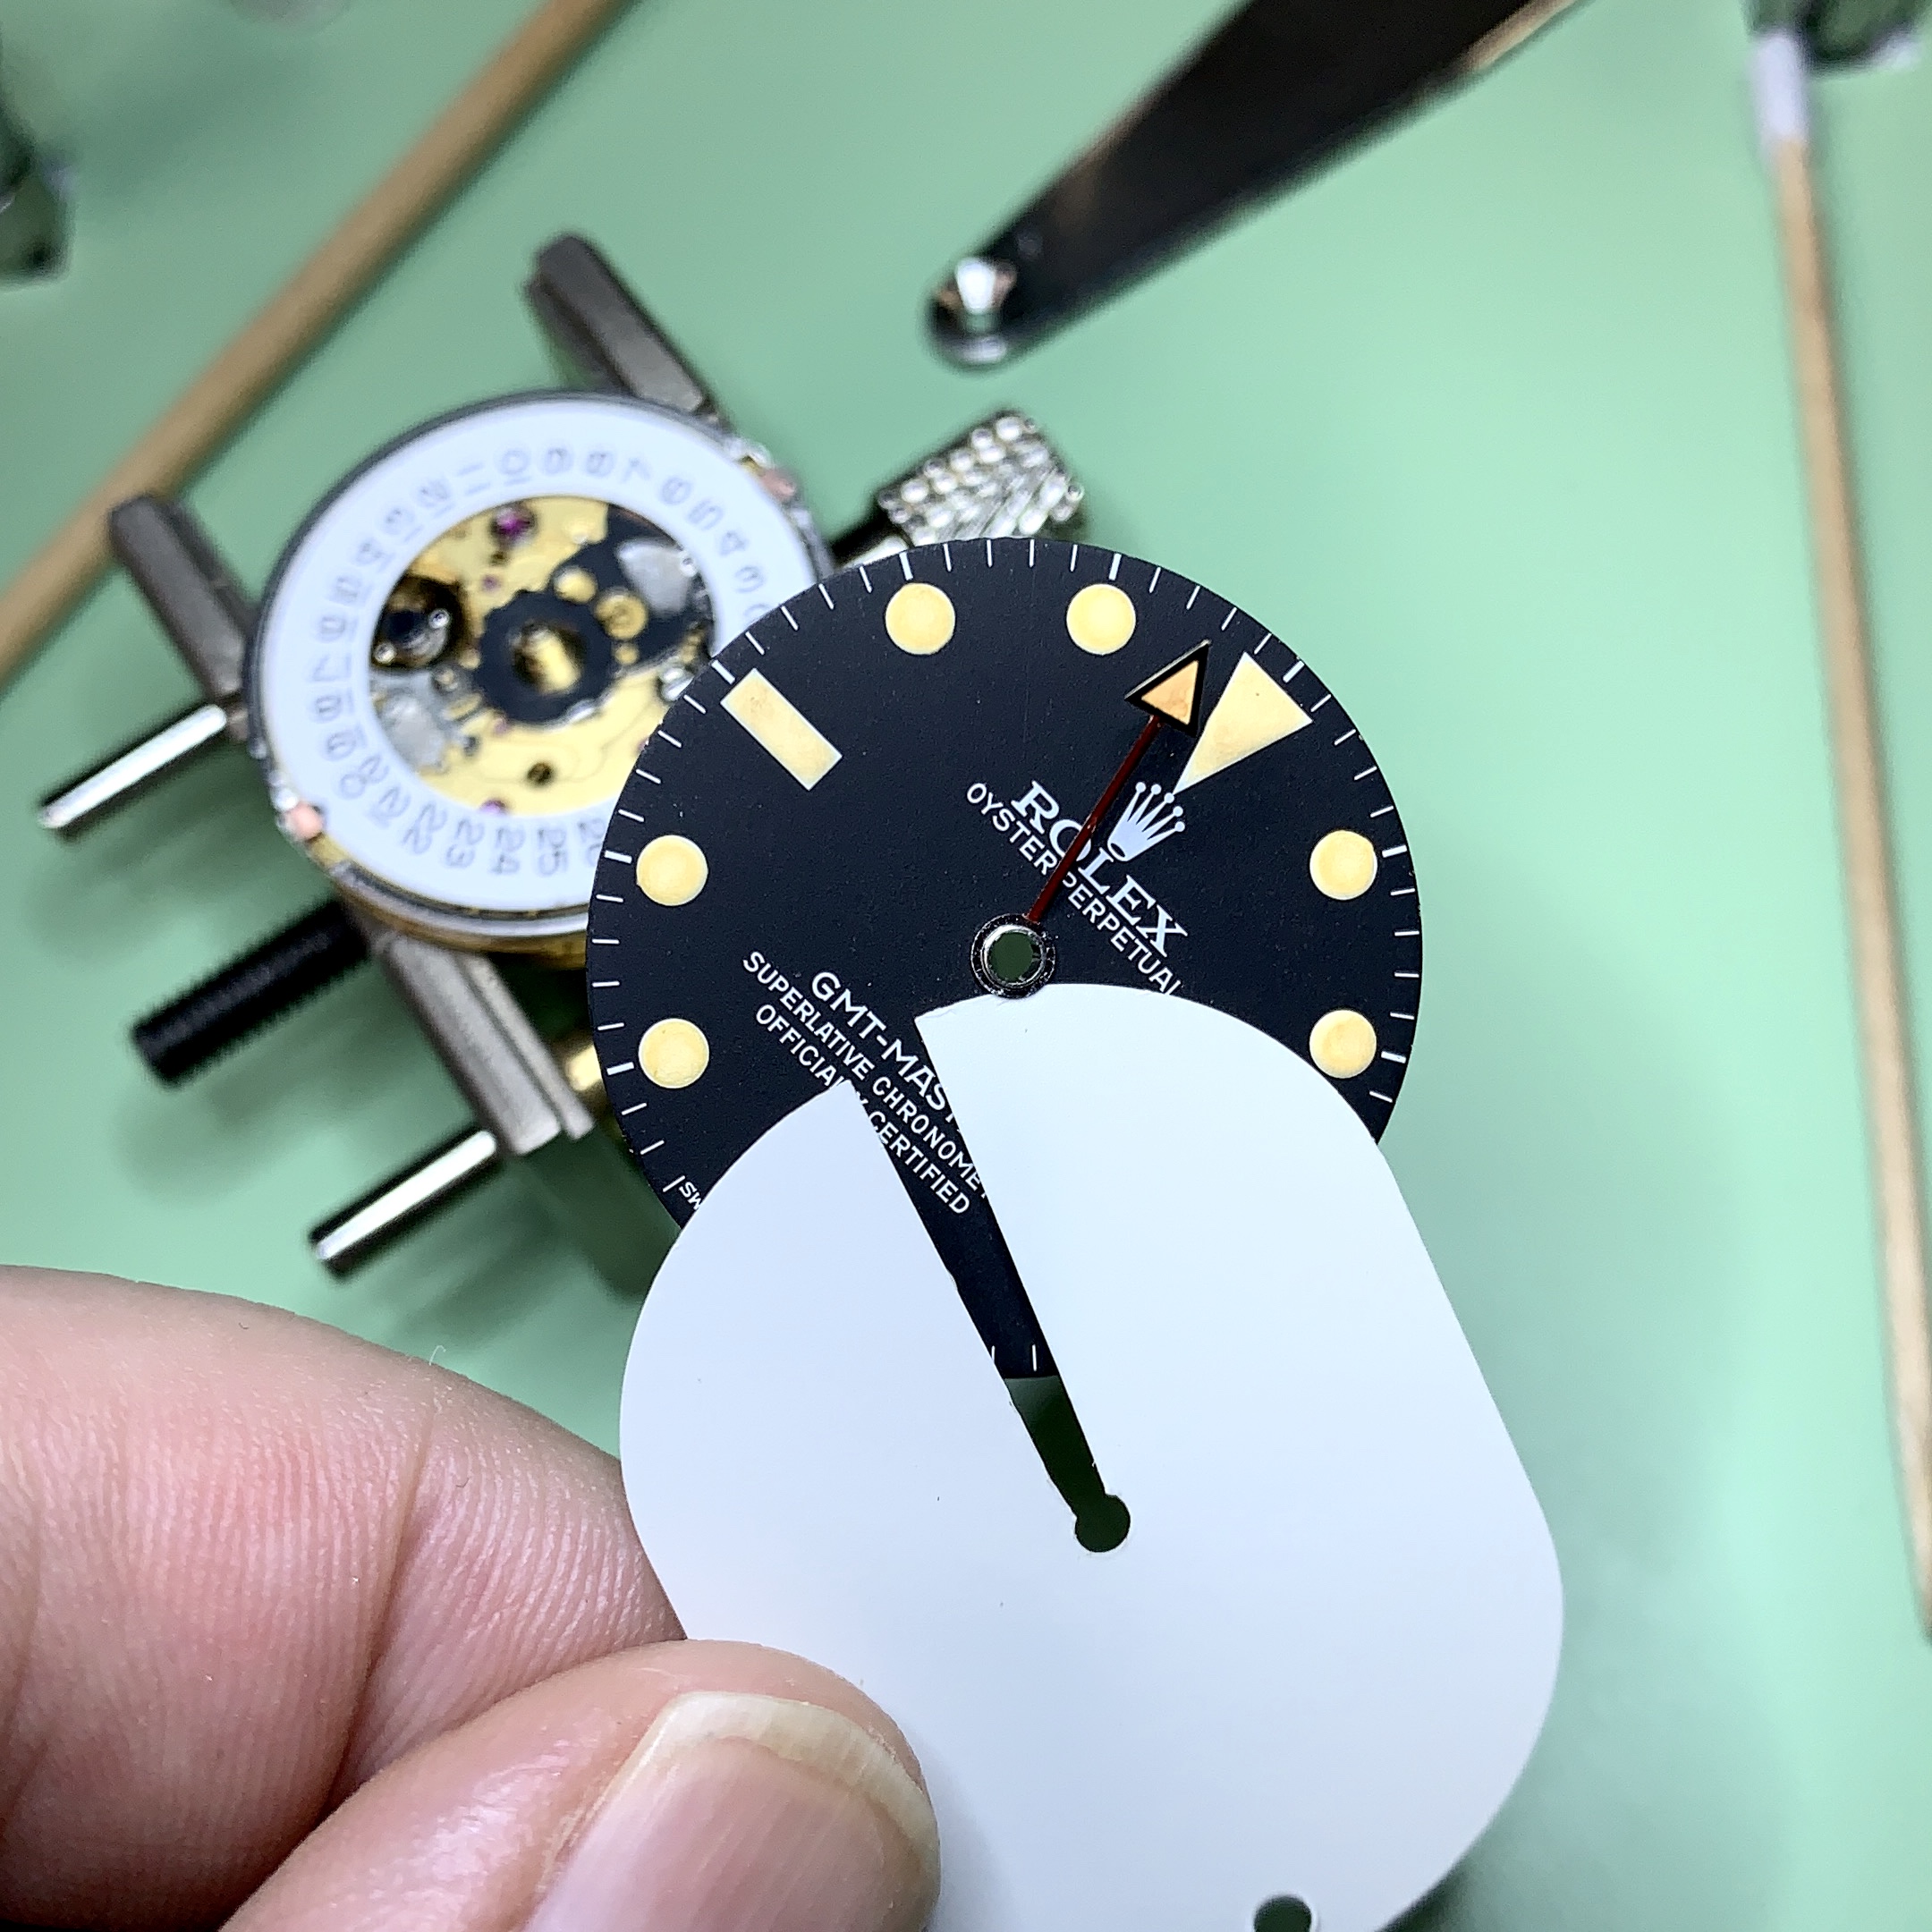
Now, during the process I also decided that my dial foot "footprint" was inadequate, so I switched to dial feet with a bigger "footprint" (what I call the flat plate that you glue to the dial). BUT, these bigger footprints also then fouled the datewheel. BUT, I'd noticed there was plenty of depth to the GMT pinion, and I thought I'd get away with clamping the dial posts so the dial and the big feet footprints hovered over the datewheel. So I proceeded with that cunning plan.

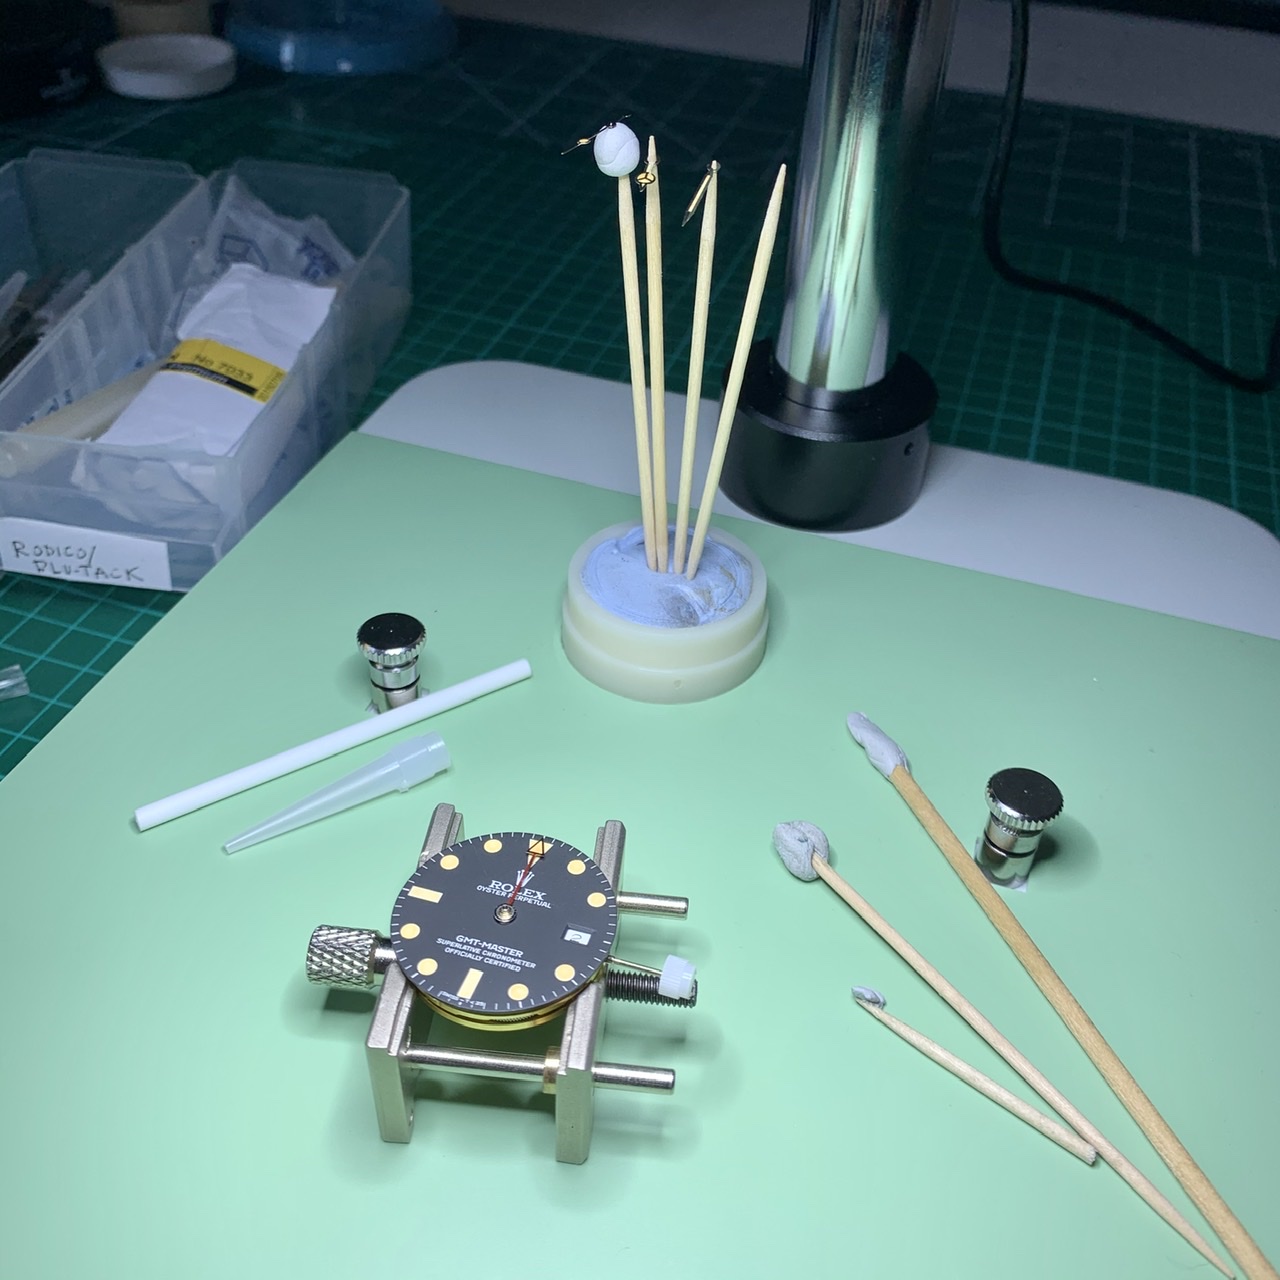
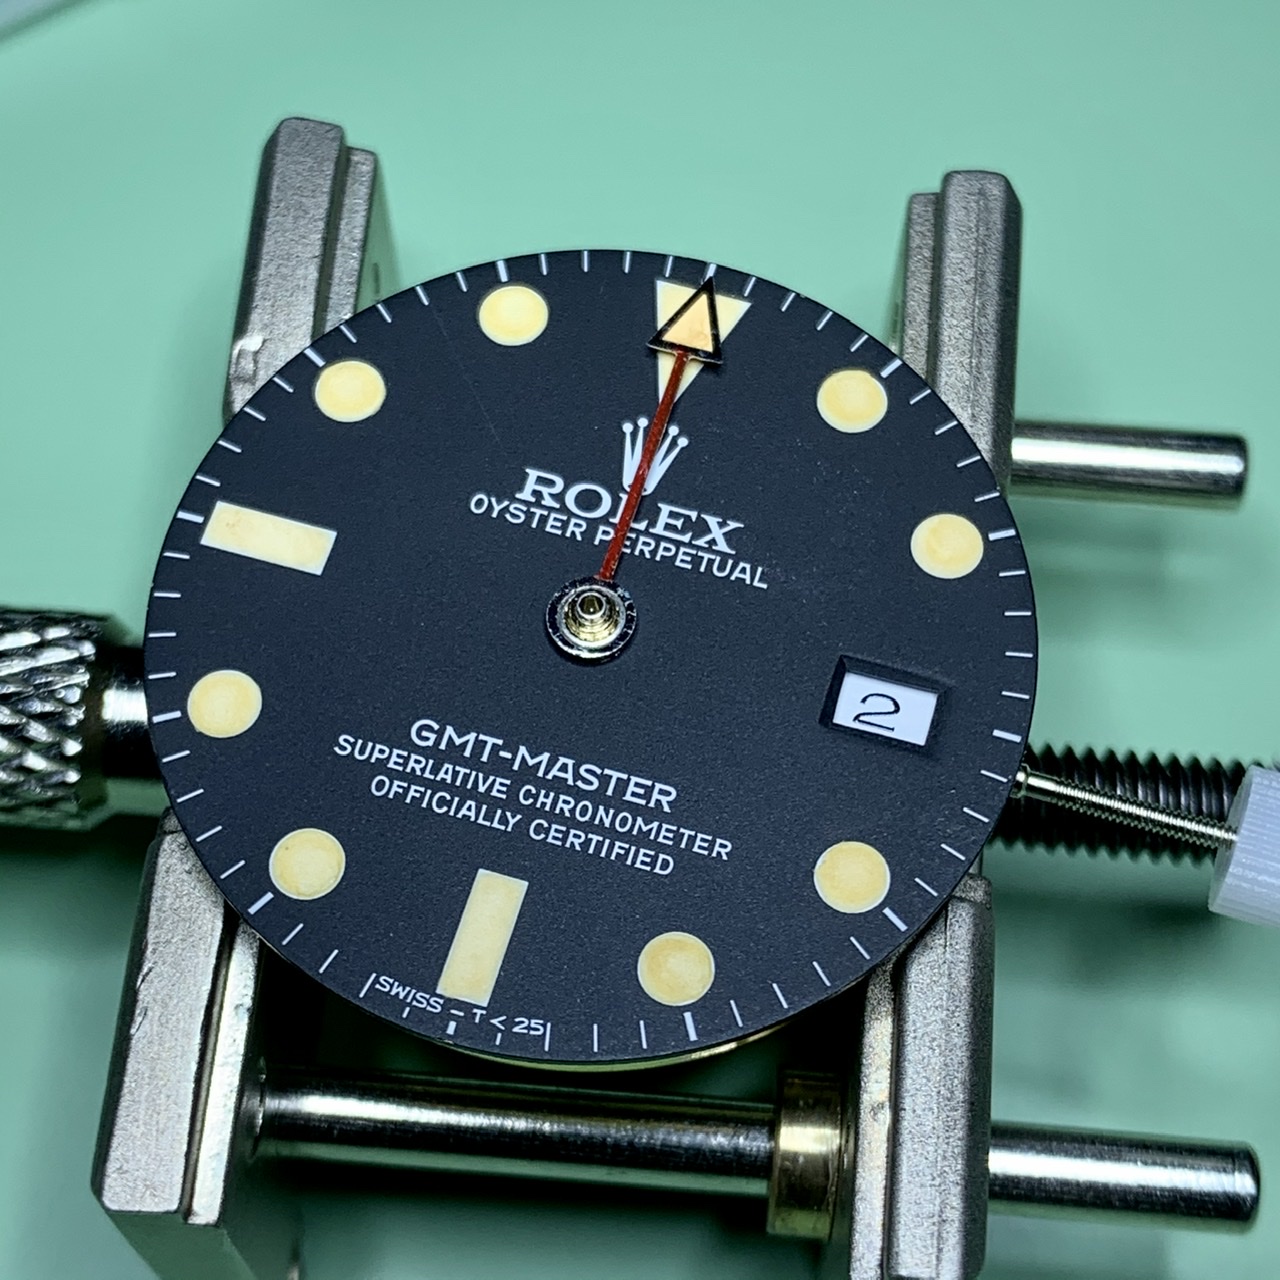
Before assembly, I gave the dial and hands a very light ageing pass with the ol' coffee wash. Just on the lume and hands - I didn't feel the need to work over the dial surface.

XxPoP.jpg


And then on to assembly. I attached the dial to the movement, making sure it cleared the datewheel. Checking the operation of the movement, it worked just fine! The GMT hand went on, no problem.

Xxk5Q.jpg


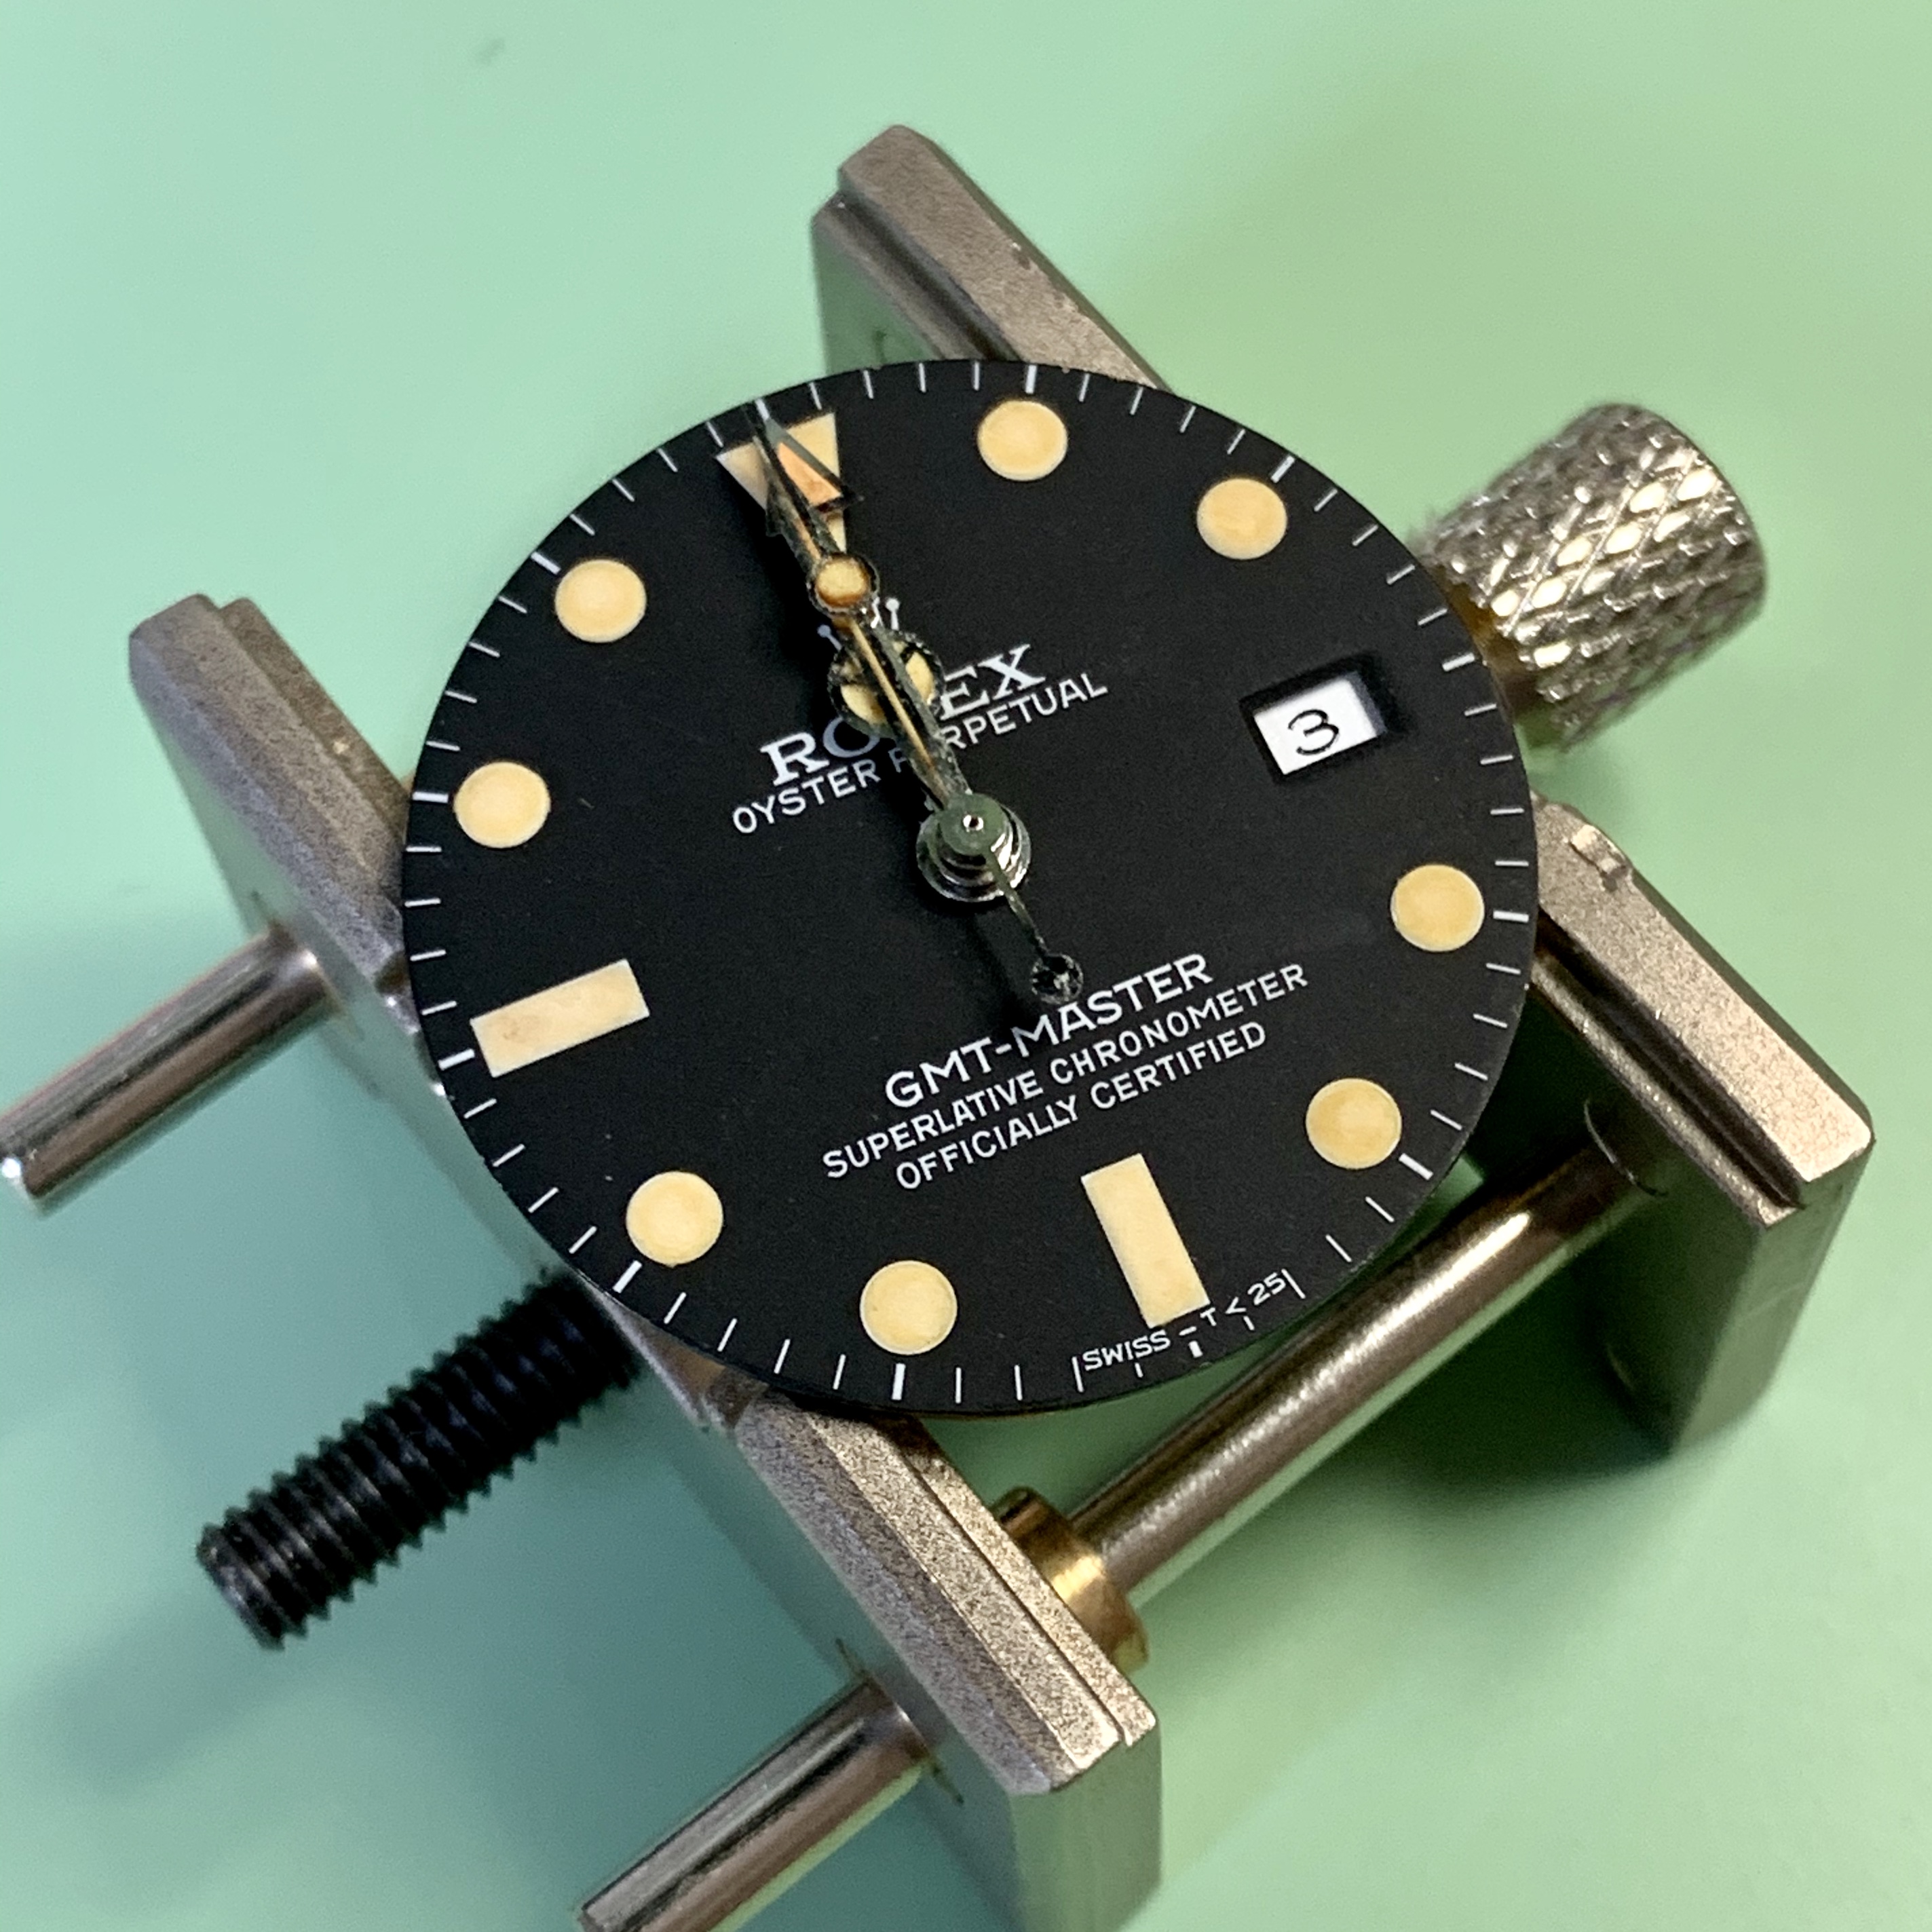
And then I tried to fit my nicely aged hour hand. Oh. It's the wrong size. Okay, so I'd aged a set of hands for a low beat movement. Tits. At this point impatience to get the watch constructed took over, and - having found a set of ETA hands - I went straight ahead and fitted them (I'll give them a very light coffee wash in situ, I thought, because that's the kind of watchmaking rebel I am).

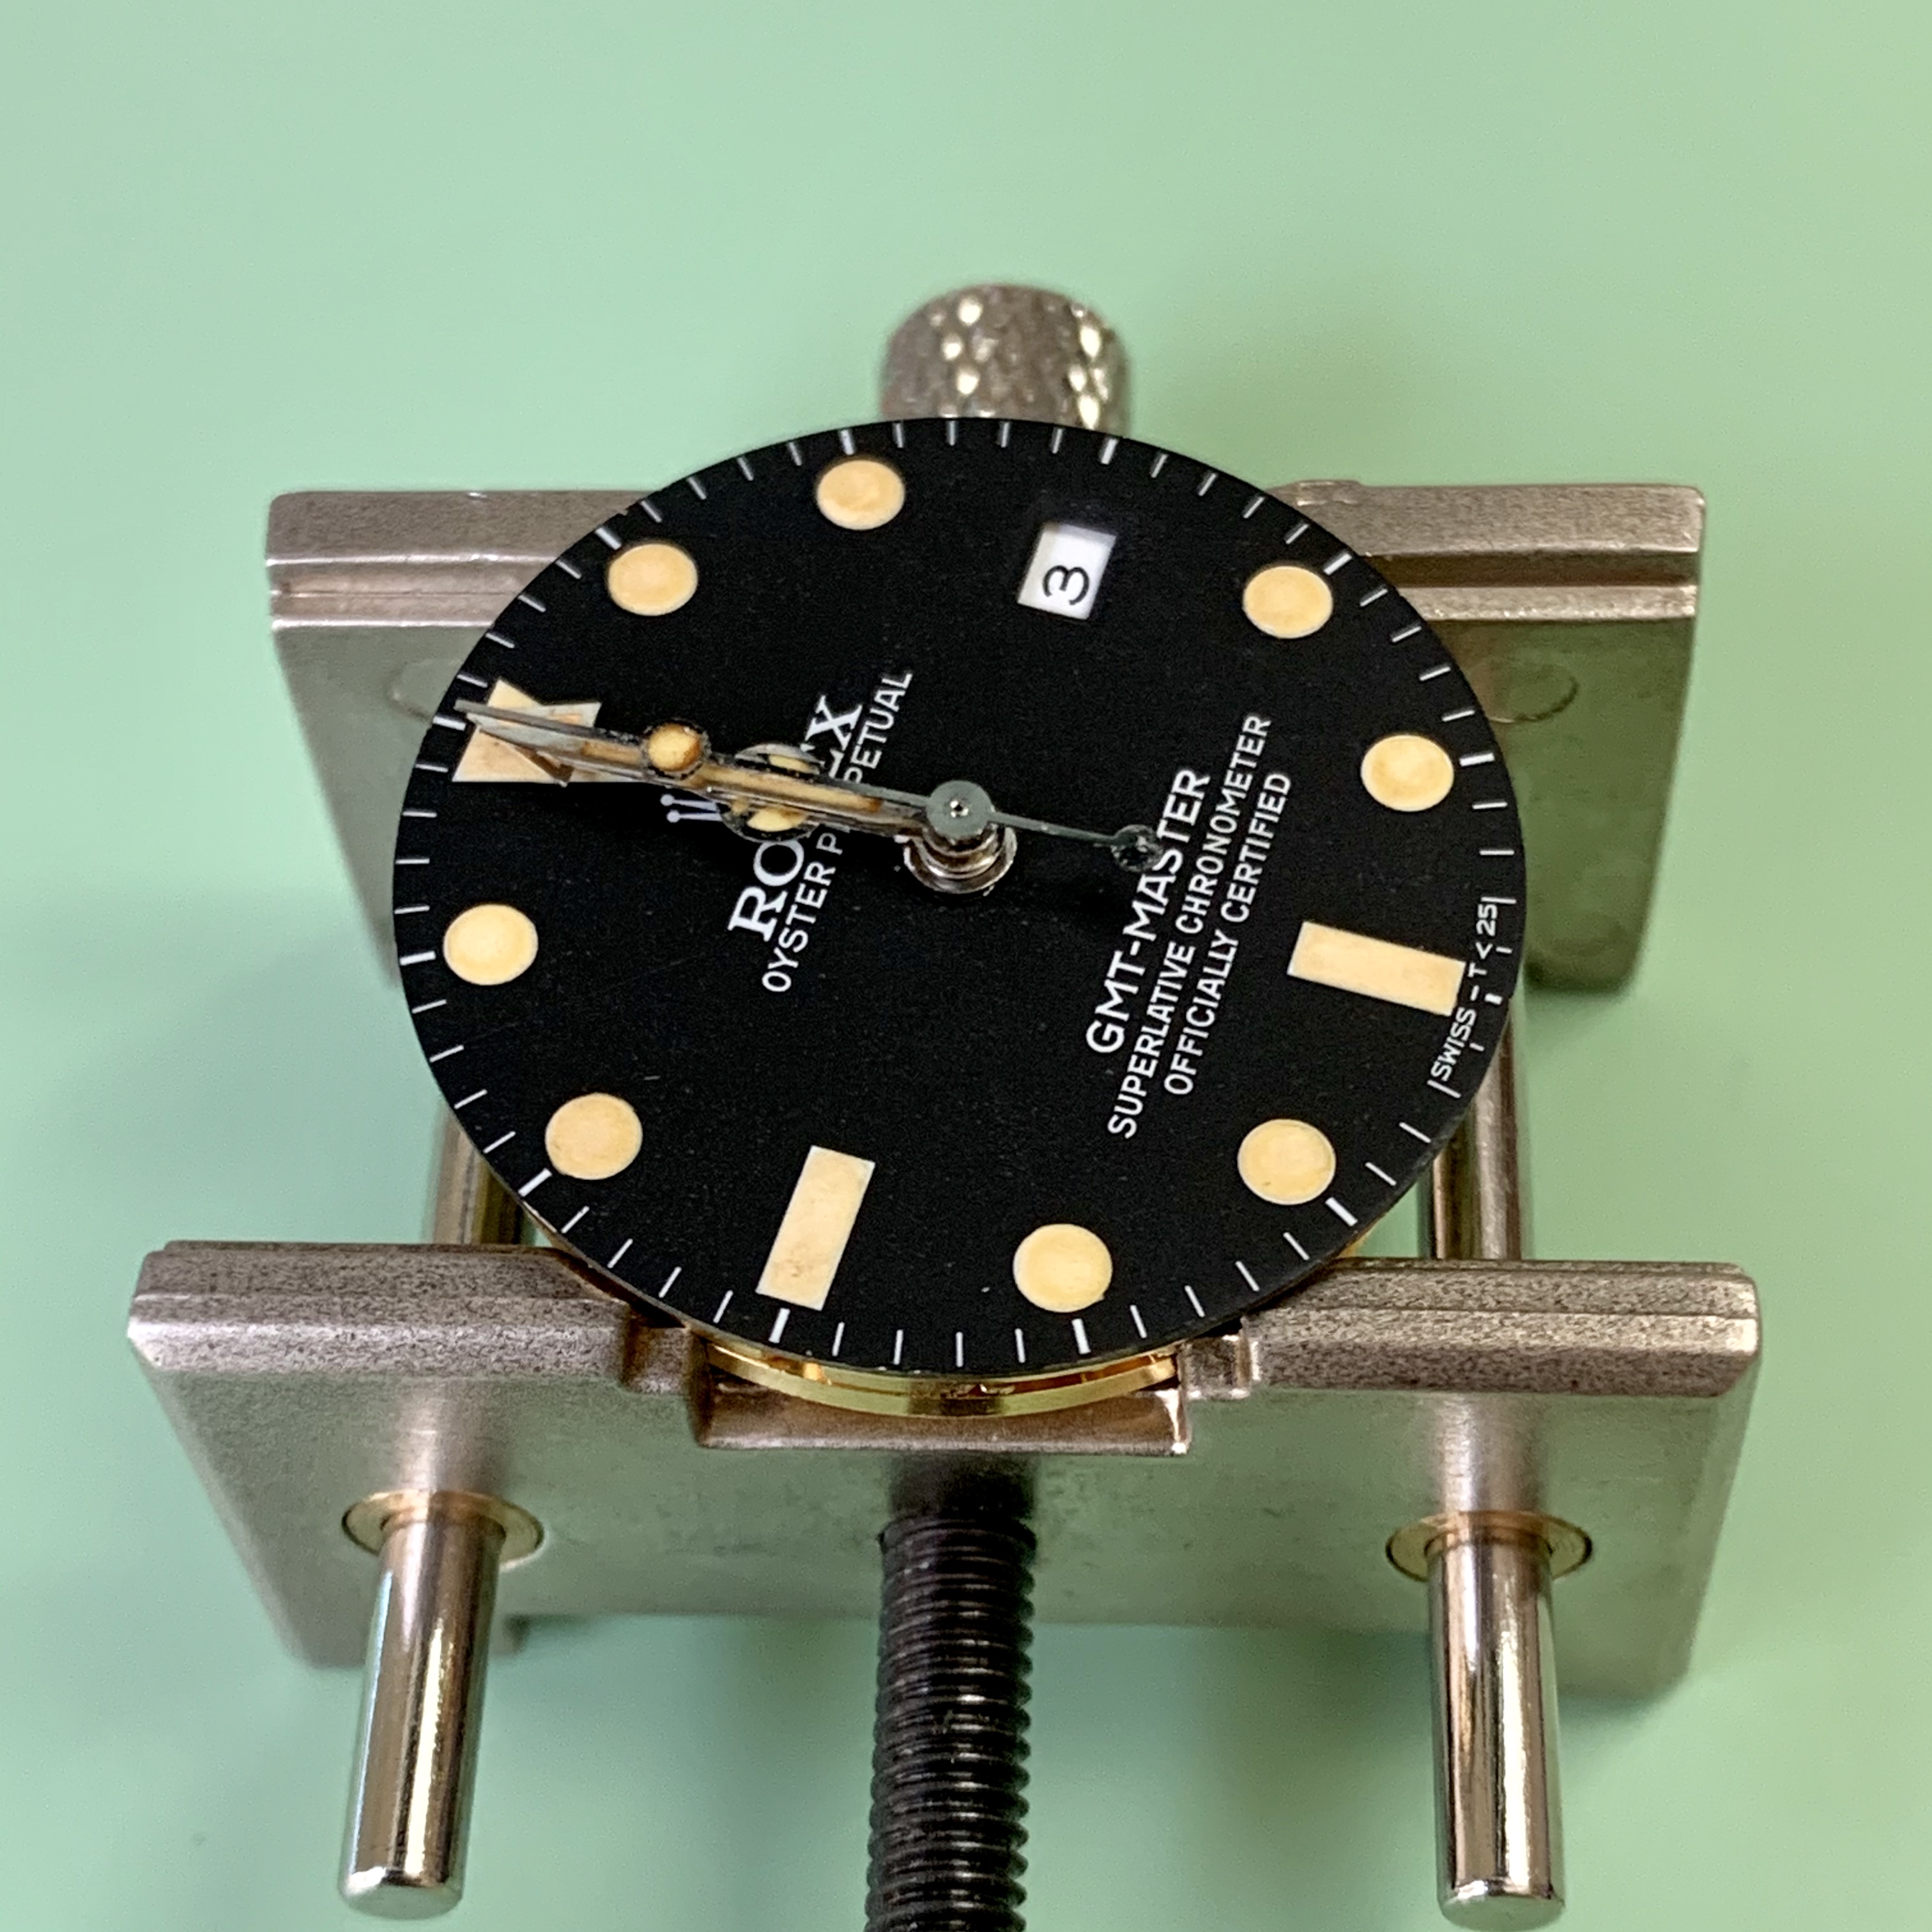
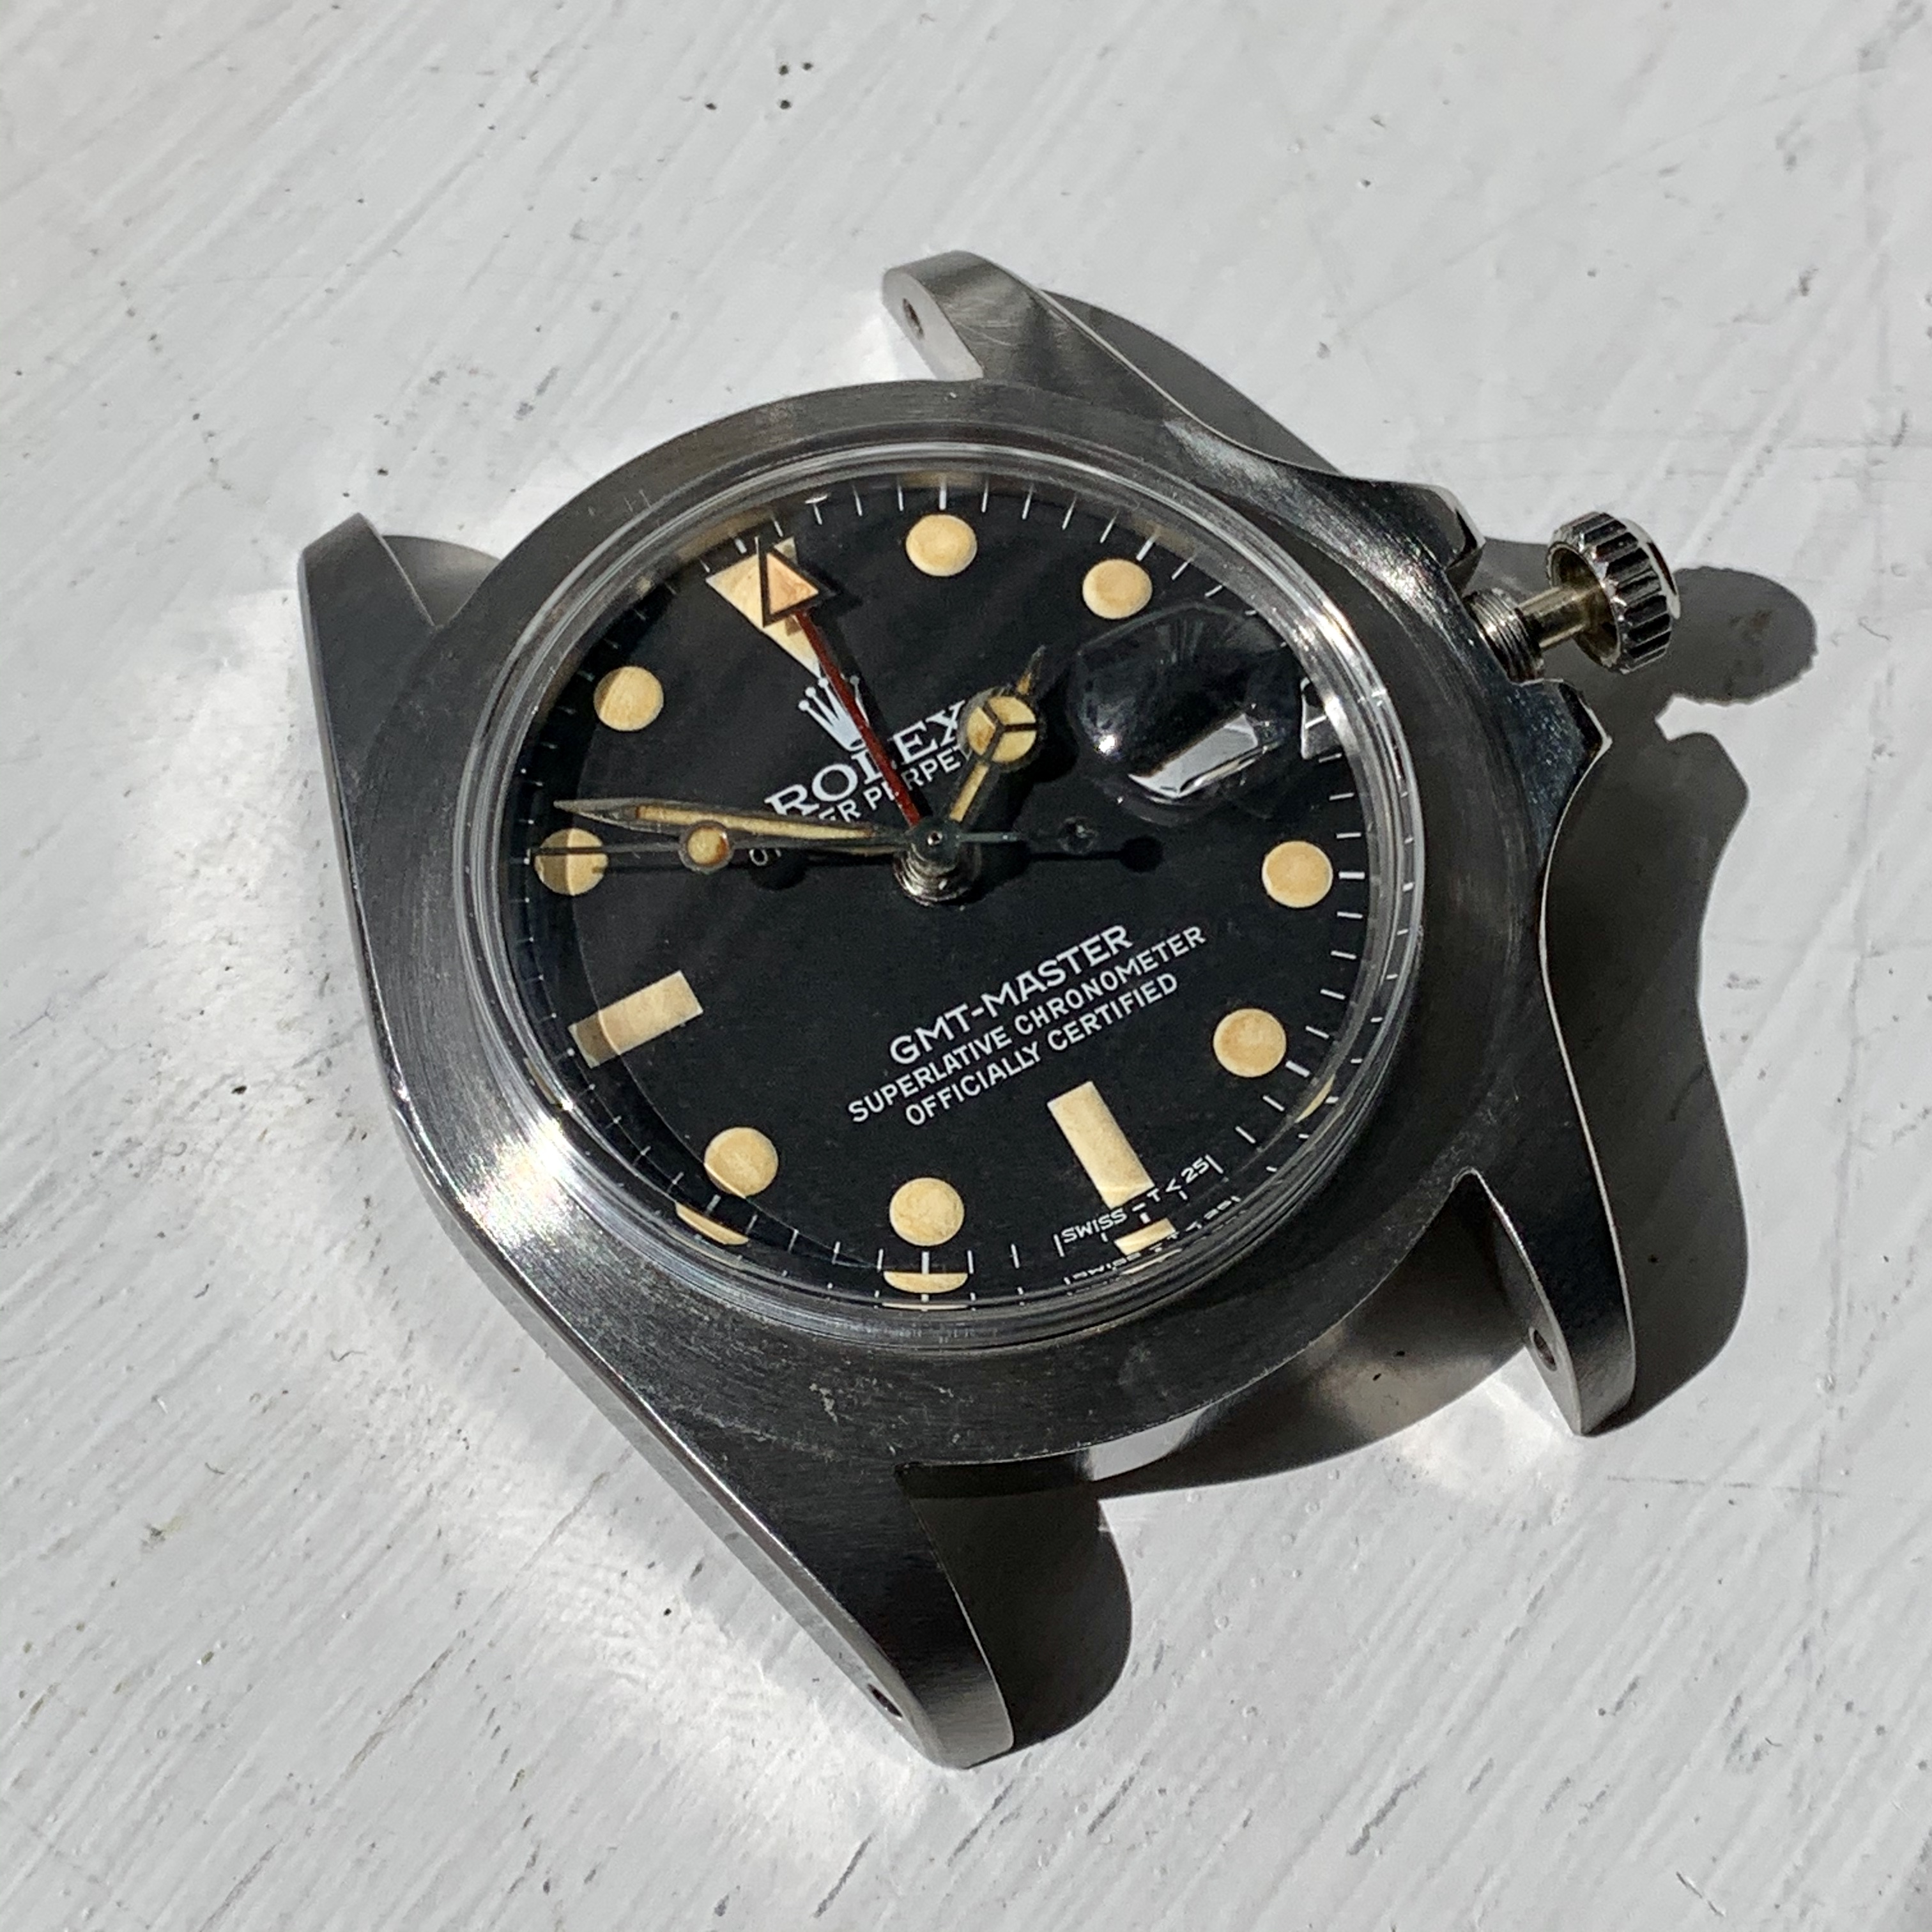
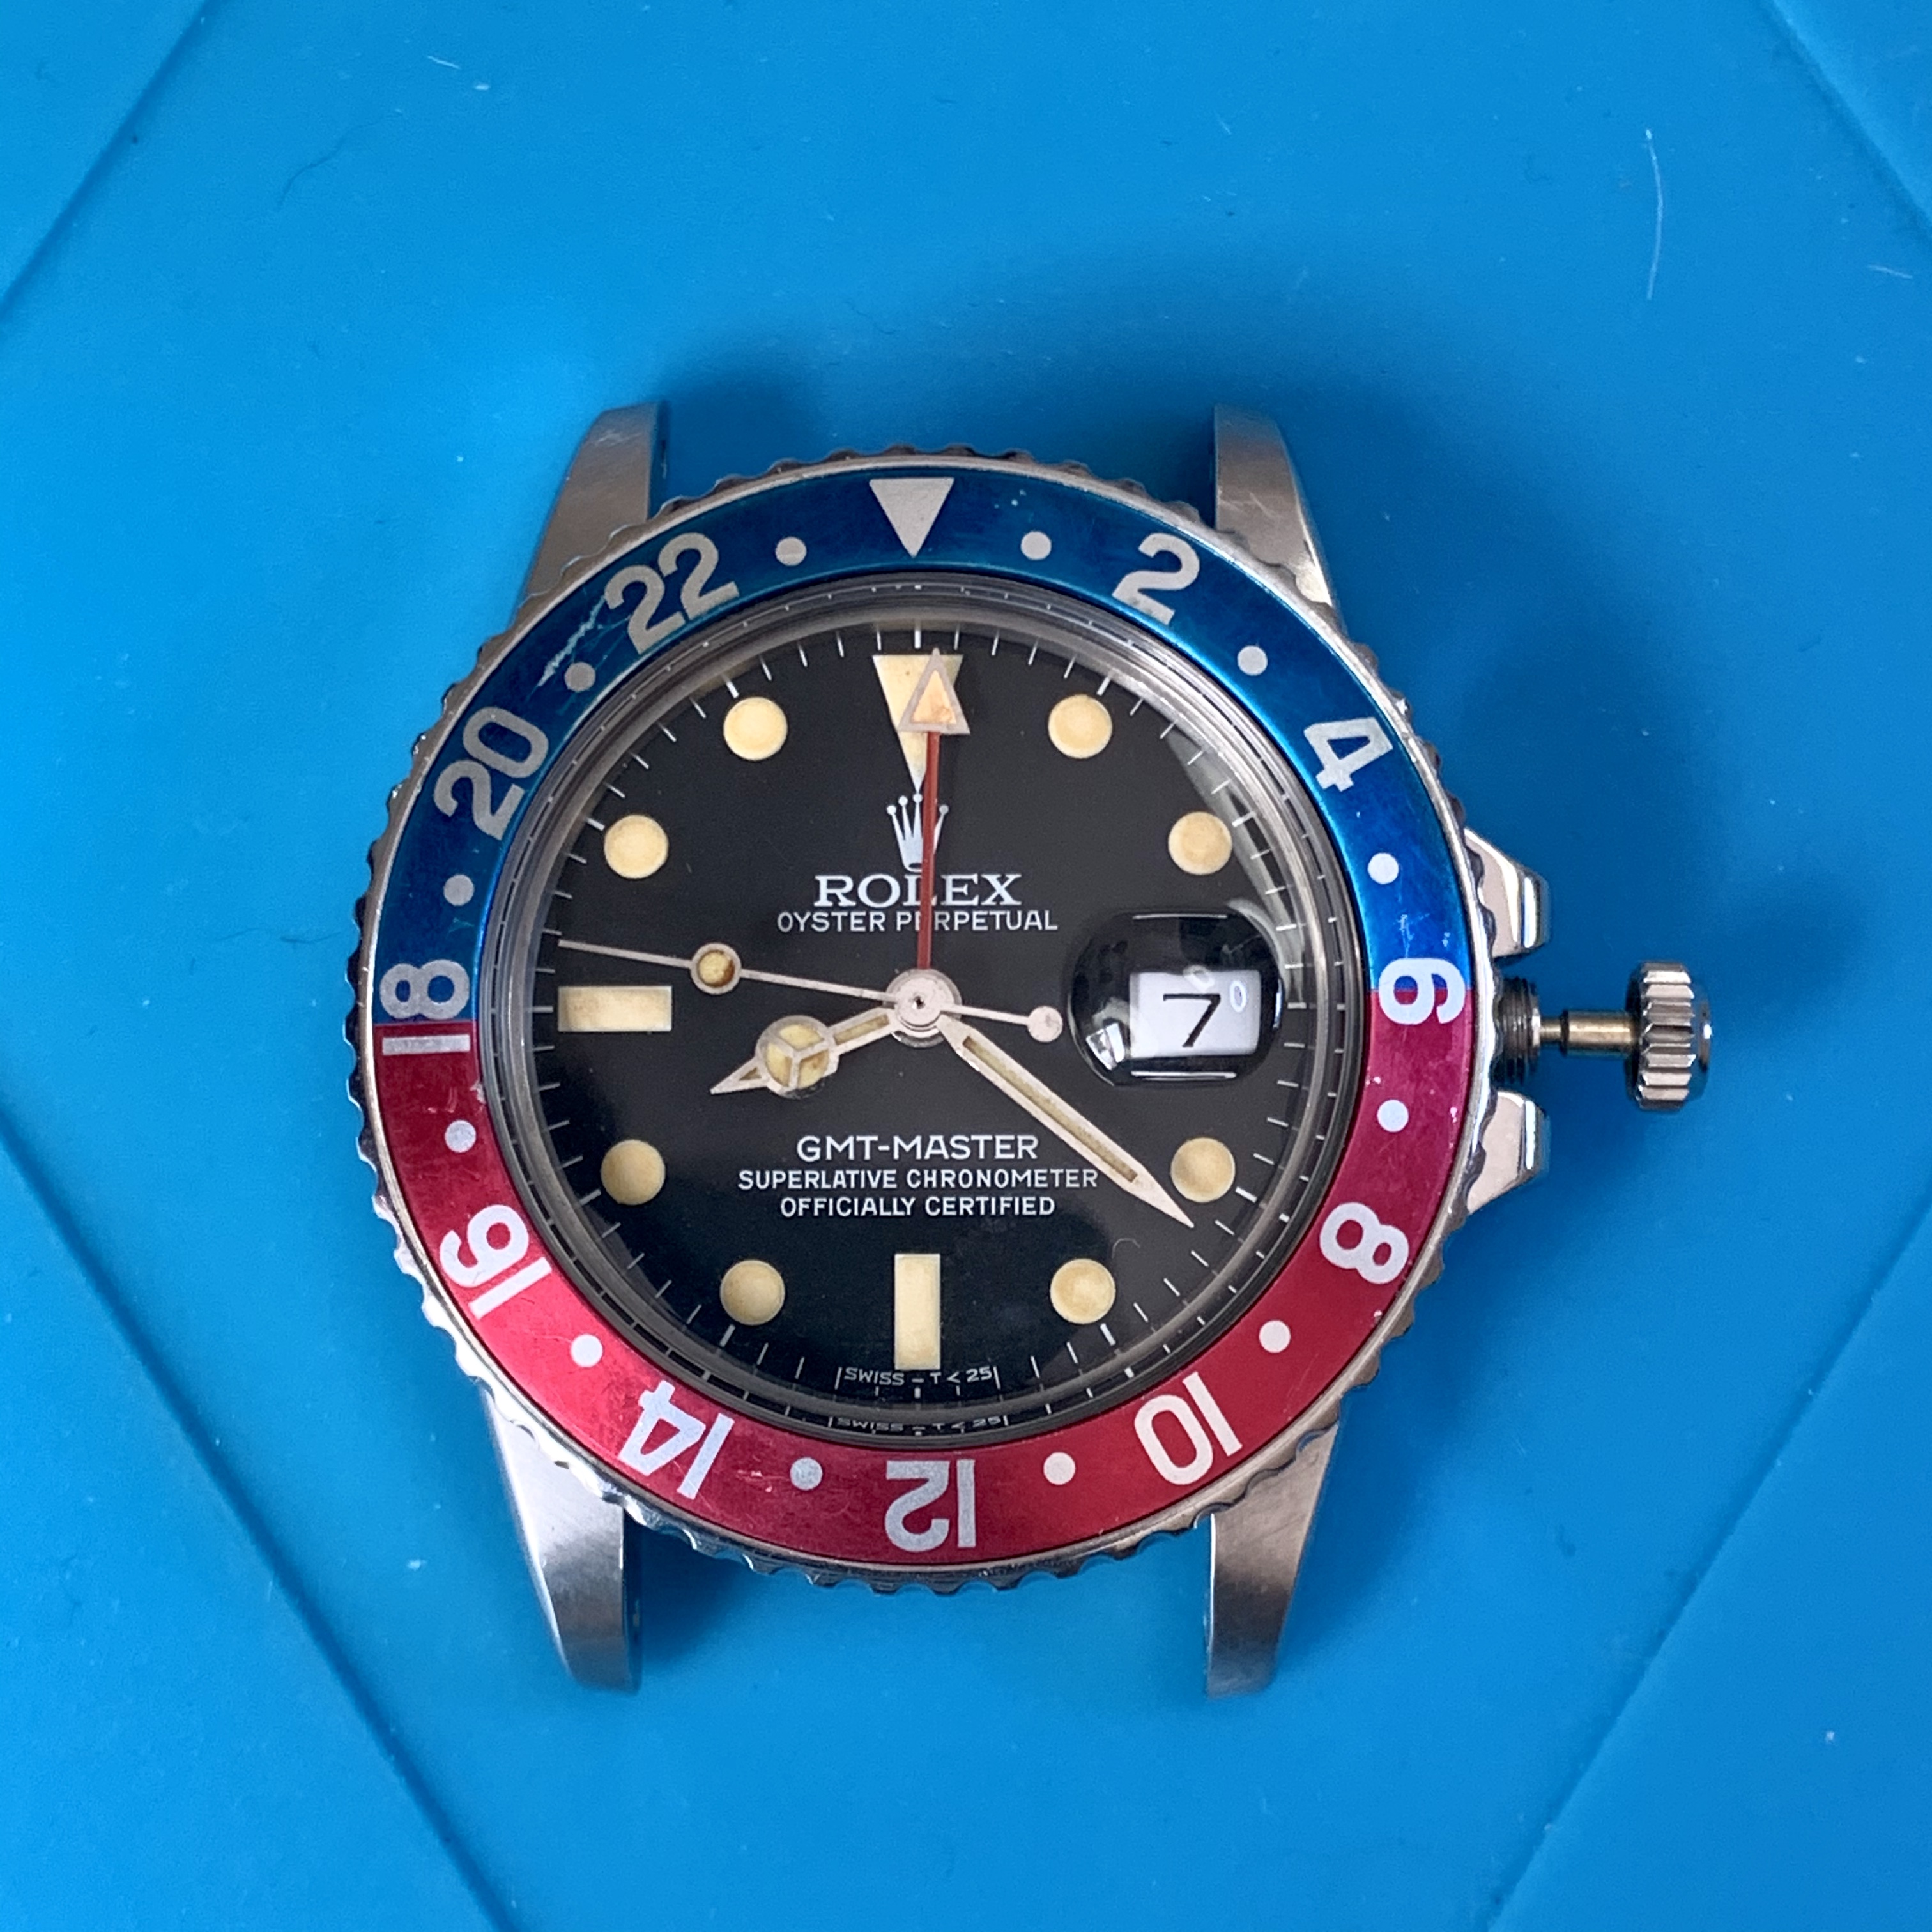
But then in no time at all, I had A COMPLETE WATCH. NEARLY. WOO!

XxX0S.jpg


XxTTW.jpg


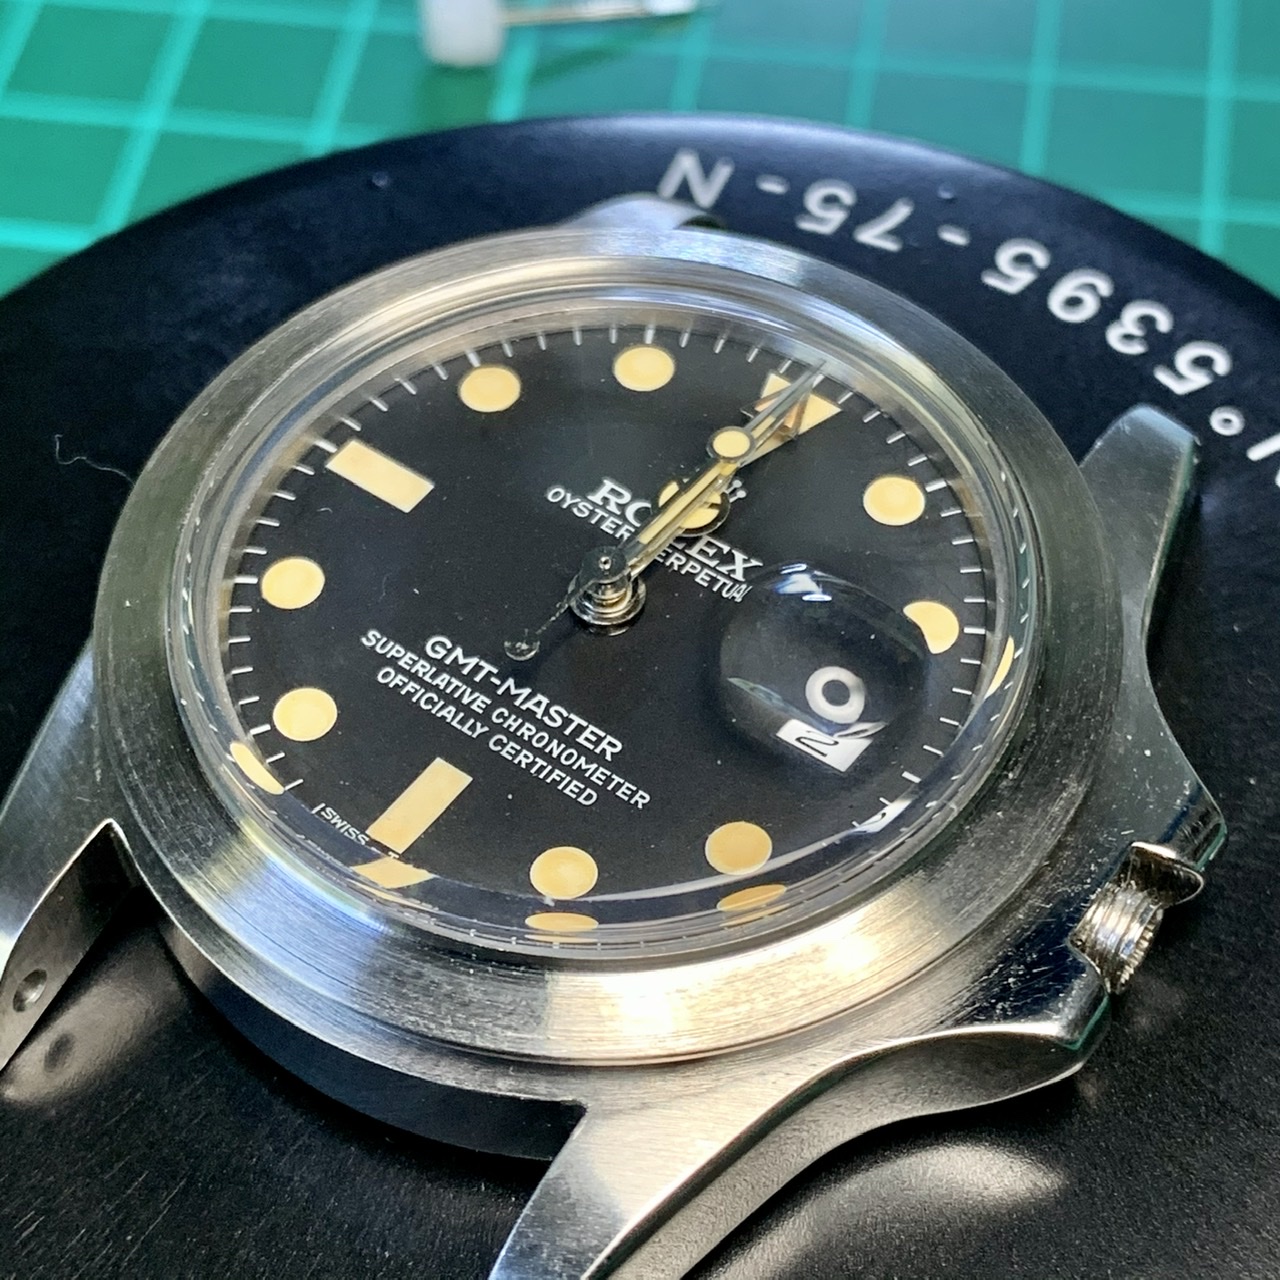
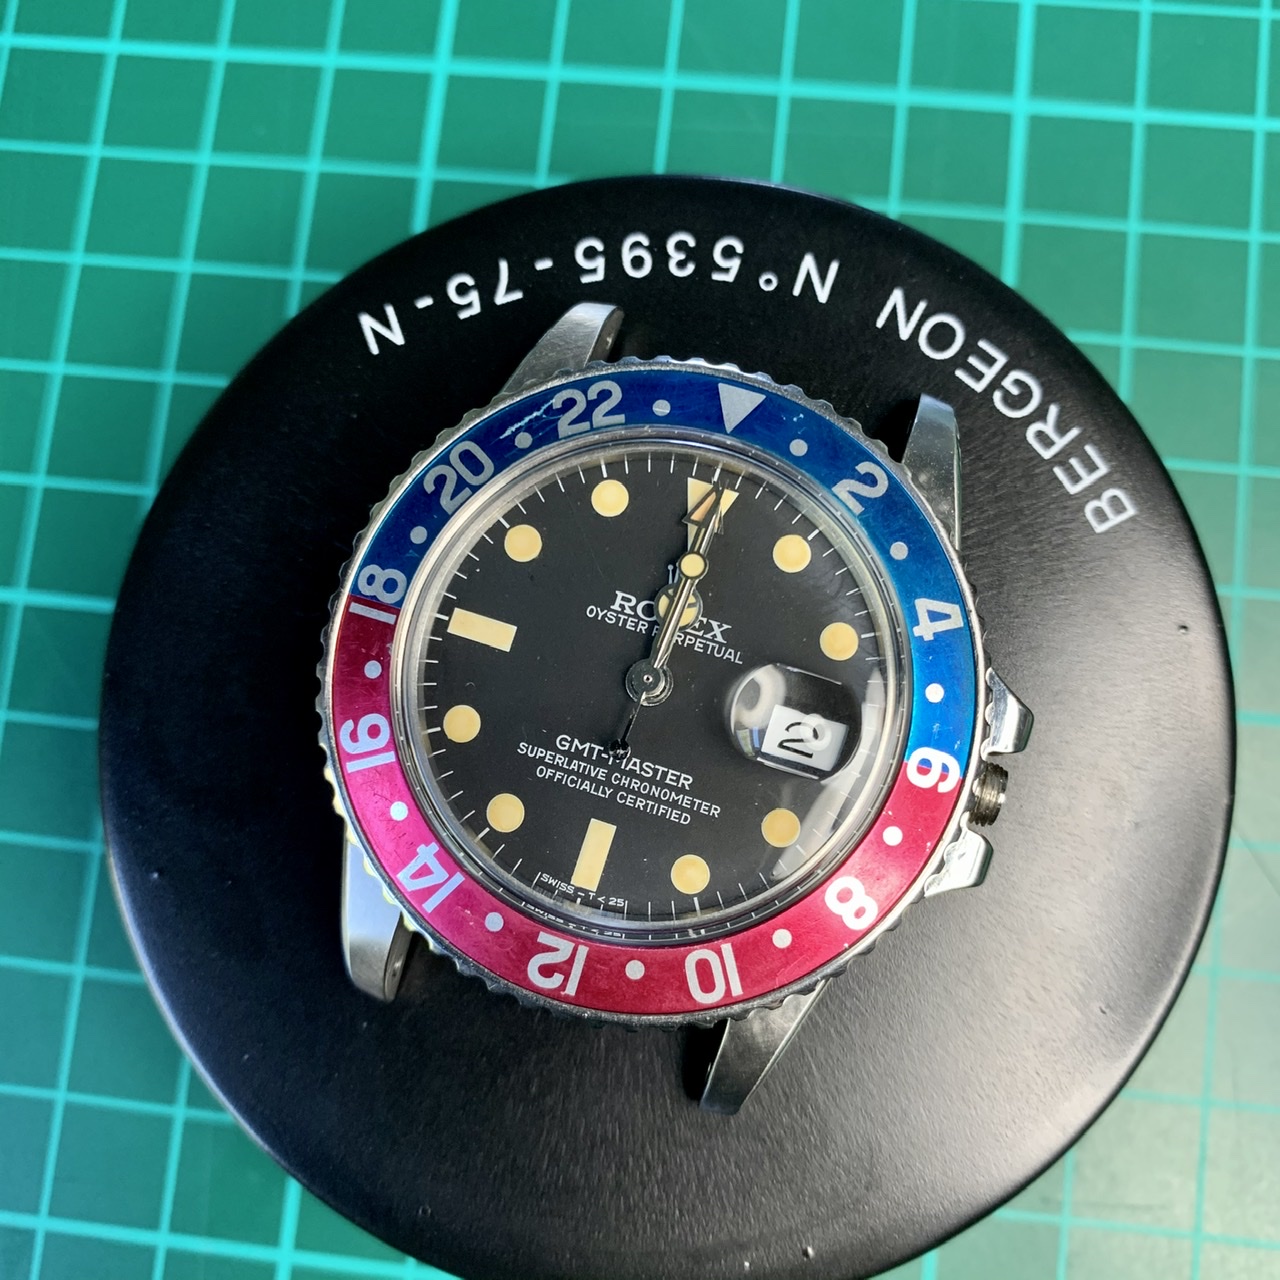
Next - get the gen crown on the stem, and trim the stem to size. Whizz the hands round, slap a bit of coffee on 'em, job's a good 'un.

Crown on, stem in, start to move the hands about... oh. The GMT hand doesn't move at all. And now the date won't change. Hmm. So, clamping the movement into the case has probably caused my big-footed dial feet to press on the datewheel. Oh, and was I meant to use that bendy washer thing between the GMT wheel and the dial..?

Well, I suppose I'd better take it all apart again, and fix the numerous problems I've caused myself. But hey - it's actually nearly done! Apart from all the things that aren't.
 

cjt202020

Renowned Member
Supporter
3/2/14
767
3,164
93
Looks tremendous, shame it doesn’t work! I suppose you could always just use your phone for the time ?
 
  • Like
Reactions: p0pperini

Specter1000

I'm Pretty Popular
Supporter
Certified
18/2/15
1,258
609
113
Cincy area
nice job! I too ran into the same problem using epoxy on my GMT dial and dial feet...they would not bond well for some reason. I cleaned the surfaces, put a very small drop of gorillia super glue gel...and as soon as the surfaces touched, they bonded fast with no time to make adjustments. It was crazy, instantly. But I got it good and centered the first pass.

I sanded the "top hat" of the dial feet down a bit so it would not take up too much space between the dial and movement spacer.

I keep following your build with interest as I'm right behind you on same build!
 
  • Like
Reactions: p0pperini

p0pperini

patr0n h0arder
Gold Patron
Certified
29/1/19
8,973
30,054
113
UK
Looks tremendous, shame it doesn’t work! I suppose you could always just use your phone for the time ?
That's not a bad idea. Plus, "My GMT? Oh yes, it works fine, twice a day on one day of the month." :D

Yes Specter1000 - and I'm sure epoxy would work better too, with diligent cleaning of the dial first. I was slightly afraid to handle the dial too much, but I should clean the surface that's being glued with lighter fuel or isopropyl alcohol. I really should have done that, and persisted with my dial feet that have trimmed "hats" which don't foul the datewheel. Anyway, I now have to take it all apart and get this sorted, so I'll endeavour to do it right this time!

BTW, I recently bought a tool that's making a huge difference to my watch bodging. It's a stereo trinocular microscope - with barlow lenses, to allow a good wide view. It's really brilliant, and I strongly recommend one to anyone who has difficulty seeing what they're doing and (like me) doesn't really get on with loupes or other magnifiers. So, I can now see in crystal clear highly magnified detail all the terrible things I'm doing with my tweezers and screwdrivers.

XJkdt.jpg


I have a CCD full HD 48 MP camera for it as well, but I'm waiting for the wide adaptor lenses for it to arrive, so I can start to take some super-magnified watch-bodging photos and video too.
 

cjt202020

Renowned Member
Supporter
3/2/14
767
3,164
93
Is there a mastermind marketing expert behind every vintage watch thread? You end up buying enough tools and parts to start your own watch company!

More parts arriving in dribs and drabs, ordered months ago. Slowly starting to resemble another watch or more likely to become queens of the parts Tupperware

1de512ad34002881af380a8a798676c0.jpg
 

manodeoro

Section Moderator
Supporter
Section Moderator
Certified
13/10/16
3,830
2,148
113
That's not a bad idea. Plus, "My GMT? Oh yes, it works fine, twice a day on one day of the month." :D

Yes Specter1000 - and I'm sure epoxy would work better too, with diligent cleaning of the dial first. I was slightly afraid to handle the dial too much, but I should clean the surface that's being glued with lighter fuel or isopropyl alcohol. I really should have done that, and persisted with my dial feet that have trimmed "hats" which don't foul the datewheel. Anyway, I now have to take it all apart and get this sorted, so I'll endeavour to do it right this time!

BTW, I recently bought a tool that's making a huge difference to my watch bodging. It's a stereo trinocular microscope - with barlow lenses, to allow a good wide view. It's really brilliant, and I strongly recommend one to anyone who has difficulty seeing what they're doing and (like me) doesn't really get on with loupes or other magnifiers. So, I can now see in crystal clear highly magnified detail all the terrible things I'm doing with my tweezers and screwdrivers.

XJkdt.jpg


I have a CCD full HD 48 MP camera for it as well, but I'm waiting for the wide adaptor lenses for it to arrive, so I can start to take some super-magnified watch-bodging photos and video too.
Wow !!! What a great tool
Would you make a review of it and, if it works well, tell us which brand and model it is ?
 
  • Like
Reactions: p0pperini

Watchpocketguide42

Horology Curious
1/1/20
19
10
3
UK
p0pperini congrats on the progress! Silly question: seeing how it's messy to attach dial feet, way not to use dial dots to attach dial to the movement? I have been doing that for my other projects, and found it to be quick, painless and forgivible.
 

p0pperini

patr0n h0arder
Gold Patron
Certified
29/1/19
8,973
30,054
113
UK
p0pperini congrats on the progress! Silly question: seeing how it's messy to attach dial feet, way not to use dial dots to attach dial to the movement? I have been doing that for my other projects, and found it to be quick, painless and forgivible.

I didn’t use dial dots on this because I’ve found them to be somewhat unsecure when trying them previously - and space for placing them on the GMT seems tight. But if you think I’m missing a trick, then I’m more than happy to listen (these dial feet have got to come off again anyway!).


Sent from my iPhone using Tapatalk
 
  • Like
Reactions: SRower003

Watchpocketguide42

Horology Curious
1/1/20
19
10
3
UK
Dial dots do feel somehow less secure, you are right, but that never been a problem to me. Not sure if this will help, but I cut dial dots in half before peeling them off the sheet. I use four halfs accross the spacer, movement ring etc or more.

What I found is that if movement fits snugly in the case, dial dots will attach themselves to the case and that will cause plenty of mess when removing the movement. If you cut them in half, though, all sticky bits will remain under the dial. I also like working with dial dots because I can stack them if I need to regulate the height of movement (I know it's a hack, but it worked for me).
 
  • Like
Reactions: p0pperini

p0pperini

patr0n h0arder
Gold Patron
Certified
29/1/19
8,973
30,054
113
UK
Watchpocketguide42 thanks for the tips - I think I may give this a try on the next pass. I'll let you know how it goes!

manodeoro for sure, I'll do a mini review, but will be able to add more detail once the lens adaptors for the attached camera unit arrive (which will allow me to photograph the view as seen through the scope).
 

KJ2020

Time Traveler
Supporter
12/3/18
32,771
58,998
113
Hey guys, just received my insert from crowncustoms.. love the result !
717b5a0079e4d93ccd81555e86d16dbd.jpg


Envoyé de mon iPhone en utilisant Tapatalk

That does look great bro. Can you post a link to where you got it? Also, did it fit the Milk bezel without shaving it down? Thanks.
 

Kalmine64

Active Member
Patron
Certified
21/9/19
445
359
63
EU
That does look great bro. Can you post a link to where you got it? Also, did it fit the Milk bezel without shaving it down? Thanks.

It’s a guy on instagram called crownartcustoms, it’s gen spec so doesn’t fit, but 10min of shaving will do it!


Envoyé de mon iPhone en utilisant Tapatalk
 
Last edited:
  • Like
Reactions: KJ2020

Specter1000

I'm Pretty Popular
Supporter
Certified
18/2/15
1,258
609
113
Cincy area
If only post office could stop social distancing with my package... I've been waiting for some since 4 months :(

Ha! I have about 8 watch projects in the hopper in the same boat...parts on order for 3-4 months now....including my 1675! Shipments from Hong Kong seem to be the worse...delayed and no updates from HK Post.
 
  • Like
Reactions: KJ2020

p0pperini

patr0n h0arder
Gold Patron
Certified
29/1/19
8,973
30,054
113
UK
A miniature update... Today, I committed to getting the GMT back together again. Using a combination of one successfully glued on foot and dial dots, I got the dial back on again. Friction washer/spacer thing fitted onto the GMT pinion, everything looked hunky dory. I fitted the GMT hand... and... FFS. The hand went down on the GMT pinion, and jammed tight against the dial. Looks like my dial position isn't perfect for height. And now, my GMT hand is totally flush with the dial... I can't prize it up with a scalpel - I'll damage the dial. Right, I've accidentally popped hands off with the Bergeon dial protector before - that'll do it!

So, after much gentle coaxing, getting nowhere... slightly less gentle coaxing... Ah... there you go... it's starting to slide under... and...

vA9k5.jpg


BOOM! Off comes the dial again, leaving the previously sturdily glued-on foot behind. Sigh. I still had to get the GMT hand off, which I achieved by sliding a scalpel under the pinion gear and prising the gear from the hand. As it popped off, the scalpel slipped and stuck right in my thumb.

That's it. I give up on this one. I've PMed Ado213, and I'm gonna send him all the bits to get the GMT assembled by a professional. This hopeless amateur is admitting defeat. :)
 

deadpan

Active Member
1/6/19
462
264
0
Over the horizon
. As it popped off, the scalpel slipped and stuck right in my thumb.

That's it. I give up on this one. I've PMed Ado213, and I'm gonna send him all the bits to get the GMT assembled by a professional. This hopeless amateur is admitting defeat. :)

Your posts make me able to laugh at my own (very similar) mishaps instead of crying. I too engaged the skills of ado213 for final assembly, and EVERY SINGLE DAY i’m happy I did! For me mounting hands/ dials just became too much of a painful (and expensive) experience.
 
  • Like
Reactions: p0pperini

p0pperini

patr0n h0arder
Gold Patron
Certified
29/1/19
8,973
30,054
113
UK
Two updates in two days?! Get outta here!!

Okay, so yesterday I threw in the towel on this one. And yes, I PMed Ado213 and he kindly consented to sort my mess out for me. However, after a fitful night's sleep, where faces constantly loomed out of the gloom muttering, "Quitter..." and "lame..." at me, I awoke with a singular purpose of mind: I WILL FINISH THIS!

And it helps that I live my life guided by the proud motto of the NSEA-Protector's crew: "Never Give Up... Never Surrender!"

And so it was, that within the next half hour I'd reattached the dial with carefully sculpted and positioned dial dots, and all the hands were back on. Again!


voUVL.jpg


There followed a comedic 45 minutes or more (I'm not sure exactly how long it was - two mugs of tea went cold in the process) while I tried in vain to get the movement tabs in. My how I laughed... Anyway, eventually the screw for the second tab was catapulted into the carpet for about the 25th time, and lost forever. So, I raided my big box o' movement tabs 'n' screws, and wouldn'tcha know it... the new screw went in first time, no fuss whatsoever.

I carefully reinstalled the (still untrimmed) stem. Zinging with excitement, I turned the watch over, and tested the winder. HOLY MOTHER OF GOD IT WORKED!!!

As evidenced by this pic of "Hands in a different position":

voaaR.jpg


Of course, it couldn't last. After checking that the date setting worked, it became clear that the stem only has a tenuous connection with the movement. It disengages itself and spins without effect. Moving it to different positions and trying again, it'll work - but then disengage at random. But I don't care so much about that, because I feel that I've achieved another step on my "Learn To Mod" journey this morning!

"Never Give Up... Never Surrender!"

vo5kQ.jpg


God knows what Ado will make of it, when he gets it next week... :D