• Tired of adverts on RWI? - Subscribe by clicking HERE and PMing Trailboss for instructions and they will magically go away!

A newbie attempt to make a 6263 rep. [step by step]

7-d-7

You're Saying I Can Sell?
5/9/18
39
11
0
Step 12: The Dial (continued) - Rusted

So I worked on my rust effect this Saturday.
I am still waiting for the rust power from Amazon, but in the meantime I did an attempt mixing black, brown and red ink from my kids' pencil case and applying it with a small detail pencil


IMG-0903.jpg

IMG-0902.jpg


It is a tad red (halloween dial!) but I think the powder from Amazon could complement it well.
Also the damn logo fell in the process, so I had to glue it back again !
 

7-d-7

You're Saying I Can Sell?
5/9/18
39
11
0
Step 13: The 6 o'clock sub dial mod

So the first step is to remove the plate on top of the movement (i.e. the one with the dial marker). There are 3 small screws to remove (so small I have lost one...).

IMG-0882.jpg
To lift the top plate out just use the tiny screwdriver as a lever.

IMG-0905.jpg


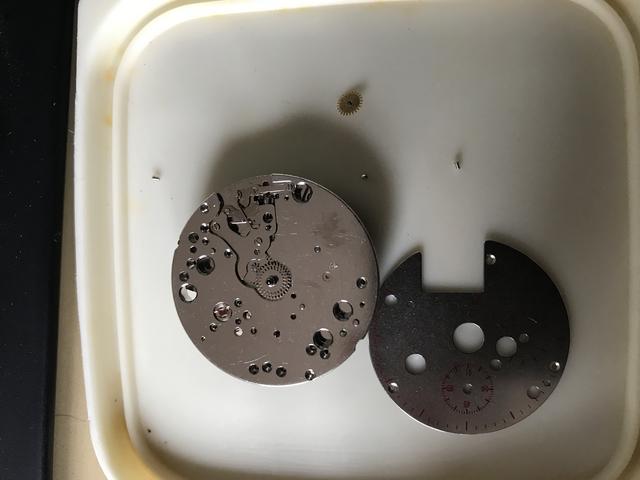
Then it gets tricky: you see that tiny wheel on top the picture ? It was put in place in the movement thanks to small machined hole.
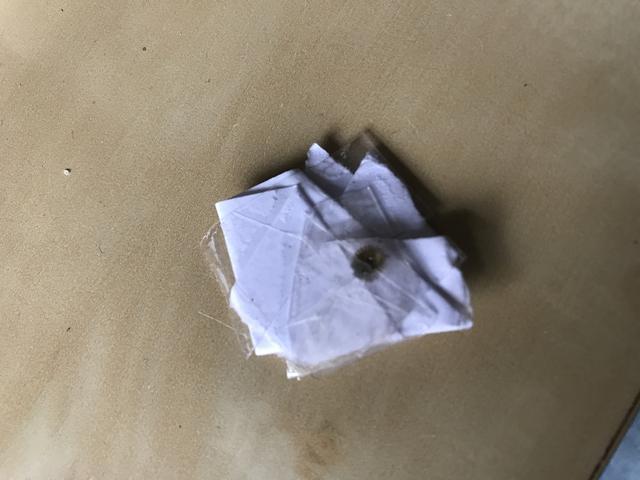
Since to aligned it with V72 subdial hole it needs to be moved up by about 1/2 mm you will need to sand the back of the wheel.

IMG-0906.jpg

To do so I pinned it into a stack of sheets of paper, then used tape to make it stick to the stack, then used the Dremel to sand it flat.

The next step is tricky as well: you ll need to enlarge the hole in the movement plate so that the protruding part of the wheel can go through.
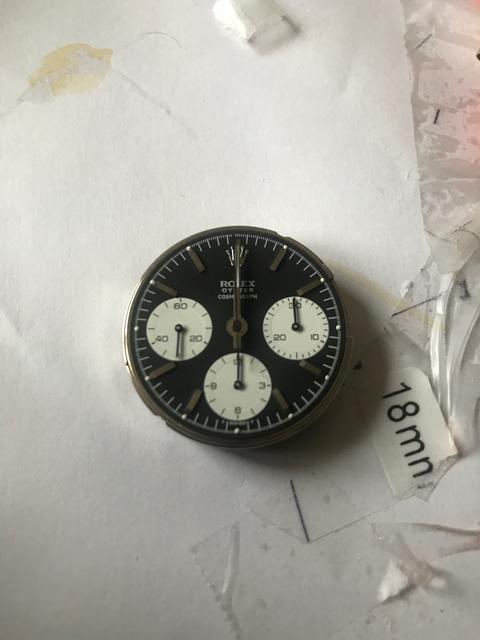
Looking at the picture of the plate that is the small 1 mm hole on the left of the plate next to central hole.
I picked up the tiniest bit on the Dremel, put it in that hole and gently pressed the plate so that the bit would grind the hole and extend it.
The plate is quite hard versus the Dremel bit but in about 2-3 mins the hole should be large enough to accommodate the wheel.

IMG-0907.jpg

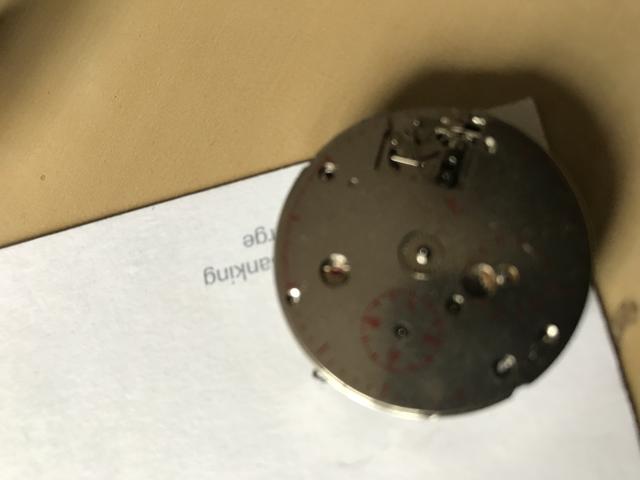
Last step is easier just put a tiny bit of glue on the back of the wheel and sandwich it between the movement and the movement plate.
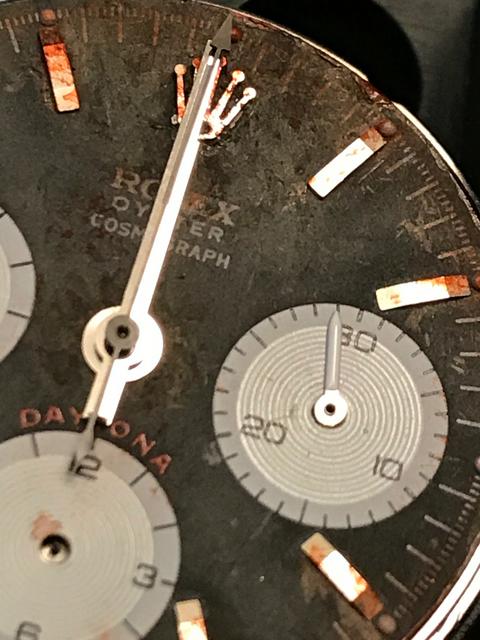
Check before with your dial that the sub dial are correctly aligned !

Ok at this point I am struggling with 3 things:
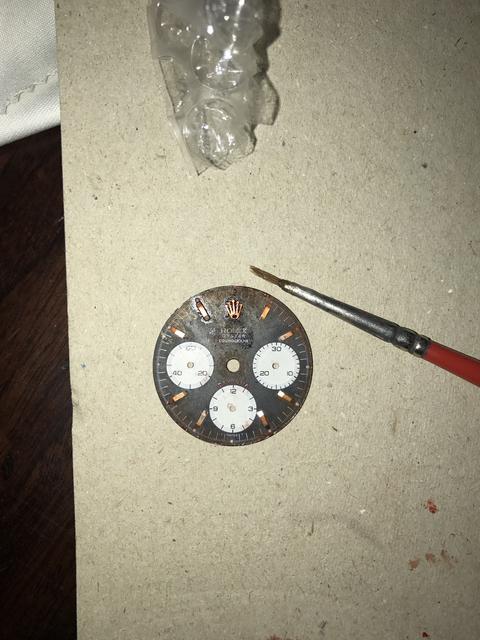
1. I need the rust powder to add more brown to an overly redish rust on my dial
2. I need to put some feet back to my dial. (My first attempt with guitar string failed as I can't get the string to glue well to the plate), Gluing the dial is too permanent, tape not ideal... Maybe some non permanent adhesive ???
3. I tried to fit my sub dial hands. It is a nightmare - feel like the yuki hands are smaller than my original hands. I will try to investigate.
 
  • Like
Reactions: lubusssster

7-d-7

You're Saying I Can Sell?
5/9/18
39
11
0

kilowattore

Sales Moderator / Section Moderator
Staff member
Moderator Sales
Section Moderator
Certified
11/5/13
13,589
5,714
113
Italy
Or you could broach chrono hands with the proper tool.

regarding dial, keep experimenting. I would advise to remove all indexes before aging though, otherwise any paint/pigment/whatever will stick around them creating an unnatural effect.
 

7-d-7

You're Saying I Can Sell?
5/9/18
39
11
0
Or you could broach chrono hands with the proper tool.

regarding dial, keep experimenting. I would advise to remove all indexes before aging though, otherwise any paint/pigment/whatever will stick around them creating an unnatural effect.

I actually have a hand tool (now) I m struggling to line up the hand shaft with the pin of the sub-dial. it is probably due to the fact my dial isn't fixed yet.

Yes, I should have removed the markers...

Also my main problem is that sourcing Daytona dial is super hard. Yuki's are expensive and not super accurate. Has anyone checked the quartz cartel ? Maybe some of the dials are ok ?
 

kilowattore

Sales Moderator / Section Moderator
Staff member
Moderator Sales
Section Moderator
Certified
11/5/13
13,589
5,714
113
Italy
The only benefit of a yuki dial will be a correct subdial placement, the rest is only marginally better than the stock cartel dial imho. I seriously doubt a quartz dial could be an improvement
 

7-d-7

You're Saying I Can Sell?
5/9/18
39
11
0
Well my problem with yuki is the coronet placement...
 

7-d-7

You're Saying I Can Sell?
5/9/18
39
11
0
Update:

Ok I have struggling for putting back the smallest watch hand of the chronograph.
Although I do have a hand press tool, I can't get the pin of the subdial in the tiny chronograph hands...

Most video I found online are about the bigger hands.
I have ordered some adhesive paste and pipette to try to hold the tiny hands either by suction or low strength glue...

It should arrive this week-end... If anyone has some experience with this feel free to comment.
 

kilowattore

Sales Moderator / Section Moderator
Staff member
Moderator Sales
Section Moderator
Certified
11/5/13
13,589
5,714
113
Italy
You should use rodico paste to hold the tiny hand and help yourself with a toothpick or a small blade in the other hand
 
  • Like
Reactions: capice

7-d-7

You're Saying I Can Sell?
5/9/18
39
11
0
STEP 14: Fitting the tiny sub-dial hands

So tiny screwdriver + UHU patafix from amazon

7-E3-B650-A-51-E3-4134-B2-AE-17-A0207861-A6.jpg


and... It worked (thanks!) !!! But only with the old hands, not the new ones from Yuki's. (The big hands from Yuki's are fine only the tiny ones couldn't fit)

0-F96-E340-1-D9-E-444-E-B8-B4-364-D00741-F4-E.jpg


So. I did order a new set of hands from eBay (15 GBP) .
And... I will also order a new dial (never give up never surrender) from Yuki.

Cheers !
 

7-d-7

You're Saying I Can Sell?
5/9/18
39
11
0
STEP 15: Fitting the new dial + hands

Well the new dial arrived ! I did the Dremel action on the feet, the robico trick on the subdial hands and here we are:

93-F25-AE5-0-A47-4570-933-E-1-B39-A3-F5-EFD0.jpg

I tried to fit in the case:

A8378-AD3-D172-47-F8-BF6-E-2710-DF4-E61-B6.jpg


Almost there... Now here is my current problem: The pushers !
When I put them out, I did not really pay attention. They were apparently hold in place with a "c - clip"

31160_lg.jpg


I ordered a set on ebay. These tiny thing are meant to be clipped on the other end of the pusher screw to prevent the pusher from sliding out of the case. (If I understood it well !)
It is super tiny (again) so not sure how I am going to put them back on but we will see when they arrive in a couple of days !

So far I am quite happy as I am finally see some light at the end of the tunnel.
 

tanith

Renowned Member
Certified
17/8/18
513
198
43
thanks for the excellent thread op!
maybe i'm kind of weird, but i actually like how the "ruined" dial turned out in that last picture
that faded, black reddish-brown combo actually looks quite appealing
 

7-d-7

You're Saying I Can Sell?
5/9/18
39
11
0
STEP 16: Final steps

Ok so putting the tiny c-clip is just painful. Robecco paste doesn t work as you need to put some pressure to make it click.
The best "technique" for me was to actually only slightly let the pusher pins protrude out of the tube and then with one hand push the pusher and with the other with a plier force the clip in place.
After 36 attempts (and 5 lost c-clips) they were finally in place.

Then I carefully slid the movement back into the case.

I realised at that point I have lost the pins helping to stabilise the movement in the case (I let my kids played with the watch... so I guess this is on me).

I fixed it by using a used guitar pick with some light glue attached to the back case to hold the movement in place. It was a perfect fit !

Anyway after all this time and a lot of learning:
A37-E9-FB1-EEB4-45-A1-9715-909636-DAACF4.jpg


168-C9090-05-F3-4-F37-83-FF-45-A106506990.jpg


I m happy !
 
  • Like
Reactions: jcher

zinduna

Renowned Member
Supporter
Certified
4/7/09
963
472
63
Good for you! You'll never forget that watch. Great thread and thanks for sharing.
 

Danii

I'm Pretty Popular
16/12/15
1,069
194
63
This was an awesome read. Thank you for sharing this journey with us and enjoy the lovely piece :)