-
Tired of adverts on RWI? - Subscribe by clicking HERE and PMing Trailboss for instructions and they will magically go away!
You are using an out of date browser. It may not display this or other websites correctly.
You should upgrade or use an alternative browser.
You should upgrade or use an alternative browser.
Decal printed dial
- Thread starter Bart Cordell
- Start date
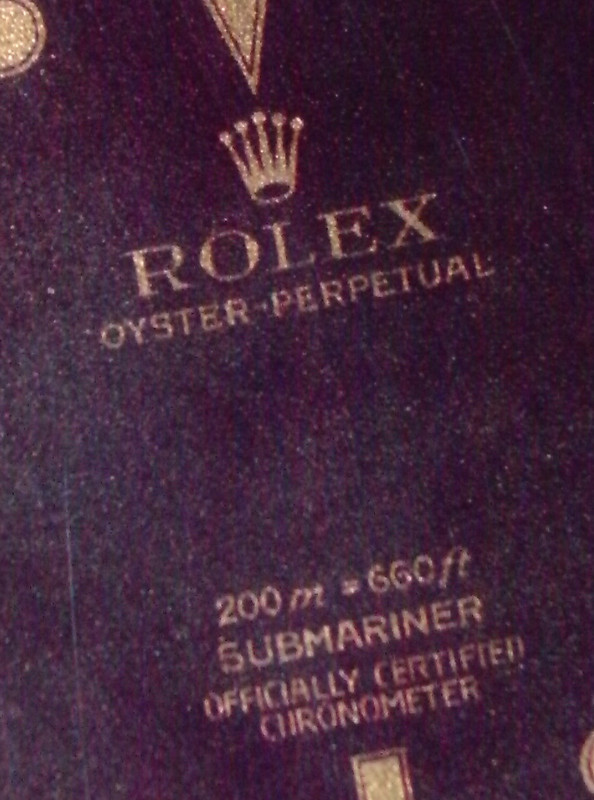
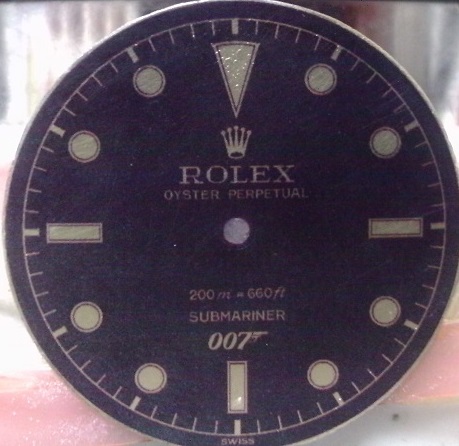
My first attempt. Not on water-slide decal paper, but another process.
I printed the design on to glossy photo paper, then cut out the dial to size and put it into a laminator pouch and put the pouch through the laminator. Once it had cooled, I peeled the laminator film from the photo paper. The ink had transferred from the paper to the to the transparent laminator film (I'm guessing it adhered to the thin layer of adhesive on the inside of the pouch.
I sprayed a layer of white rattle-can radiator enamel to a blank dial and then placed the film on the dial (using the paint as adhesive)
Once the paint had dried and the film was glued to the dial I scuffed/keyed the surface with a scotchbrite pad, then skimmed the surface with epoxy glue/resin, then sanded when dry.
I then lumed the dial (badly, also a first attempt) then lacquered over it with rattle can clear.
My printer needs it's heads aligning and some of the print is a bit fuzzy on the left.
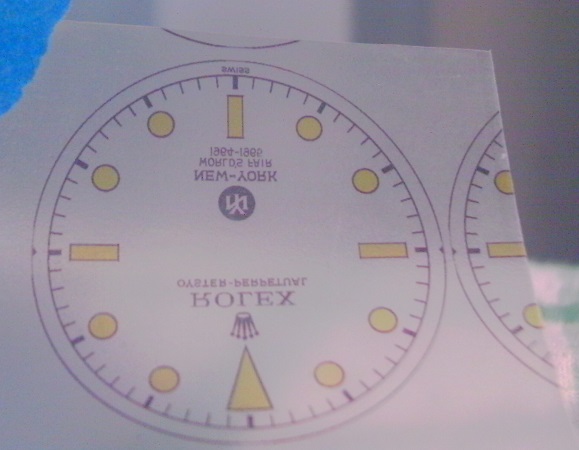
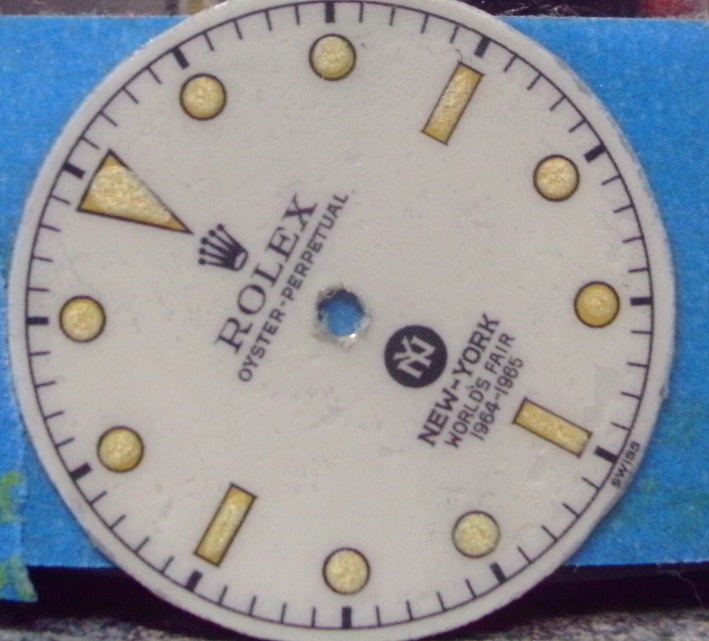
I decided to make up a random 'commemorative' dial, and chose the NY World's Fair of '64. I also shoved a 'big crown' on the case, because that's all I had hanging around.


I know it's a franken and doesn't make sense (sub dial/big crown with that case) but I just thought
I printed the design on to glossy photo paper, then cut out the dial to size and put it into a laminator pouch and put the pouch through the laminator. Once it had cooled, I peeled the laminator film from the photo paper. The ink had transferred from the paper to the to the transparent laminator film (I'm guessing it adhered to the thin layer of adhesive on the inside of the pouch.
I sprayed a layer of white rattle-can radiator enamel to a blank dial and then placed the film on the dial (using the paint as adhesive)
Once the paint had dried and the film was glued to the dial I scuffed/keyed the surface with a scotchbrite pad, then skimmed the surface with epoxy glue/resin, then sanded when dry.
I then lumed the dial (badly, also a first attempt) then lacquered over it with rattle can clear.
My printer needs it's heads aligning and some of the print is a bit fuzzy on the left.
I decided to make up a random 'commemorative' dial, and chose the NY World's Fair of '64. I also shoved a 'big crown' on the case, because that's all I had hanging around.
I know it's a franken and doesn't make sense (sub dial/big crown with that case) but I just thought

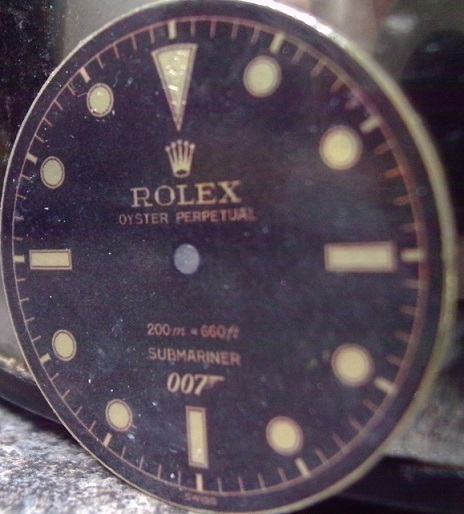
Second attempt
Same process, but with a dark print

Printed on glossy photo paper
Placed in laminator pouch
Laminated
Cut to size
Film peeled away from paper
Gold blank dial (painted with Rustoleum gold)
Clear coated when dry.
Dial then lightly dusted with Rusto gold to act as adhesive
Printed film placed on dial.
Finished dial :

My camera is old and terrible.
Same process, but with a dark print
Printed on glossy photo paper
Placed in laminator pouch
Laminated
Cut to size
Film peeled away from paper
Gold blank dial (painted with Rustoleum gold)
Clear coated when dry.
Dial then lightly dusted with Rusto gold to act as adhesive
Printed film placed on dial.
Finished dial :
My camera is old and terrible.
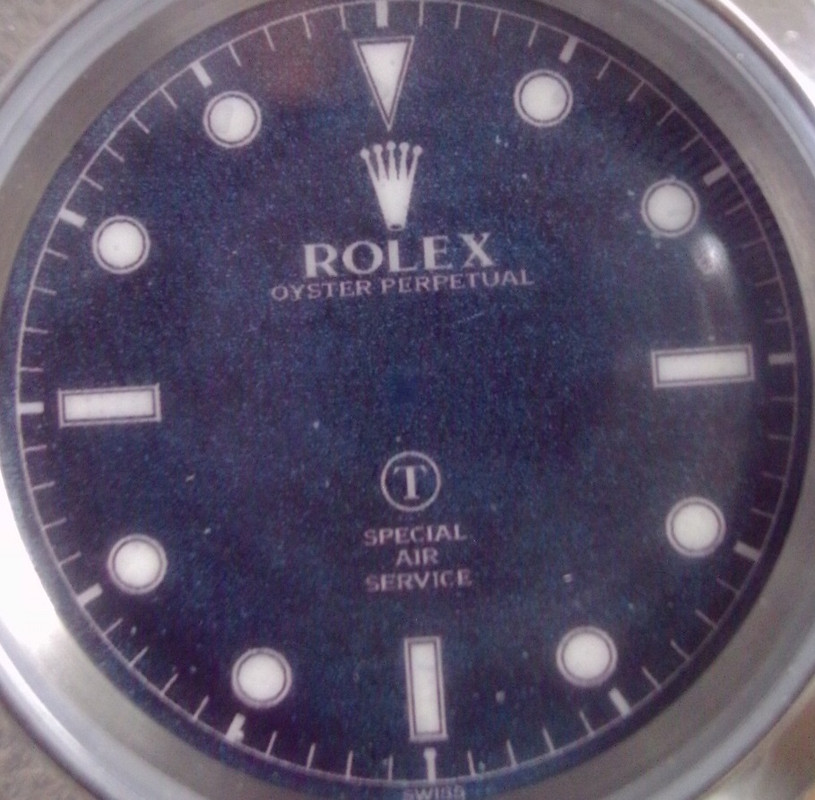
Fourth and fifth attempt.
Building a watch for a friend with his name and club on dial.
Decided to let paint dry on dial first, then skim the transfer with epoxy to glue it to dial. The epoxy reacted with the ink on the transfer which changed the black translucent and then green when placed over the gold paint, giving the dial a metallic green appearance. Not bad looking, but not what I was going for.

Went back to the tacky paint adhesion method with a baby blue enamel rattle can

Still need to work on my lume though
Building a watch for a friend with his name and club on dial.
Decided to let paint dry on dial first, then skim the transfer with epoxy to glue it to dial. The epoxy reacted with the ink on the transfer which changed the black translucent and then green when placed over the gold paint, giving the dial a metallic green appearance. Not bad looking, but not what I was going for.
Went back to the tacky paint adhesion method with a baby blue enamel rattle can
Still need to work on my lume though
Thought I'd try using epoxy glue on a plain brass dial rather than gold painted dial to see if it wouldn't turn green this time.

It did.
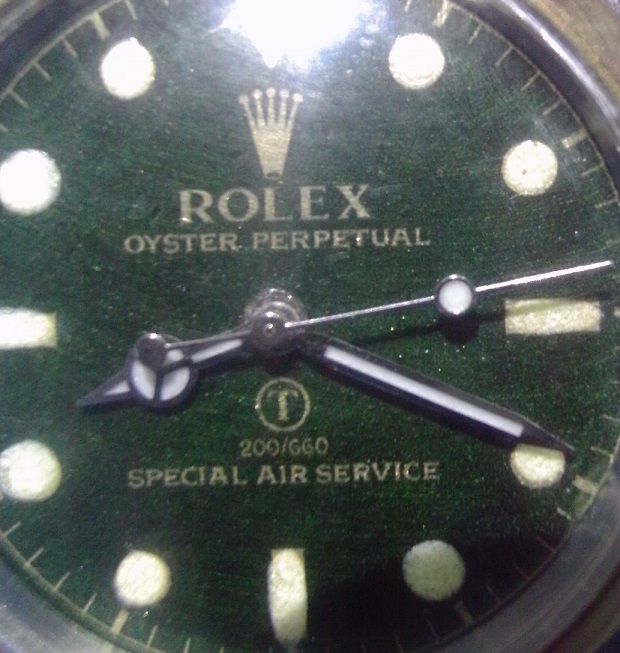
Quite like it though.
Remade the 'World's Fair' dial, printing orange where the lume goes to see if it'd come through underneath lume to give a dated look:
Not really :
The film was also glued down with epoxy, but the black stayed black and not turn green.
It did.
Quite like it though.
Remade the 'World's Fair' dial, printing orange where the lume goes to see if it'd come through underneath lume to give a dated look:
Not really :
The film was also glued down with epoxy, but the black stayed black and not turn green.
Another couple of attempts:
Another Burford tall coronet. This time using waterslide decal paper over a Rustoleum gold painted dial.
...and back to laminator film, this time on a high polished brass dial. I used Gorilla 'clear' adhesive to see if it stopped the 'greening' from when I used epoxy.
The black has not turned green as yet. So it looks promising.
One bad lume job and a bit of faux aging later :

Getting there, slowly. Having fun trying and testing.
Getting there, slowly. Having fun trying and testing.
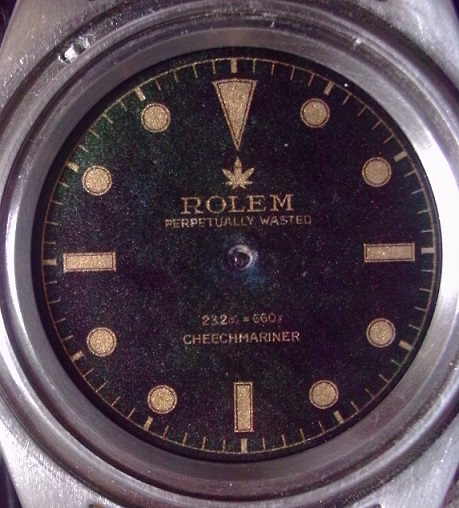
A Cheech and Chong inspired green 'fiberweed' dial I made for a laugh
- 12/3/18
- 32,701
- 58,575
- 113
A Cheech and Chong inspired green 'fiberweed' dial I made for a laugh
Haha, hilarious bro
bigtiddygothgf
Active Member
- 7/10/18
- 303
- 137
- 43
I've tried the decal method with an inkjet a while ago, but the ink always washed out and became very transparent when I dipped it in the water before applying. I wanna give it another shot. Still have the inkjet decal paper so I'd like to try it again before jumping to the film-free laser printer method. What would cause the decal to lose opacity? Reckon I didn't seal it well enough with clearcoat? I was using matte clearcoat on my initial attempts. Maybe gloss would work better?
chrome72
Active Member
I've tried the decal method with an inkjet a while ago, but the ink always washed out and became very transparent when I dipped it in the water before applying. I wanna give it another shot. Still have the inkjet decal paper so I'd like to try it again before jumping to the film-free laser printer method. What would cause the decal to lose opacity? Reckon I didn't seal it well enough with clearcoat? I was using matte clearcoat on my initial attempts. Maybe gloss would work better?
i had a similar problem when i made some. The dials looked very black on paper but when I put them on polished brass the it wasn't very black anymore.
- 13/10/16
- 3,830
- 2,147
- 113
I've tried the decal method with an inkjet a while ago, but the ink always washed out and became very transparent when I dipped it in the water before applying. I wanna give it another shot. Still have the inkjet decal paper so I'd like to try it again before jumping to the film-free laser printer method. What would cause the decal to lose opacity? Reckon I didn't seal it well enough with clearcoat? I was using matte clearcoat on my initial attempts. Maybe gloss would work better?
I made inkjet decals some years ago ... used to fix the ink with 3 really thin coats of matte lacquer and it worked perfectly ...
Some stuff I'm trying out :
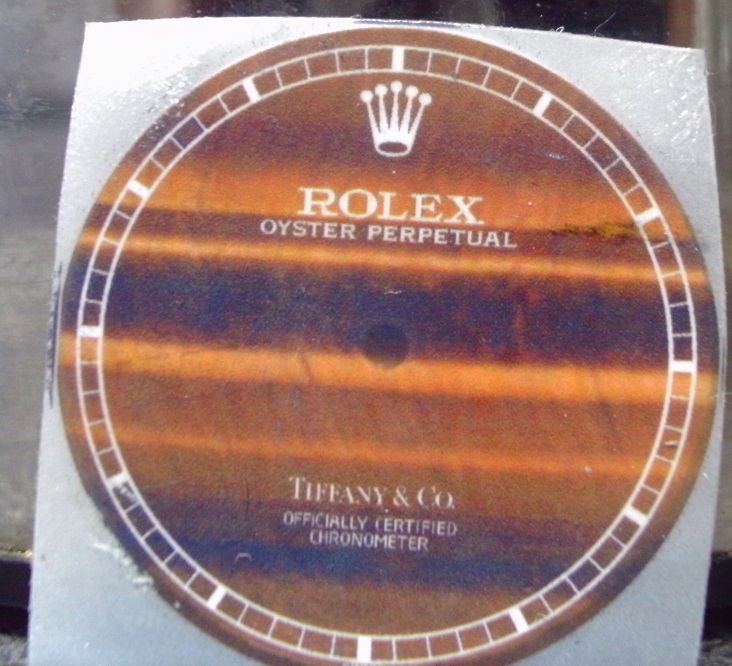
Tigers Eye over a brass dial. There were bubbles in the clear-coat I put over the brass to stop it oxidizing, and it came through and it looks pretty terrible :
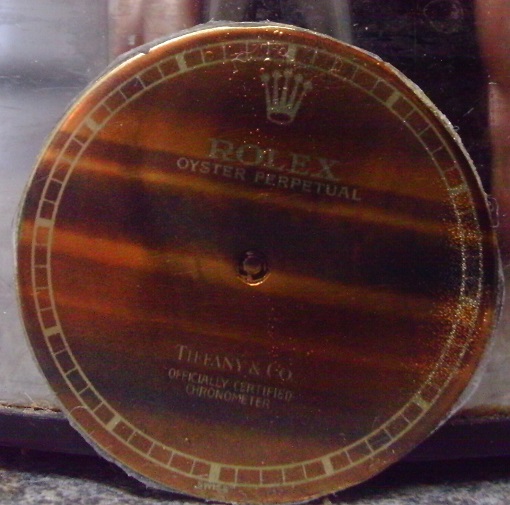
Might look better with a better applied clear-coat, but next to no contarast .
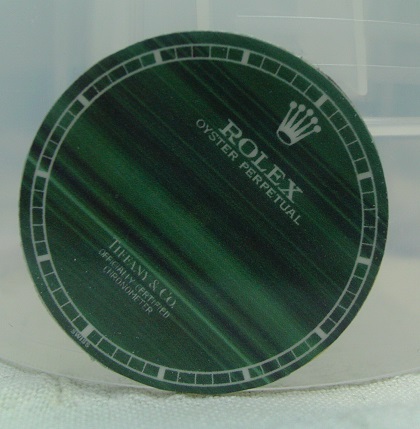
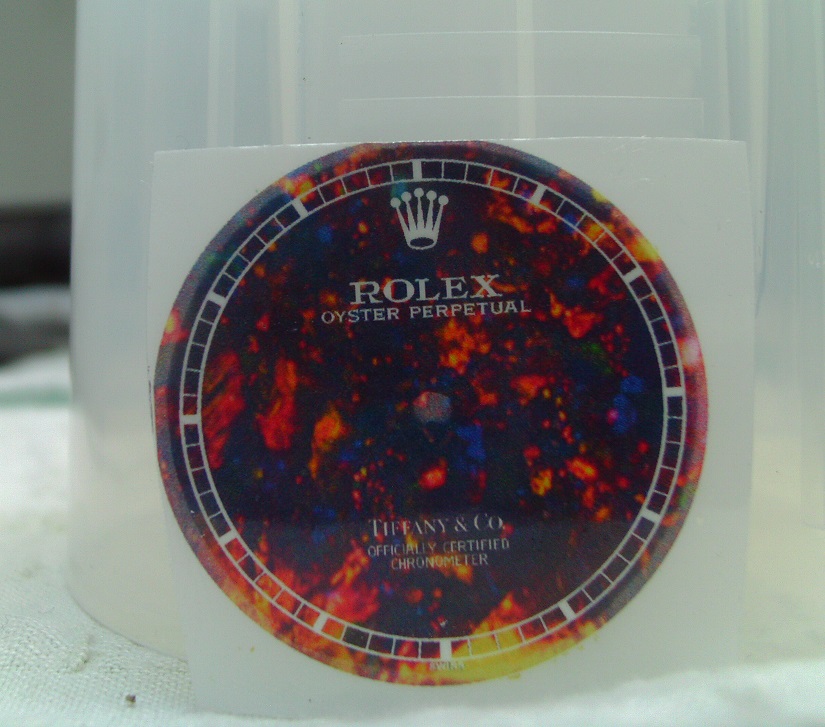
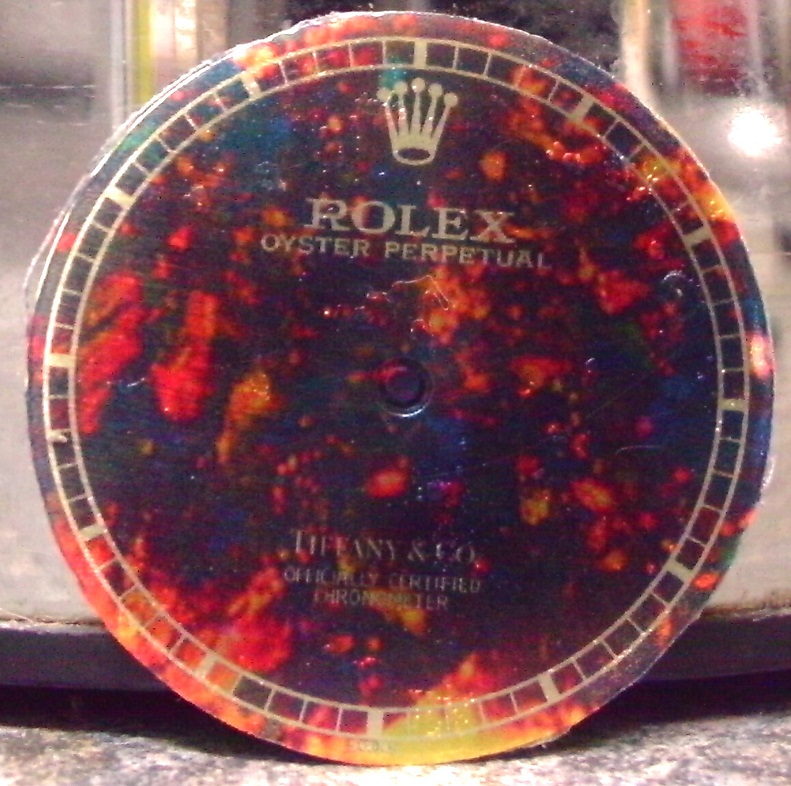
Tried again over a white dial :
I tried a couple more dials with white backing.
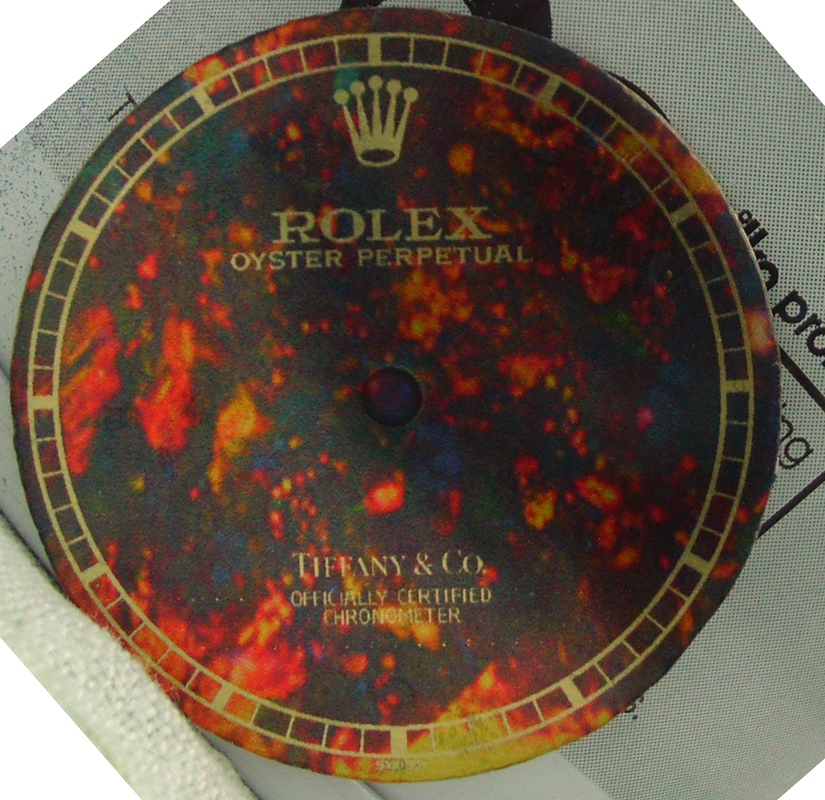
Malachite :
...and opal :
Tigers Eye over a brass dial. There were bubbles in the clear-coat I put over the brass to stop it oxidizing, and it came through and it looks pretty terrible :
Might look better with a better applied clear-coat, but next to no contarast .
Tried again over a white dial :
I tried a couple more dials with white backing.
Malachite :
...and opal :
chrome72
Active Member
For those of you using the film free method, what make and model of laser printer are you using? What program are you printing with? Settings all around? I have been test printing on plain paper with an Adobe Illustrator file exported as a PDF and printed at the highest quality settings out of Adobe Acrobat. That has yielded the best results for me. However, the resolution does not appear to be good enough with my Brother HL-2280 DW laser printer, despite numerous attempts printing different types of image file (PDF, AI, PNG, TIF), using different programs (Illustrator, Photoshop, Acrobat), and adjusting every setting for the printer and program that I can find.
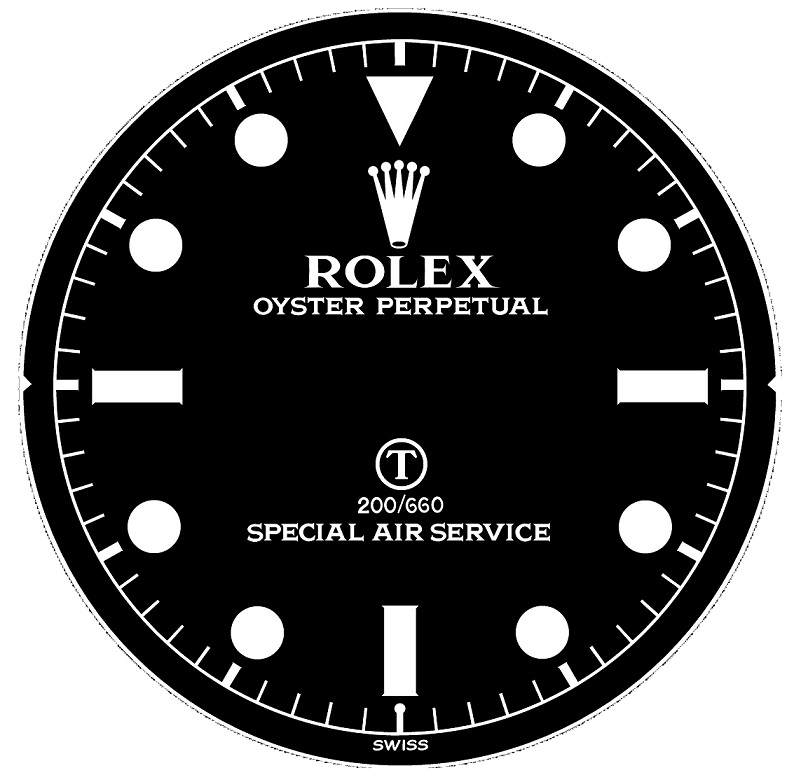
Below is an example. Early 1016 dial. Chapter ring is 26 mm across, which I believe is gen spec. Any help or advice would be greatly appreciated.
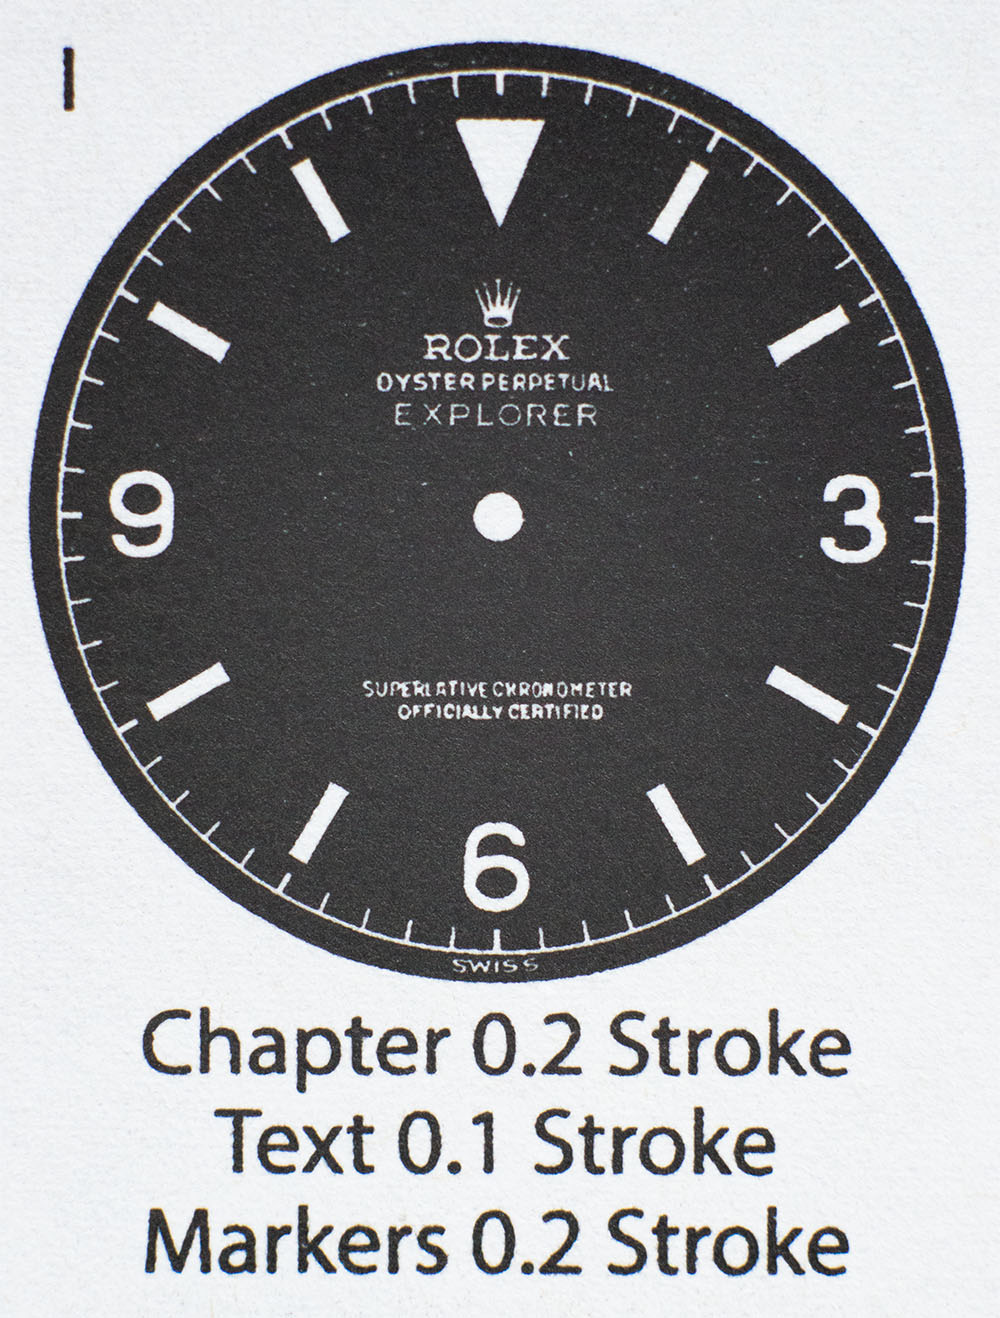

Below is an example. Early 1016 dial. Chapter ring is 26 mm across, which I believe is gen spec. Any help or advice would be greatly appreciated.
- 13/10/16
- 3,830
- 2,147
- 113
GenuineFool
I just checked the specs of your printer and it can print up to 2400/600ppp ... the 600ppi could be part of the problem as your design seems to be OK
I draw my decal dials using Illustrator >>> export files to TIFF >>> print using Photoshop on professional copier that prints up to 1200/1200ppi ... without any interpolation
I've tried to interpolate up to 2400/2400 but the results were so so