-
Tired of adverts on RWI? - Subscribe by clicking HERE and PMing Trailboss for instructions and they will magically go away!
You are using an out of date browser. It may not display this or other websites correctly.
You should upgrade or use an alternative browser.
You should upgrade or use an alternative browser.
Bezel 101 (repair,realign,clean)
- Thread starter robinstyler
- Start date
D
d4m.test
Guest
Unfortunately I didn‘t take any pics of this process. But I‘m working on a BB at the meantime. Maybe I have to disassemble the bezel here. If yes I will take some pics for sure.
Gesendet von iPhone mit Tapatalk Pro
thank you.
This seems to be a really good post. Looks like there pictures associated with it in a number of areas but they are not showing for some reason. Is there something I need to toggle on in order to see them? It would be very helpful. I have a stiff bezel and I want to see what I did wrong in the assembly.
Last edited:
- 3/6/14
- 14,319
- 5,255
- 113
Hi. Why cant i see the images?
Because you necro bumped a thread from more than 3 years ago. The pictures aren't available anymore. Please refrain from necroposting in the future.
- 21/4/19
- 425
- 371
- 63
Hi. Why cant i see the images?
The original pictures were hosted on imgur, but imgur started blocking calls from RWI so the pictures hosted on imgur no longer show up in the posts.
However, the original pictures are still available on imgur, so I re-hosted the pictures on RWI's native picture hosting site clickpix.org and replaced the original imgur links with the new clickpix links in the following quoted posts:
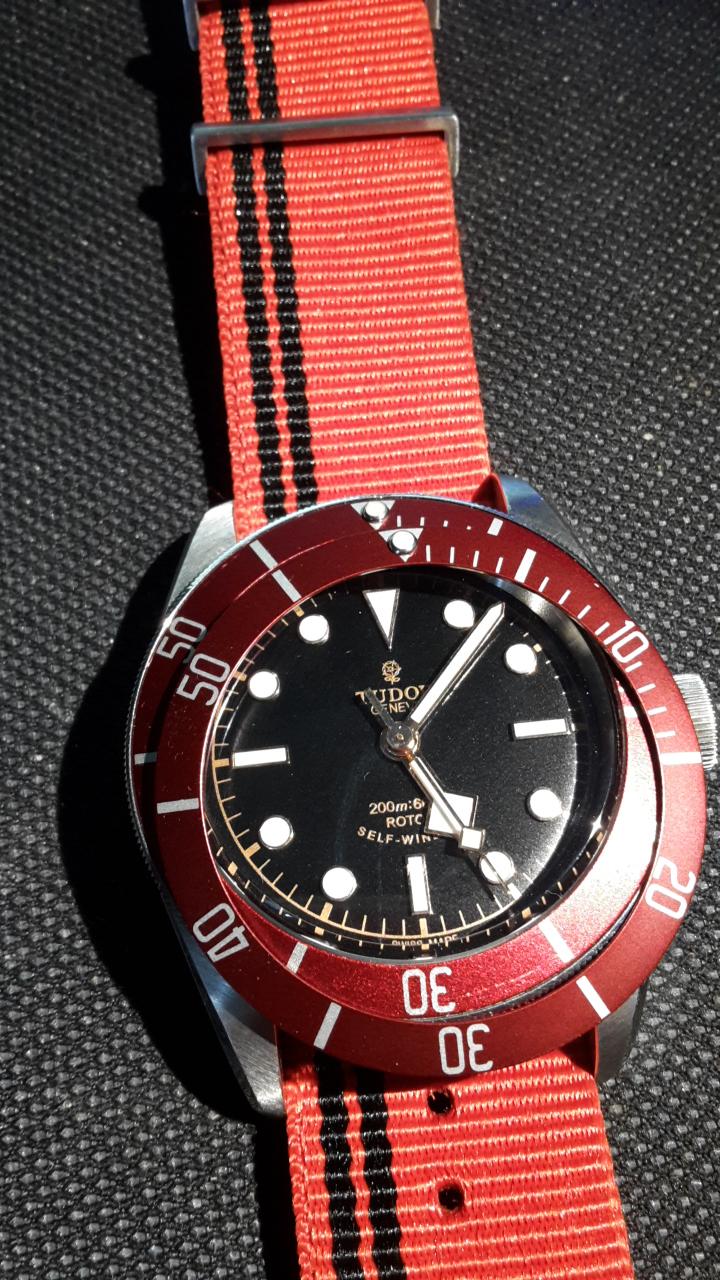
TUDOR BEZEL 101 Cleaning/Removing Play/Repair
Hello everybody. I have seen some people in the Tudor section ask about how to fix a broken Bezel with a lost pearl/ remove play from their Bezel or just make it turn smoother/lign up better. Since i needed to switch out my Bezel Insert i thought this would be a good time to take pictures to help out other members.
How to fix a Tudor bezel. There might be several reasons for you to repair your bezel.
Some for example are:
- misaligned bezel
- tight bezel/dirty bezel
- lost pearl/switching to a new insert
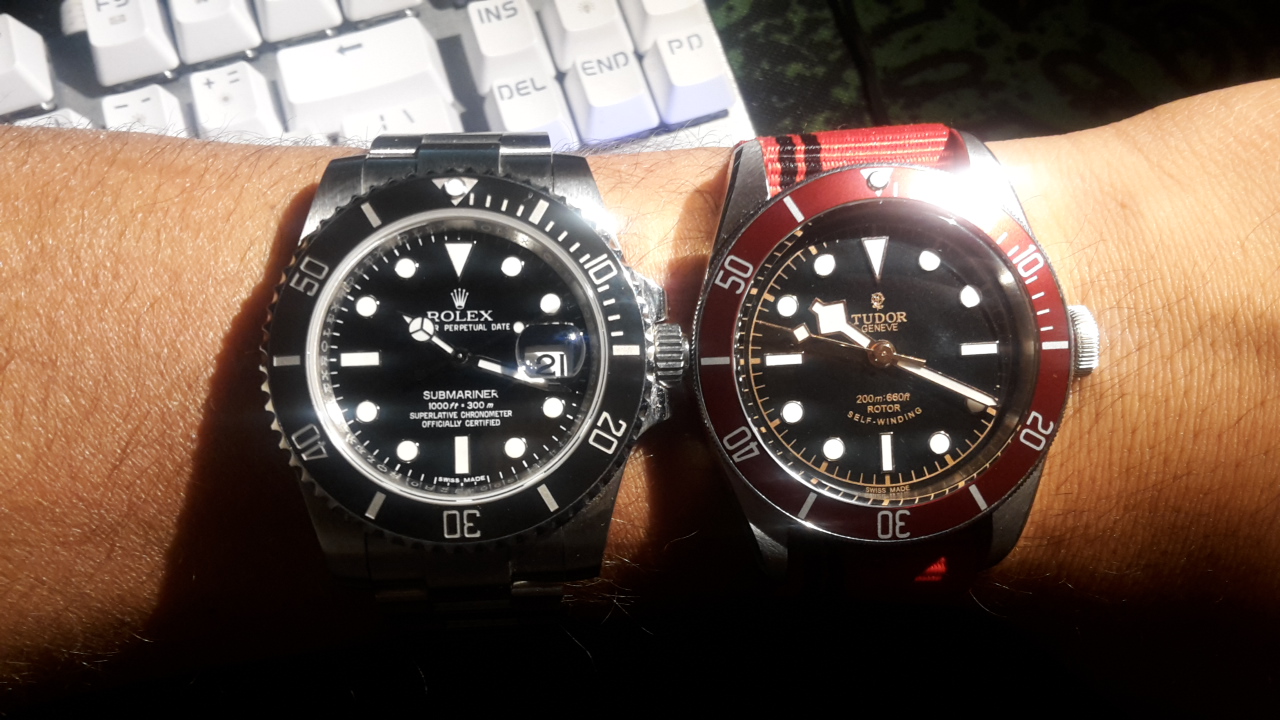
My reason is that my insert iss scratched and since I already have the HR dial and hands installed I figured I might aswell install the HR bezel to match the rest.
Things you need:
- thin knife
- scotch tape
- new bezel insert and 1mm double sided 3m tape (only if you want to install a new insert)
Alright, lets get to it.
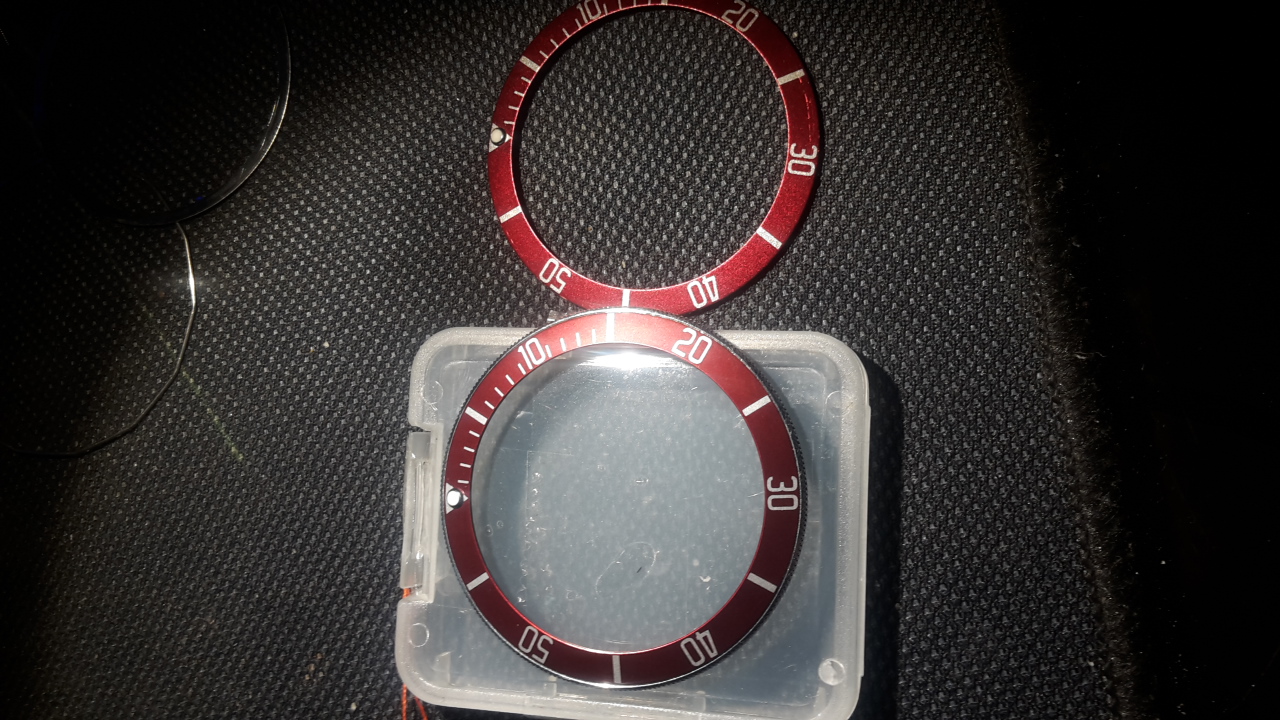
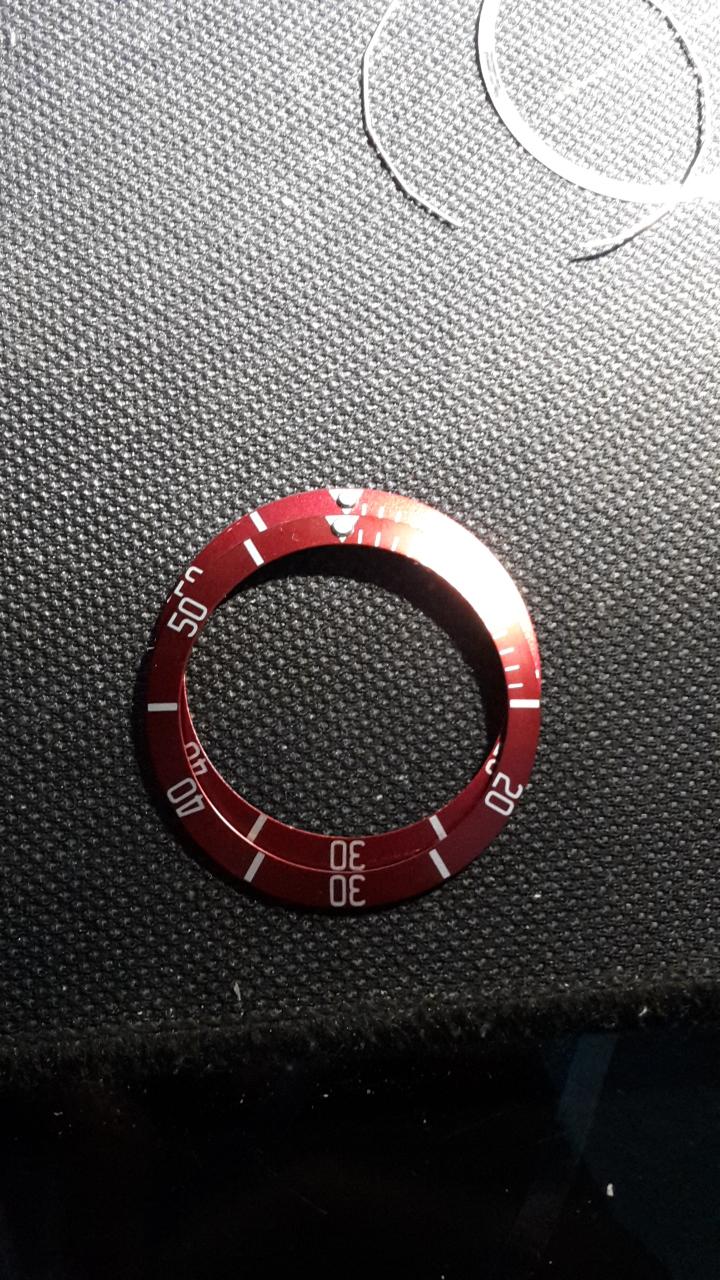
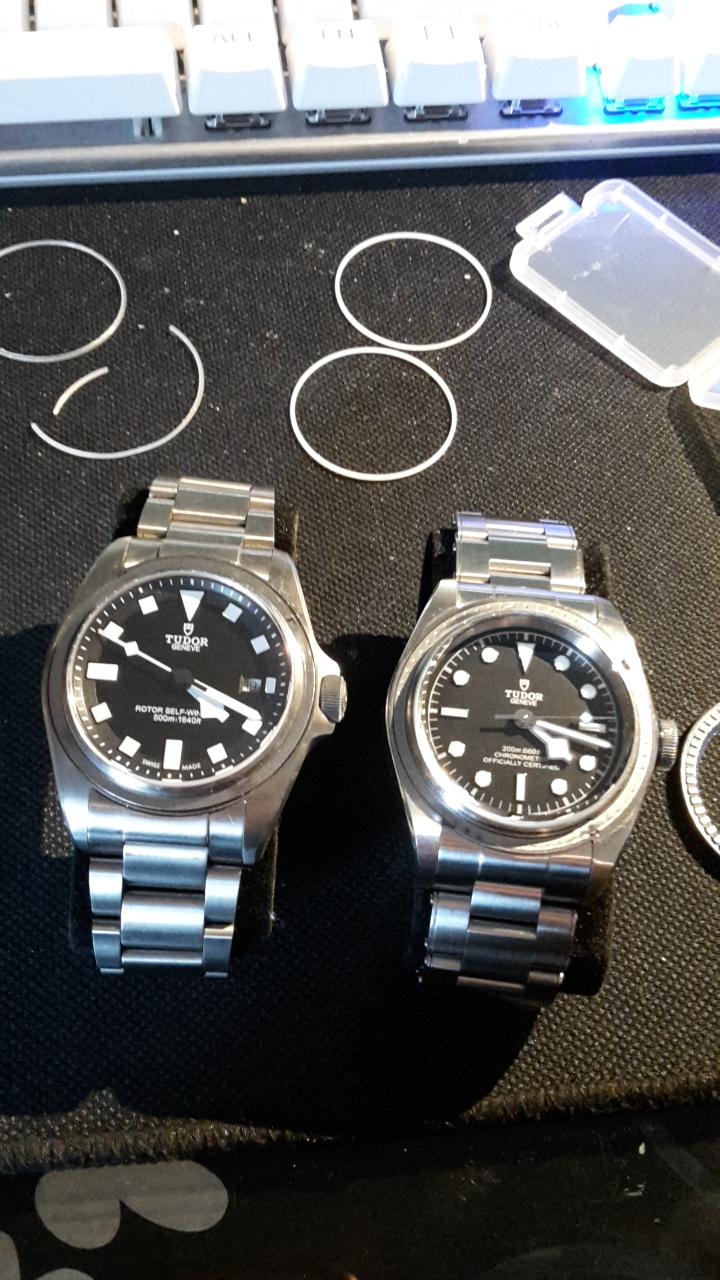
Here you can see my new HR bezel. It cost me 30$ including shipping to europe.
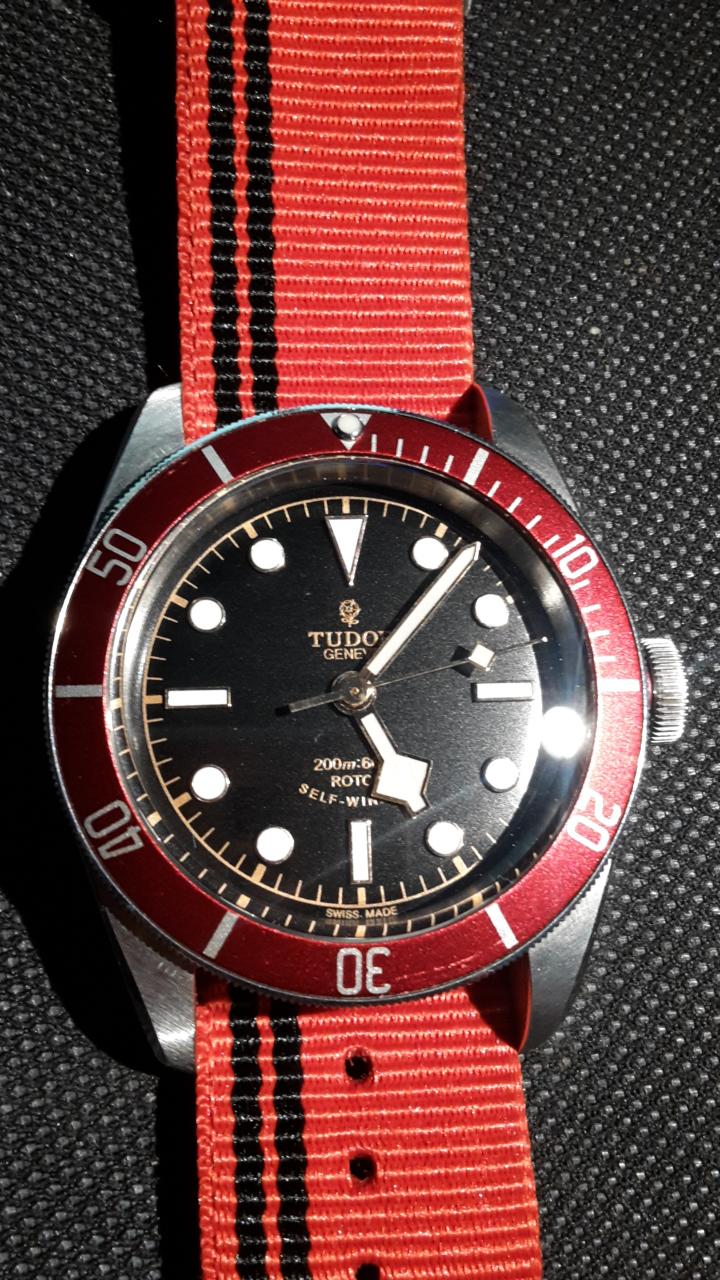
My stock insert is scratched badly at the right side of the 30 mark and around the 55 minute mark:
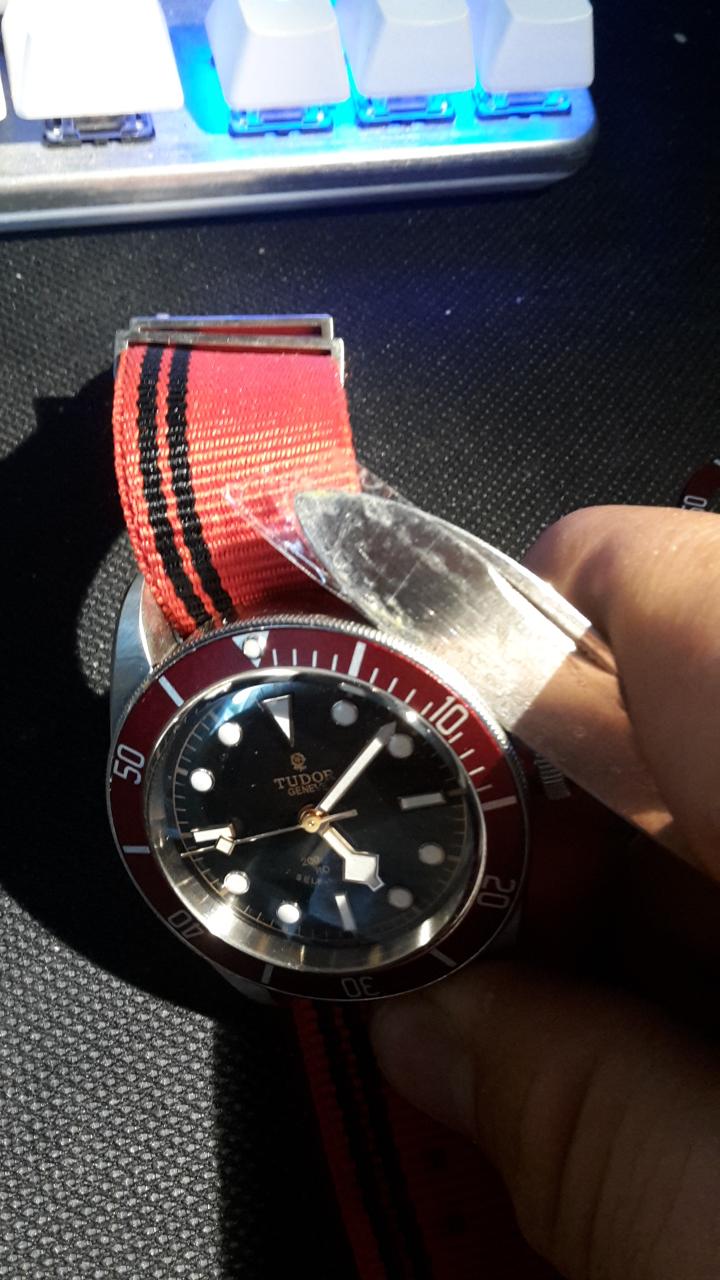
To remove the bezel you will need a think knife coated with a layer of scotch tape in order to avoid scratches on the watch. You want to insert the knife under the bezel like so:
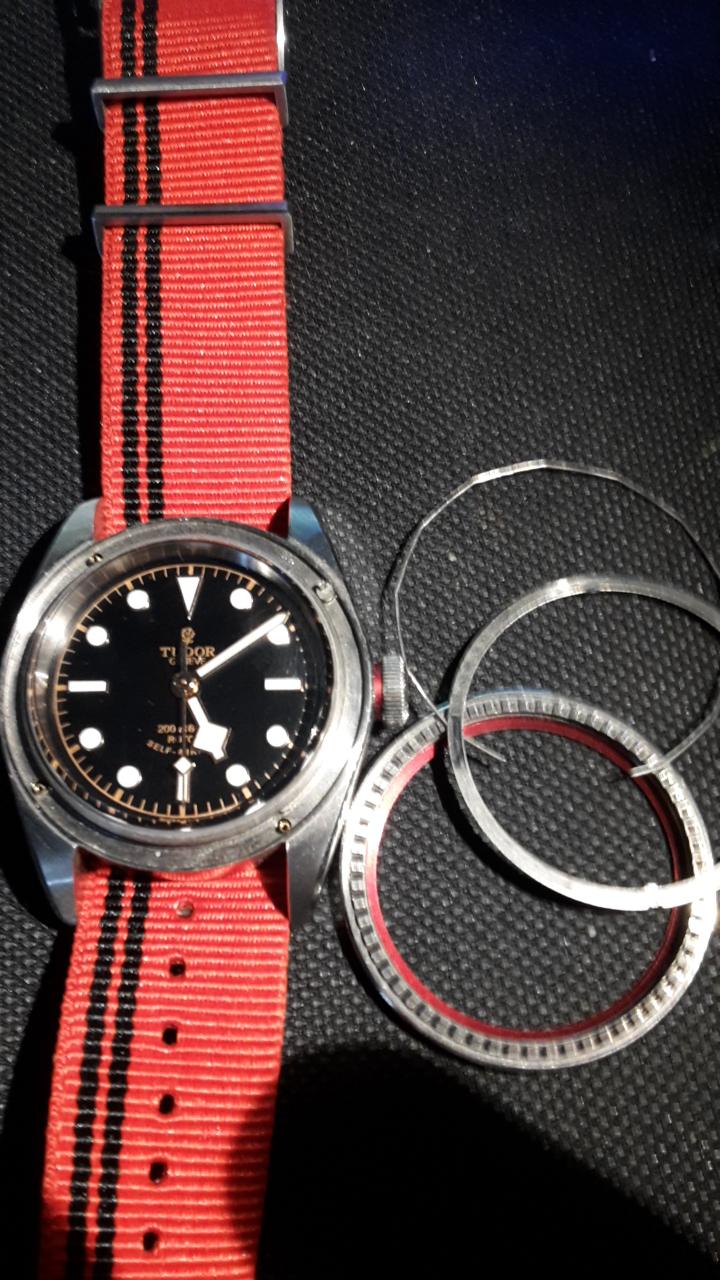
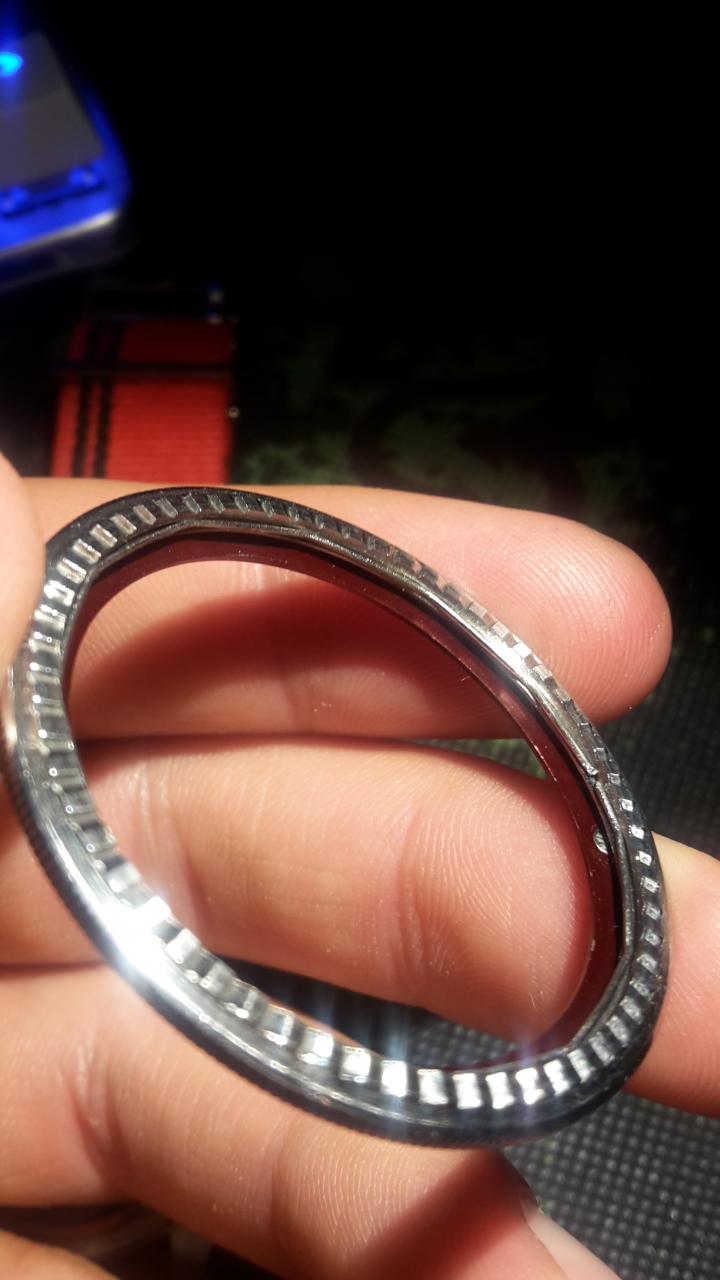
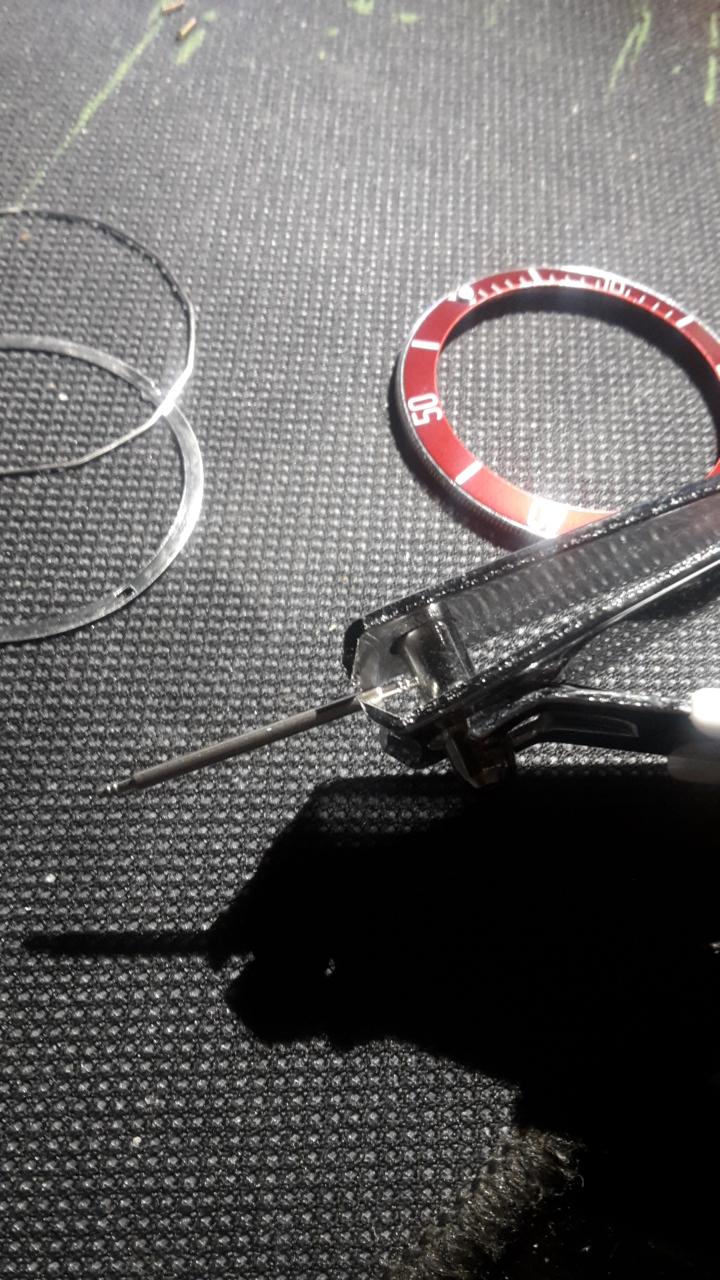
Now you just pry the bezel off. You dont need a lot of force to remove it, it should come off quite easily. Once done you should have something looking like this:
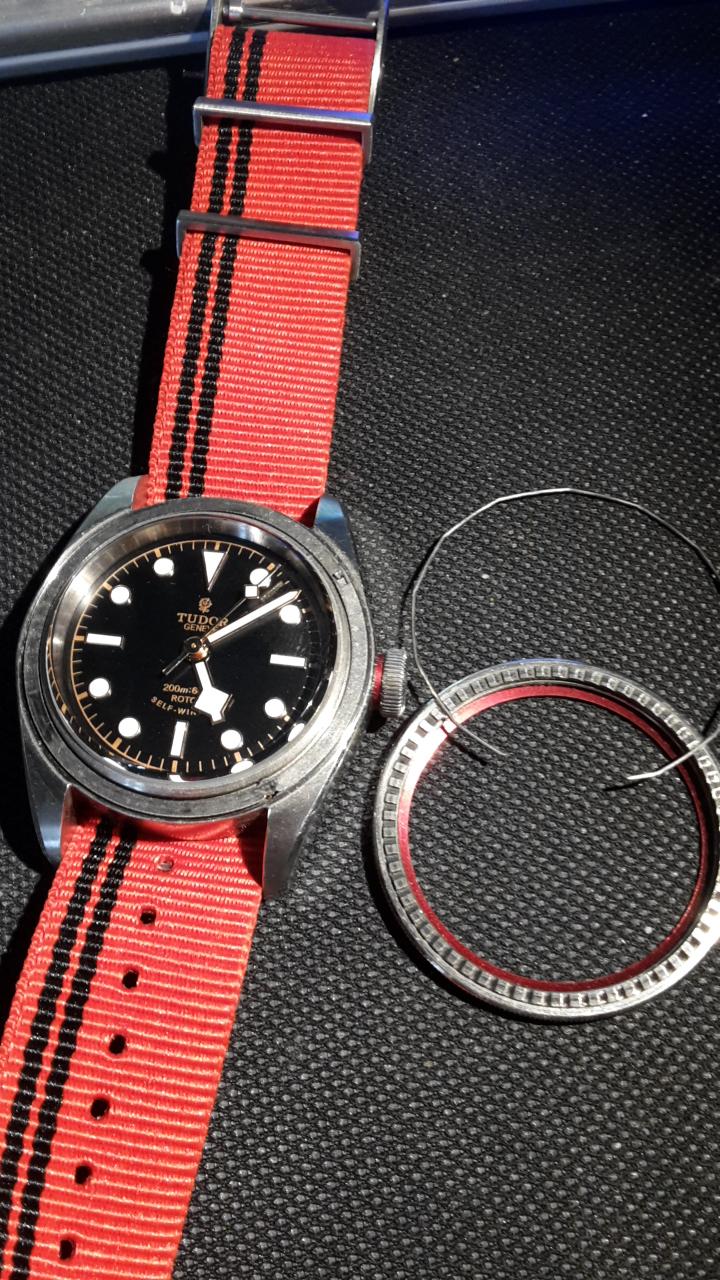
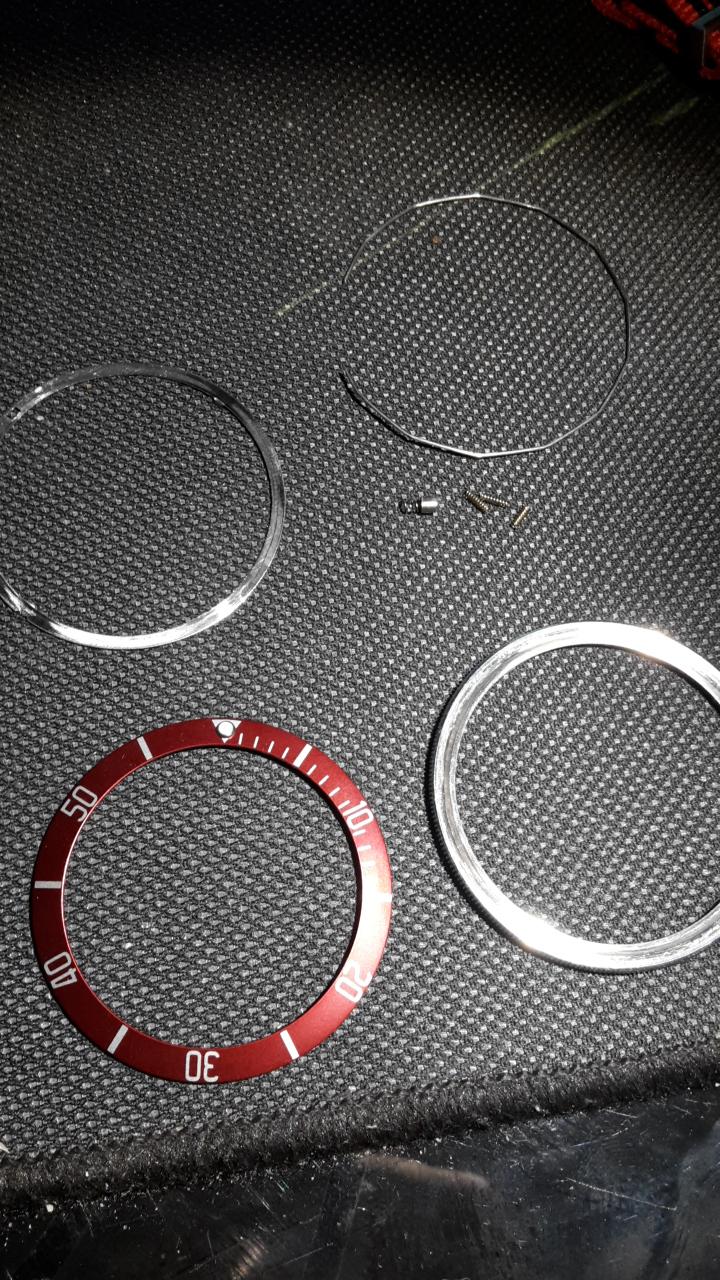
Some of the newer Tudor reps will have a plastic ring instead of the metal ring. There are some springs hiding under the circular metal plate that is still on the watch so be careful when you remove it. It is not fixed so simply lifting it off will work. Now you should have all these parts:
- 2 or 4 small springs and one with a clicking mechanism on top of it
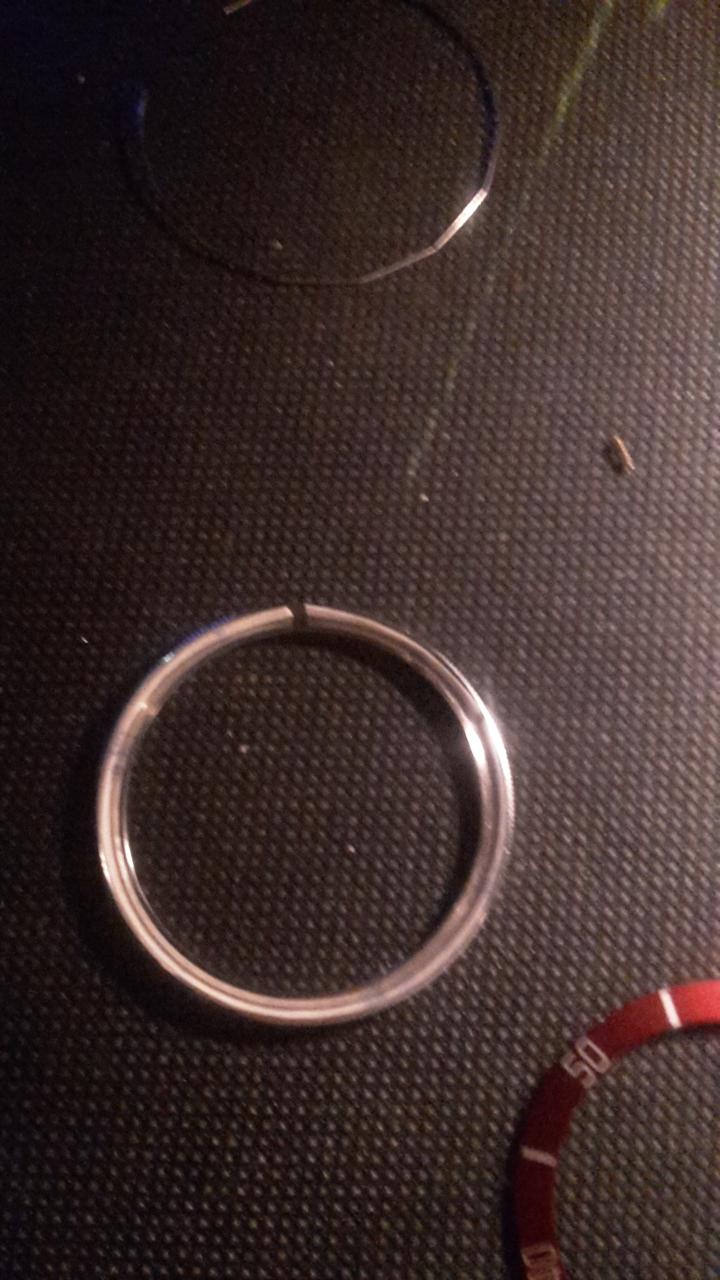
- a round metal ring
- the metal plate
- and the bezel ring with the insert
Now you can start cleaning. For the watch head I use a microfibre cloth and just wipe some off the dirt off.
The bezel insert is attached to the bezel ring by double sided tape. So you can simply heat it up and pull the insert off the ring.
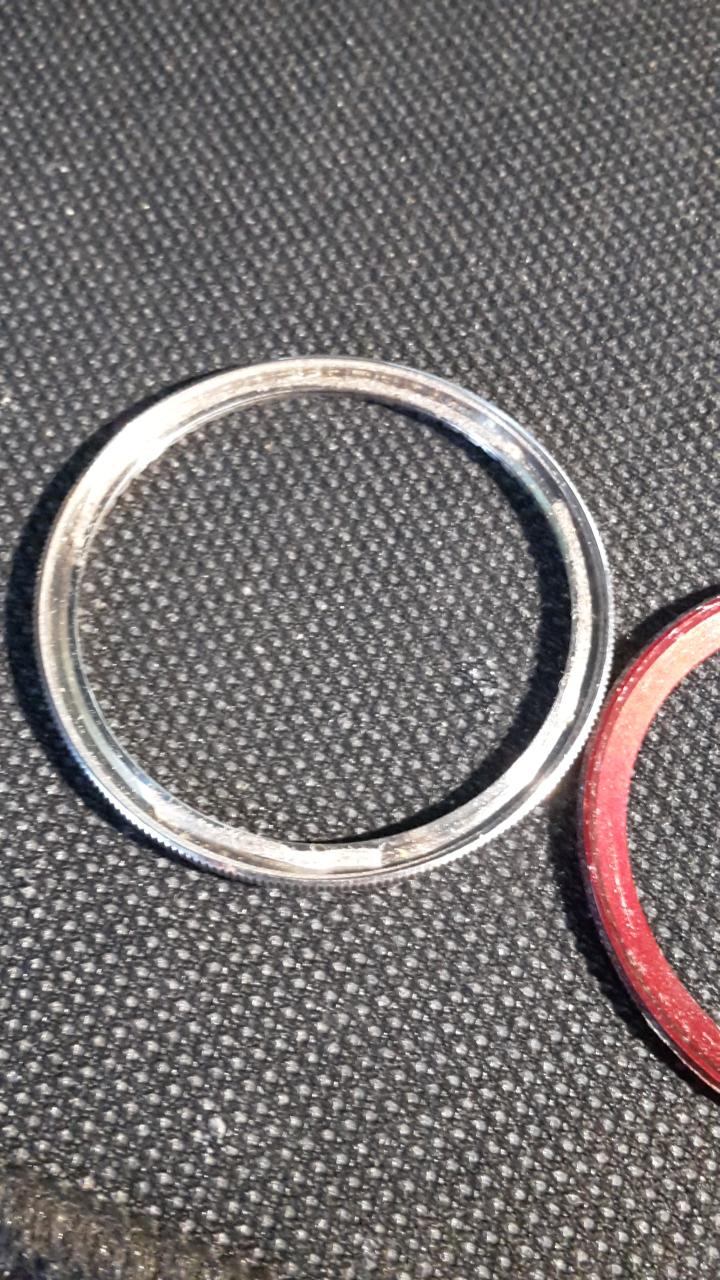
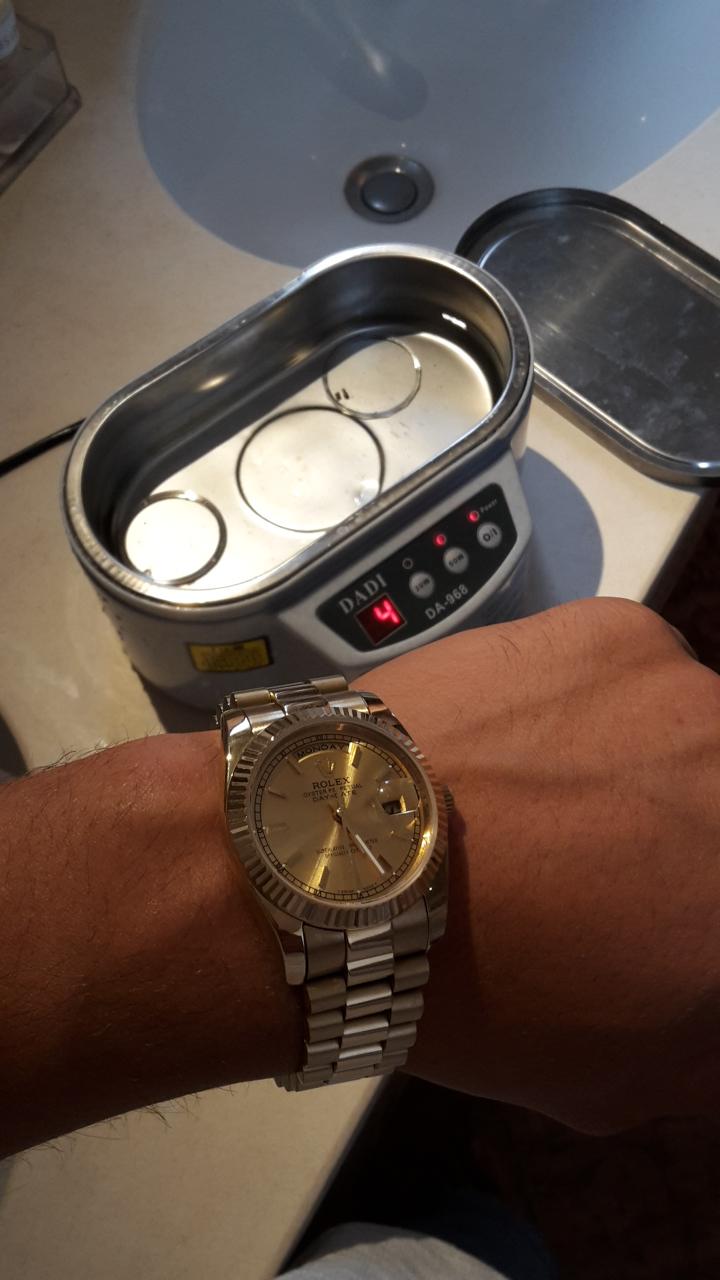
To clean the rest of the insert I just put the bezel assembly inside my ultrasonic cleaner for 5 minutes.
Now you want to take your double sided tape and retape the inside of the ring.
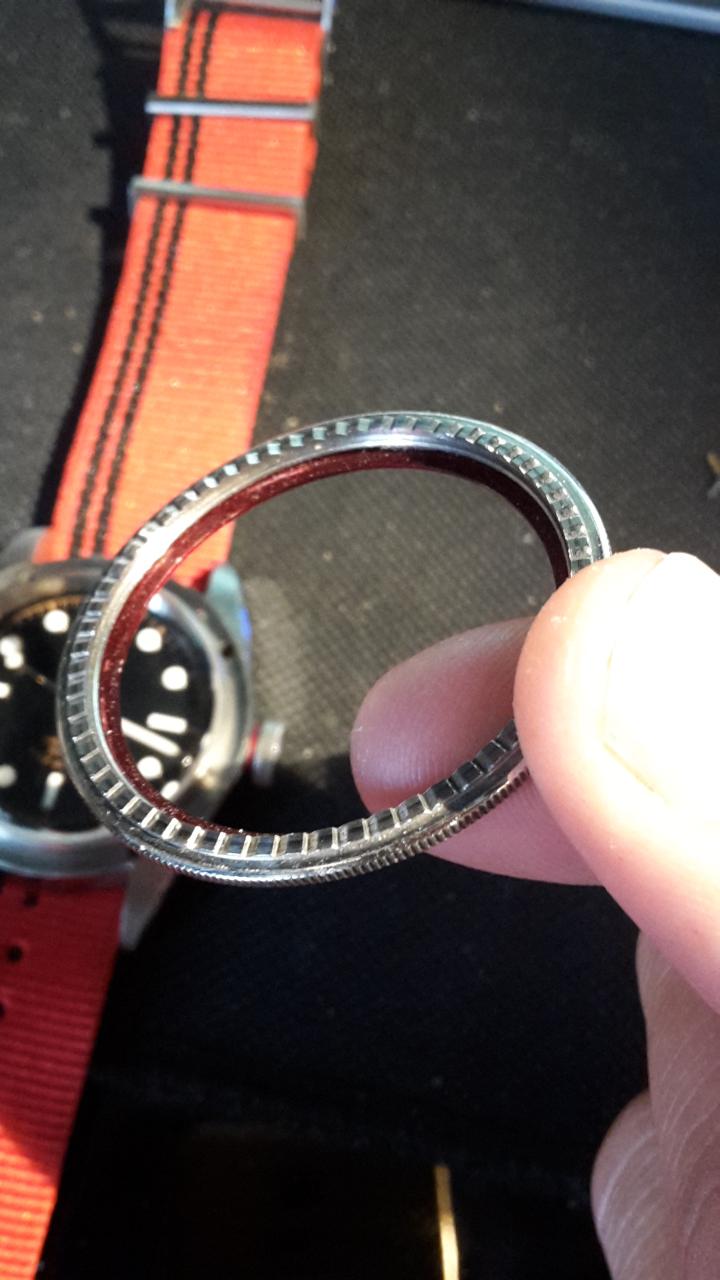
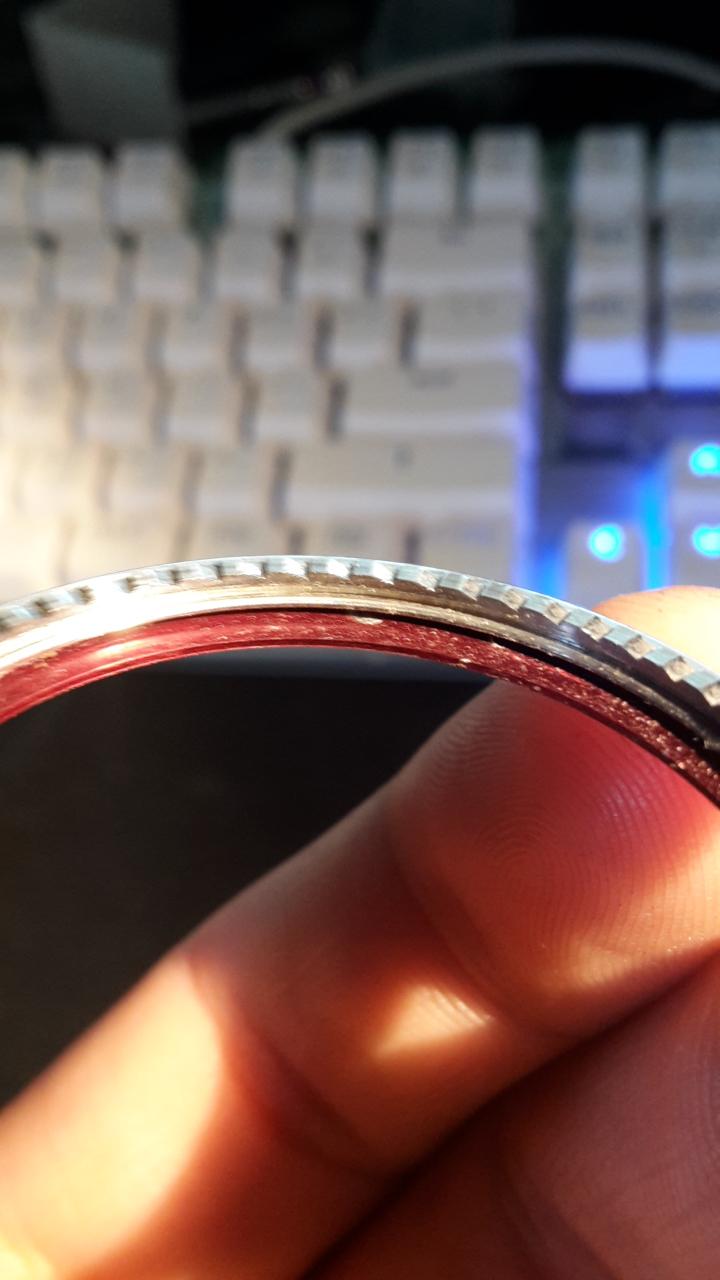
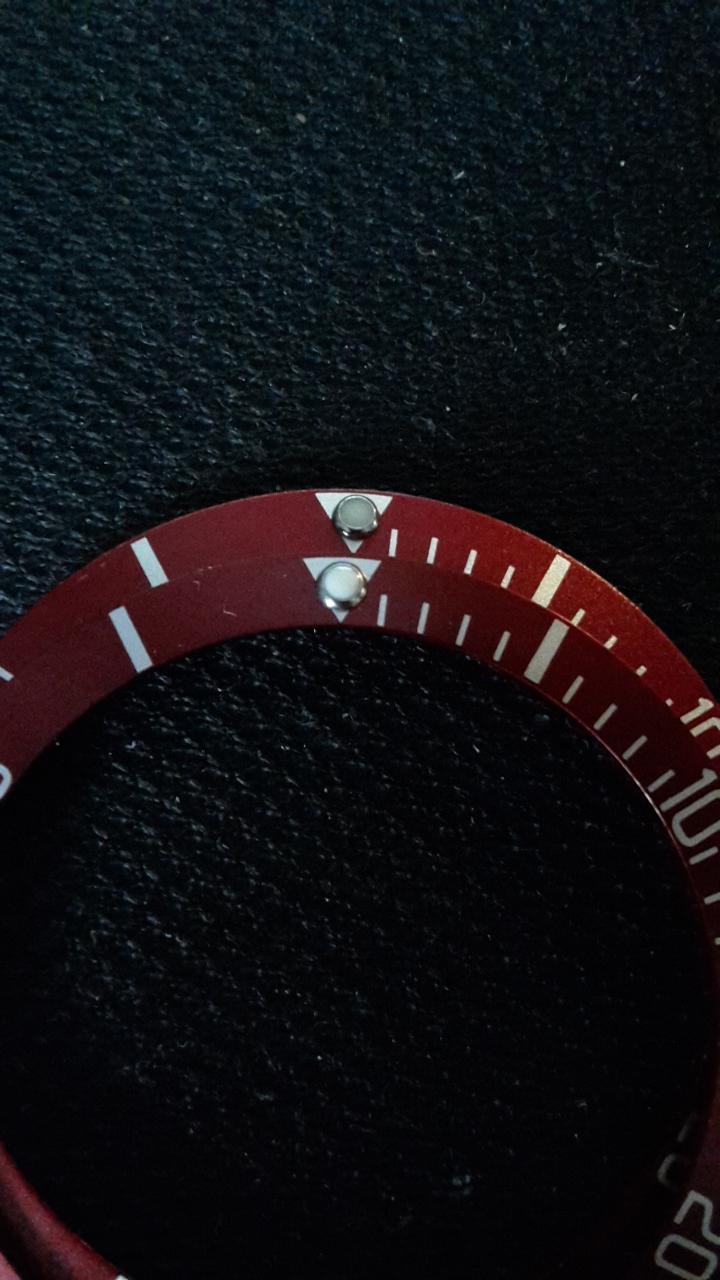
When you stick the insert back onto the ring, make sure the small circle of the pearl on the back side lines up to the teeth as shown. This is important because it will ensure that the bezel will be aligned perfectly when it clicks
It should look like this:
Now you need to put the round metal ring inside of the small ridge inside of the bezel. If you have a plastic ring then just put that one around the crystal and follow the next step.
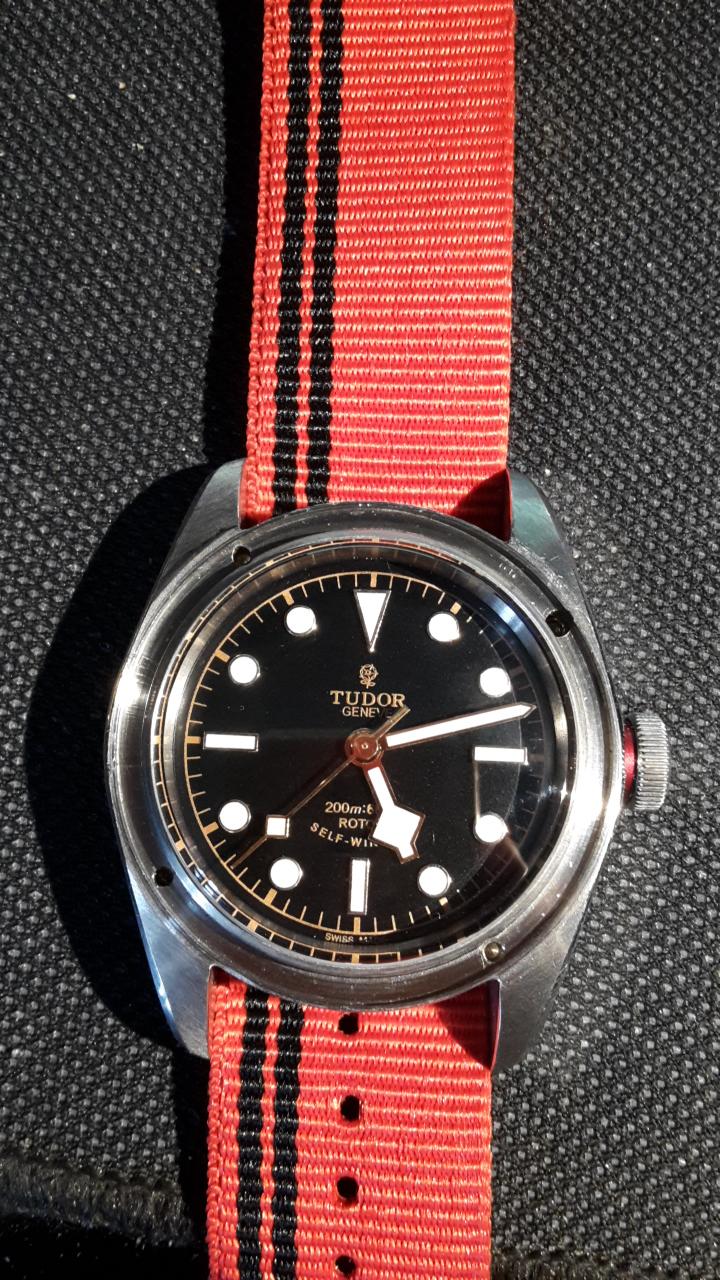
Once you put all the springs back into place and the metal plate above them you are ready to press the bezel back onto the watch. In order to do that you need to push down on the bezel and twist counter clockwise at the same time. Its best to use your two thumbs for this.
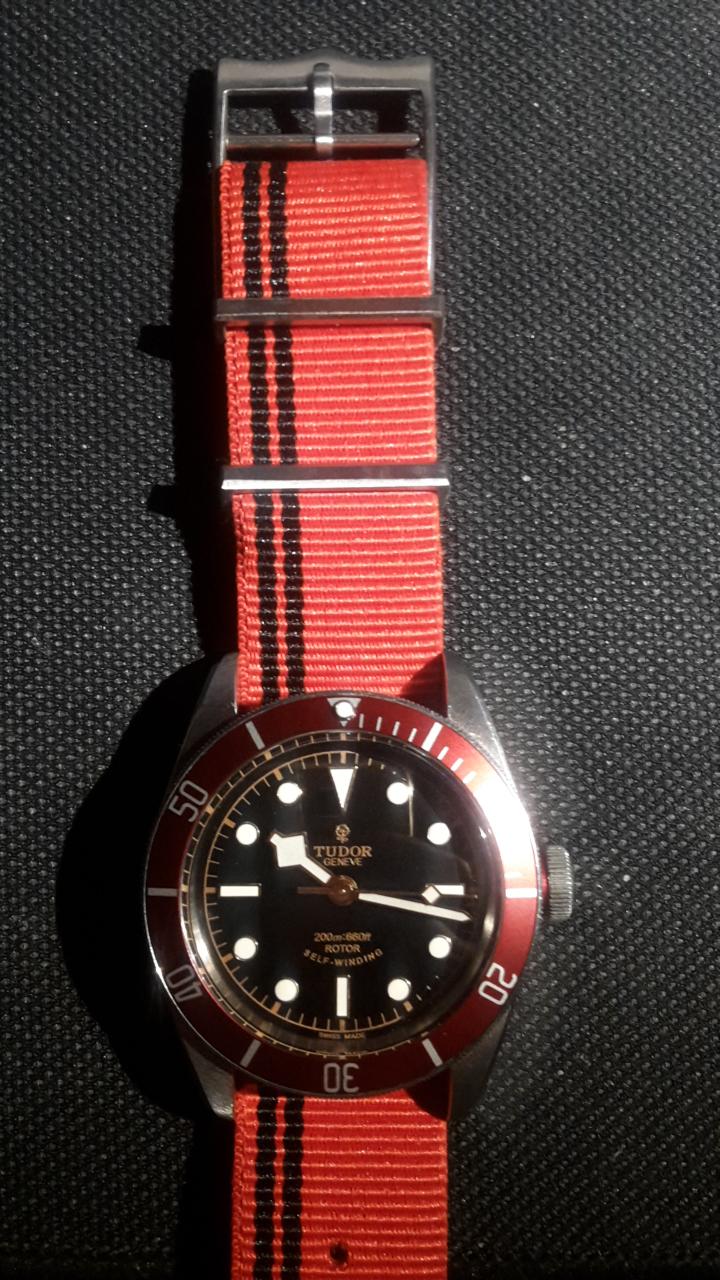
The final result:
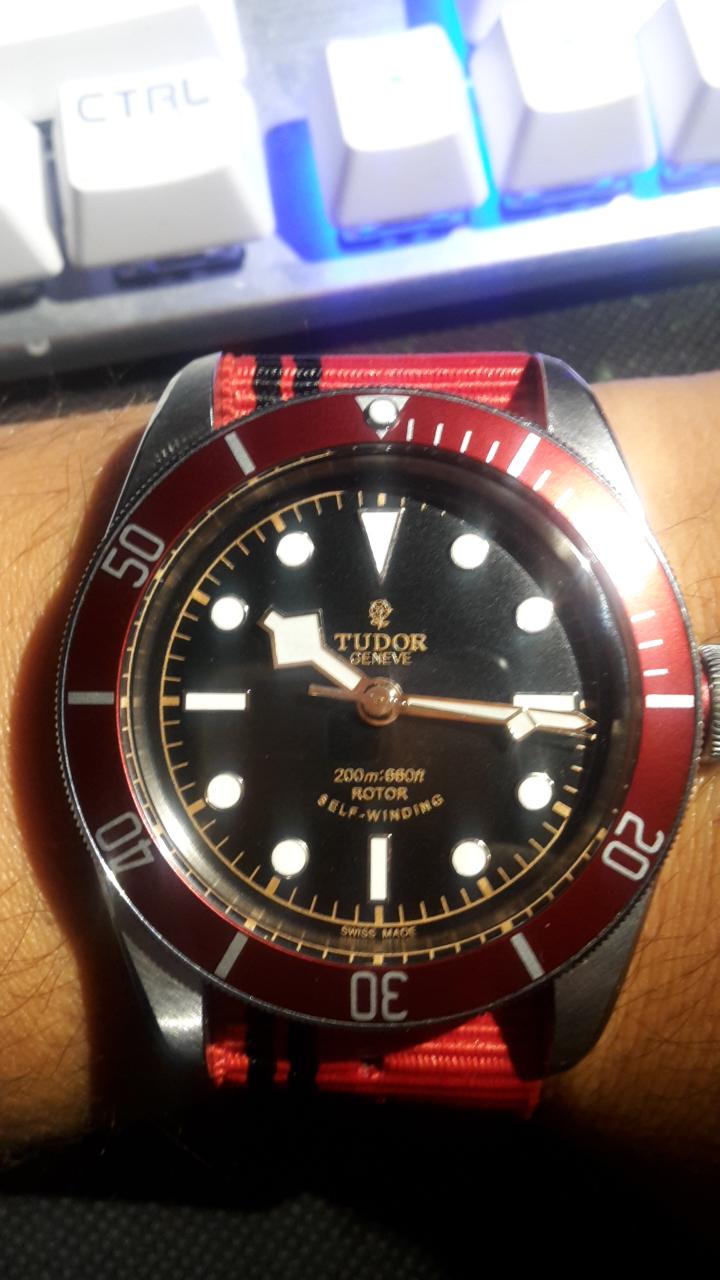
Next to my JF V2S
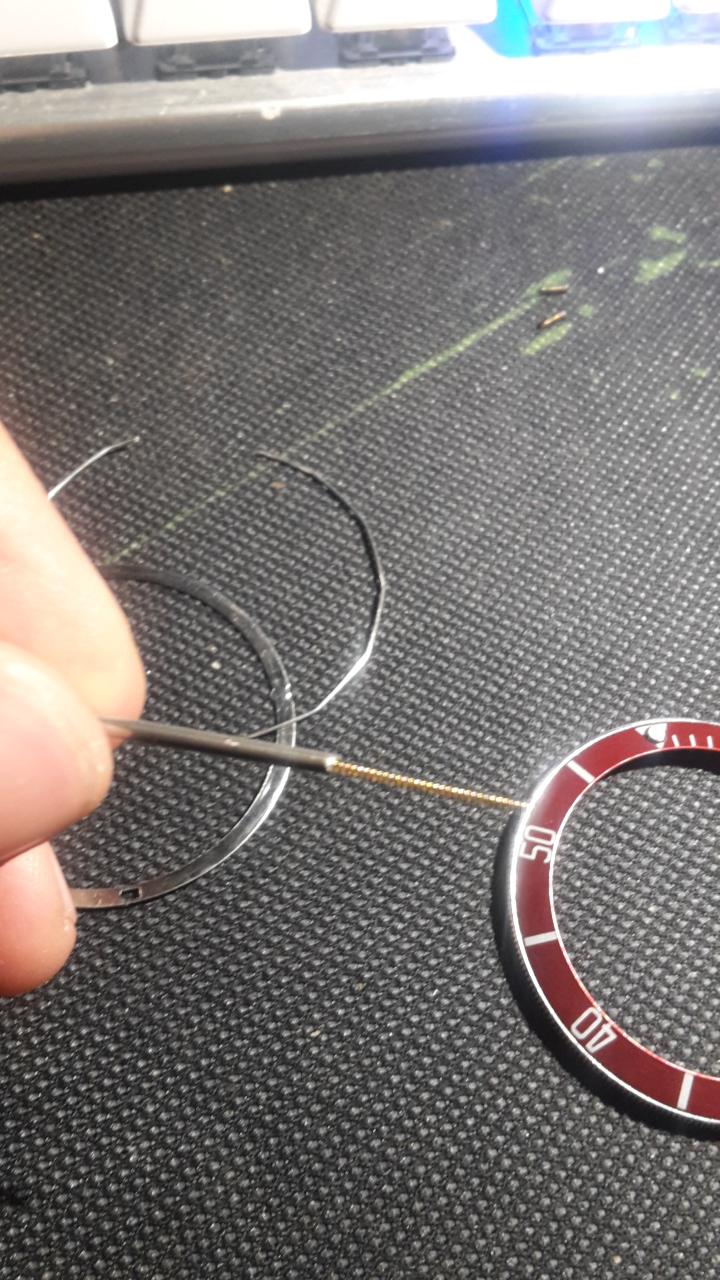
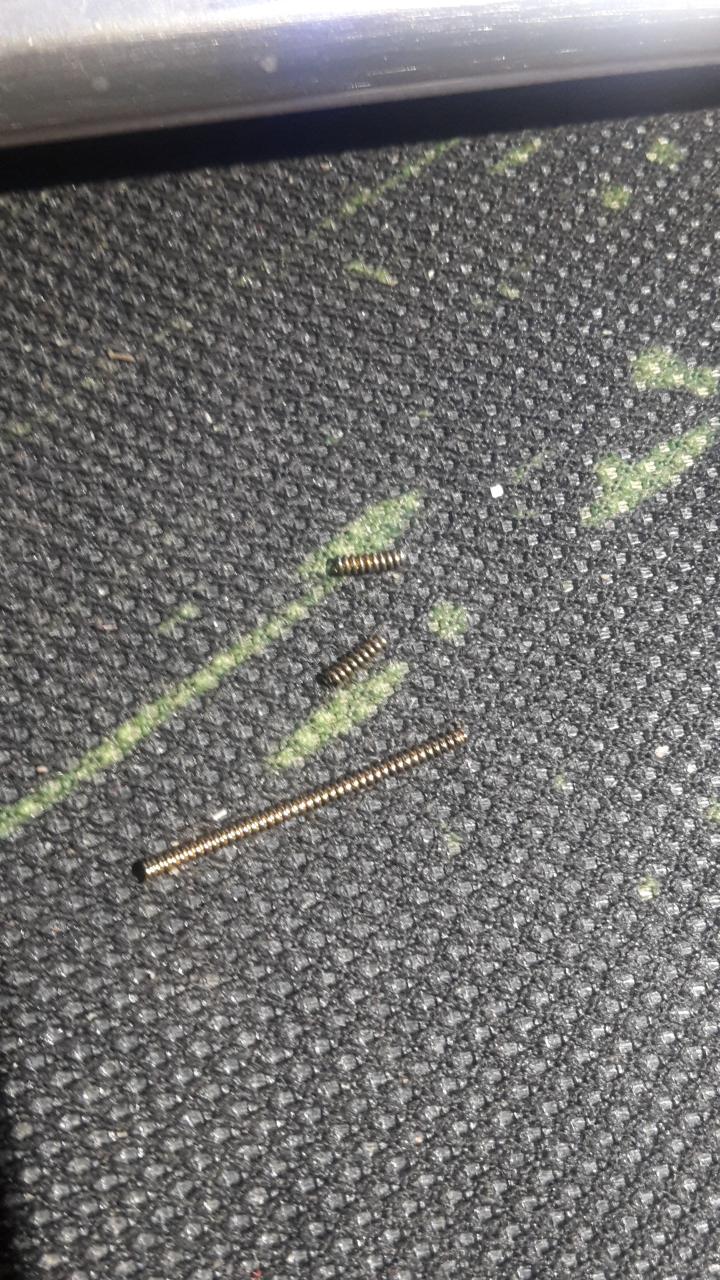
In case you loose one of the small springs from the bezel like I did while taking these pictures, theres a simple trick to make new ones. Just take a spare spring bar and clip it with a nail clipper. There will be a small springbar inside that you can cut to the desired length. The longer the springbar the stronger the click. You can also stretch the springbar to create a stronger click / less play.
Here some pics comparing the HR insert to the ZF insert aswell. (ZF on bottom)
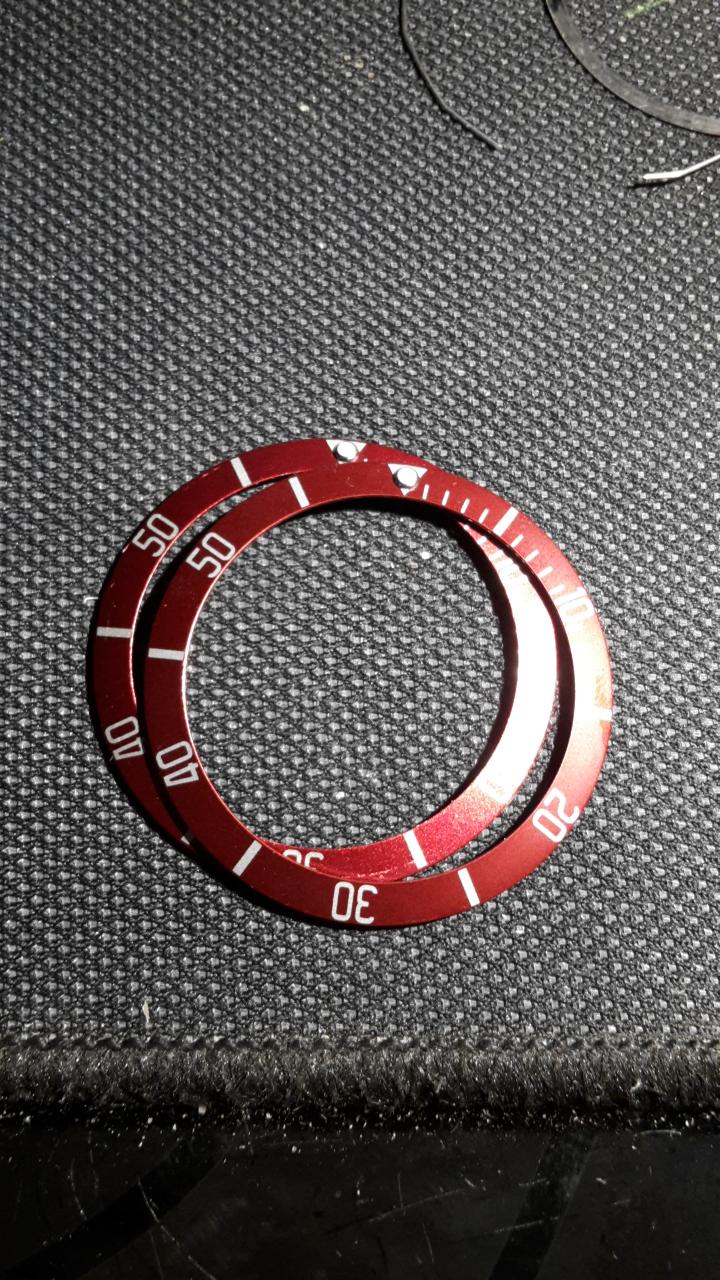
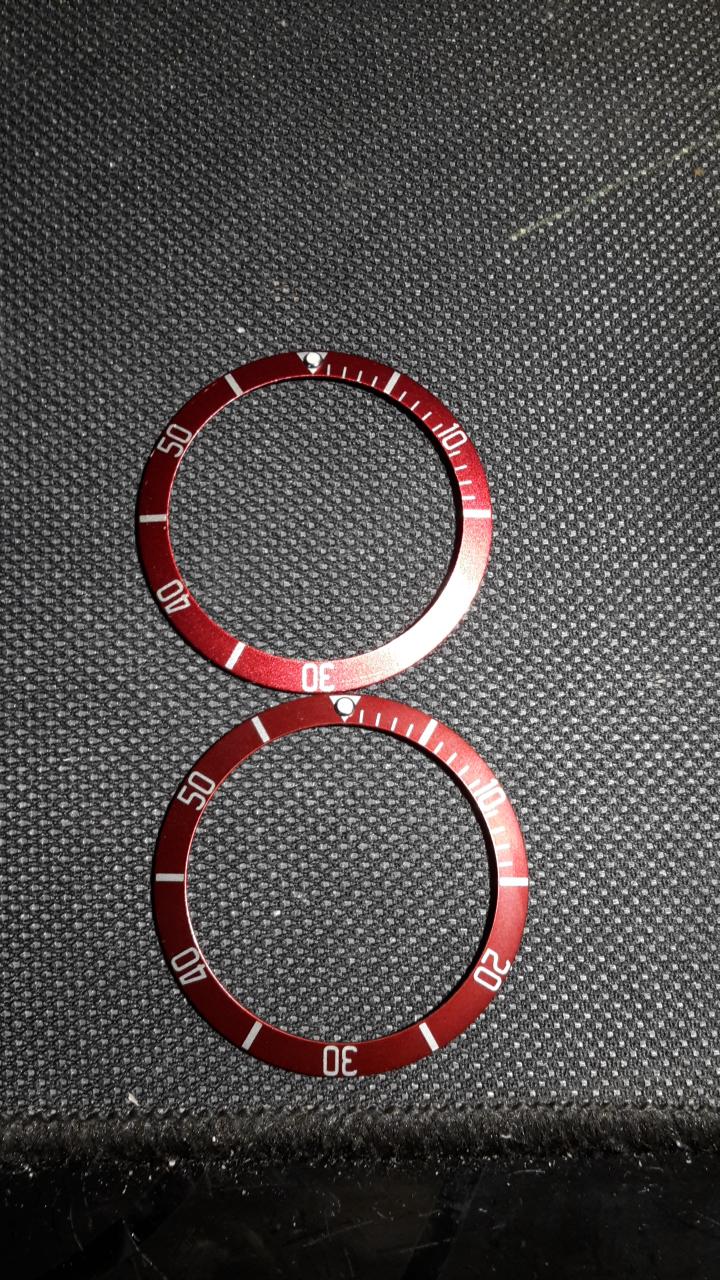
The HR insert seems to be more matte than the ZF one, but this might be due to wear on the ZF insert. The pearl on the HR insert looks better and has a nicer white color. The lume is the same color on both but the ZF shines just a tad brighter after about 2 minutes but both last throughout the whole night once charged.
Thanks for taking the time to read and I hope I could help you")
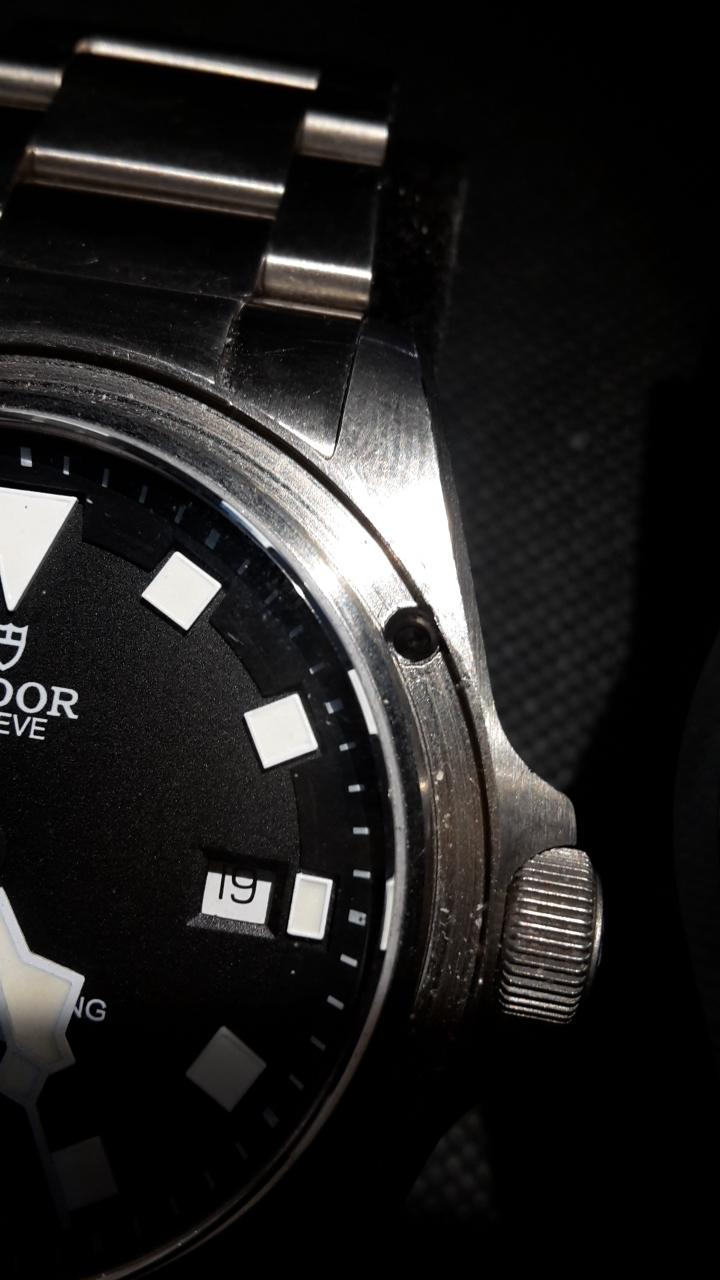
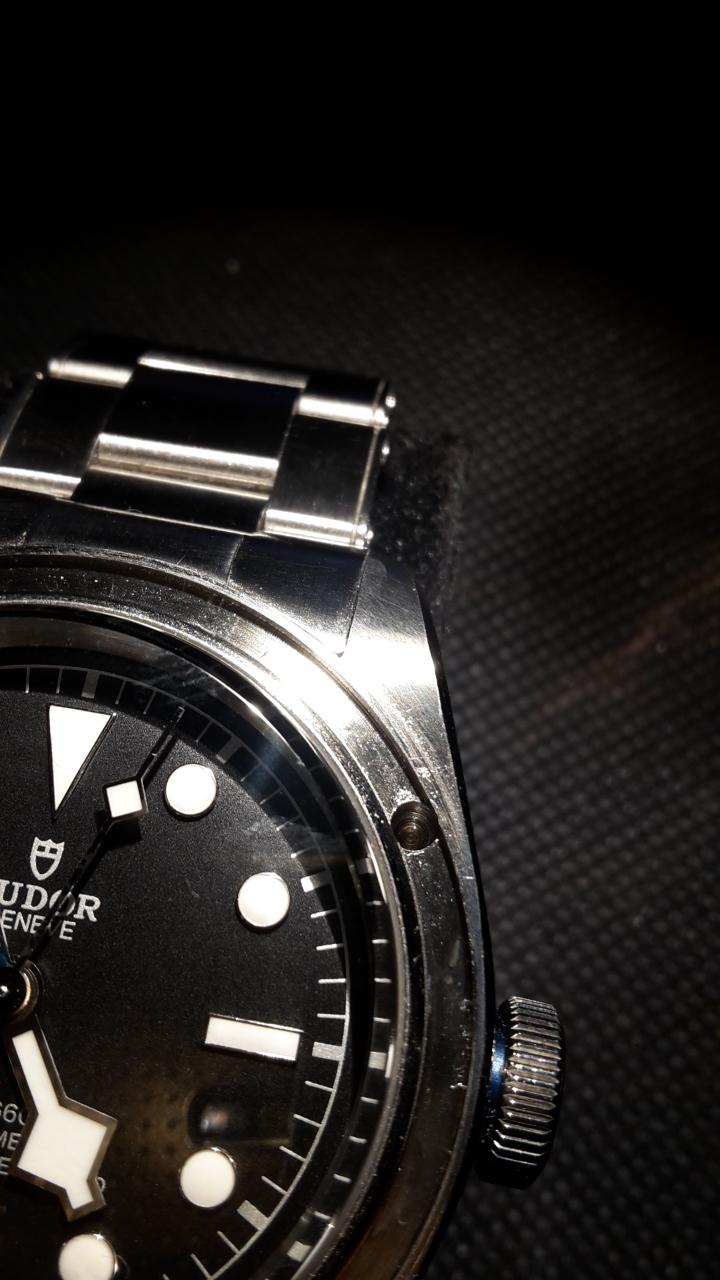
Currently trying to find a solution to completely eliminate play in the Bezel. The Pelagos has absolutely 0 play and the BB has some play. Im trying to find out what part is responsible for creating the play and so far I can say its definately not in the Bezel as when i switch them the BB bezel turns out to have 0 play on the Pelagos assembly and the Pelagos bezel on the BB has got play then.
Okay, so I have figured out what the problem was! Sadly the play in the Bezel cant be fixed, as its not actually the Bezel that creates the Play but the hole drilled into the case where the click spring goes inside that creates the play.
See here:
Another thing I did was to make the Bezel turn easier. Sadly the two replacement plastic retainers i bought didnt fit even though they were sold to me by a Dealer as replacement for Tudor. So I had to work on the already broken one. What I did was cut it into 3 pieces and put it inside the Bezel again. Dont have a pic but its basically like this:
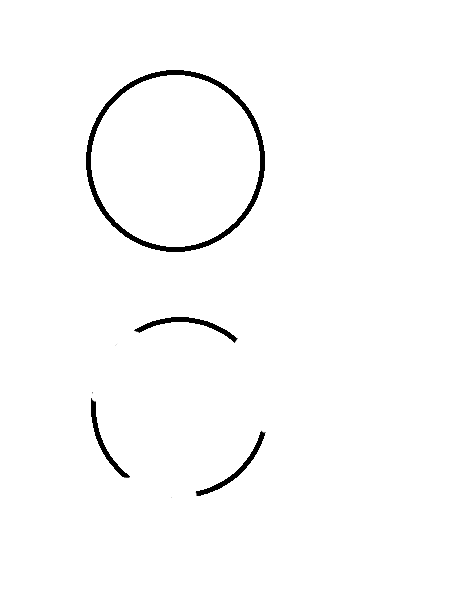
Before it was like the top but now Its like the bottom. Surprisingly the Bezel turns a lot smoother and easier now. Feels exactly like my JF Sub C. If you have a high end Sub C rep you will know what I mean. Very easy to turn but still enough resistance to not turn by itself.
There are also some good photos in this thread on watchrepairtalk forum: https://www.watchrepairtalk.com/topi...-bezel-repair/
Last edited:
I successfully did it twice. The trick is basically to pop the bezel off with a case opener from the 7 o'clock hour marker.
At this point, make sure to keep the watch level as there is a flat tension spring sitting on top of four springs at 2, 5, 7 and 11 hour markers.
Now we don't need to do anything to the tension spring and the four springs aforementioned.
As with the bezel insert, just heat it with a hairdryer or heat gun and blow on it and use your thumbs to push the insert out from the underside.
Before you put any new insert in, I suggest you put the bezel assembly back on first and use double sided tape on inside of the bezel assembly where the bezel contacts with insert. That way you can line up the bezel insert to the 12 hour marker. You might need to turn the bezel to the right until it catches on the last click, so it fully lines up when you place the bezel insert back on.
However, one very important thing to note is when you put bezel assembly, you have to do a right twist to seat the bezel on the click spring on the 2 o clock marker. If you don't do that: two things will happen.
1. The bezel will spin freely
2. The bezel will be very hard to remove if you screw up.
If the bezel spins freely, all you have to do bend the click spring upwards.


Some more good info from the other thread.
This gasket fits perfectly on v5 pelagosThe original pictures were hosted on imgur, but imgur started blocking calls from RWI so the pictures hosted on imgur no longer show up in the posts.
However, the original pictures are still available on imgur, so I re-hosted the pictures on RWI's native picture hosting site clickpix.org and replaced the original imgur links with the new clickpix links in the following quoted posts:
There are also some good photos in this thread on watchrepairtalk forum: https://www.watchrepairtalk.com/topi...-bezel-repair/
https://a.aliexpress.com/_uH3JGF
Buy in 35mm diameter.
For the bezel? Or is it for the caseback or crystal? Just to clarify.
You have any installation pictures?
For the bezel. I have no photos but is easy. Just insert the gasket into the inner space of the bezel and then press the bezel to the watch with a presos.For the bezel? Or is it for the caseback or crystal? Just to clarify.
You have any installation pictures?
I mean press no *presosFor the bezel. I have no photos but is easy. Just insert the gasket into the inner space of the bezel and then press the bezel to the watch with a presos.