- 10/12/06
- 2,835
- 1,094
- 113
Hi,
Welcome to Jiro's How to enhance your picture tutorial part 2 - Basic.
Here in part 2, I will try to show you most of the basic photoshop techniques that will come in handy when enhancing pictures of your watches
so that we can move on to the next intermediate level on upcoming part 3.
- How to get rid of Dust & Scratches -
Here we have a close up shot of PAM005 which has some dust on the dial.
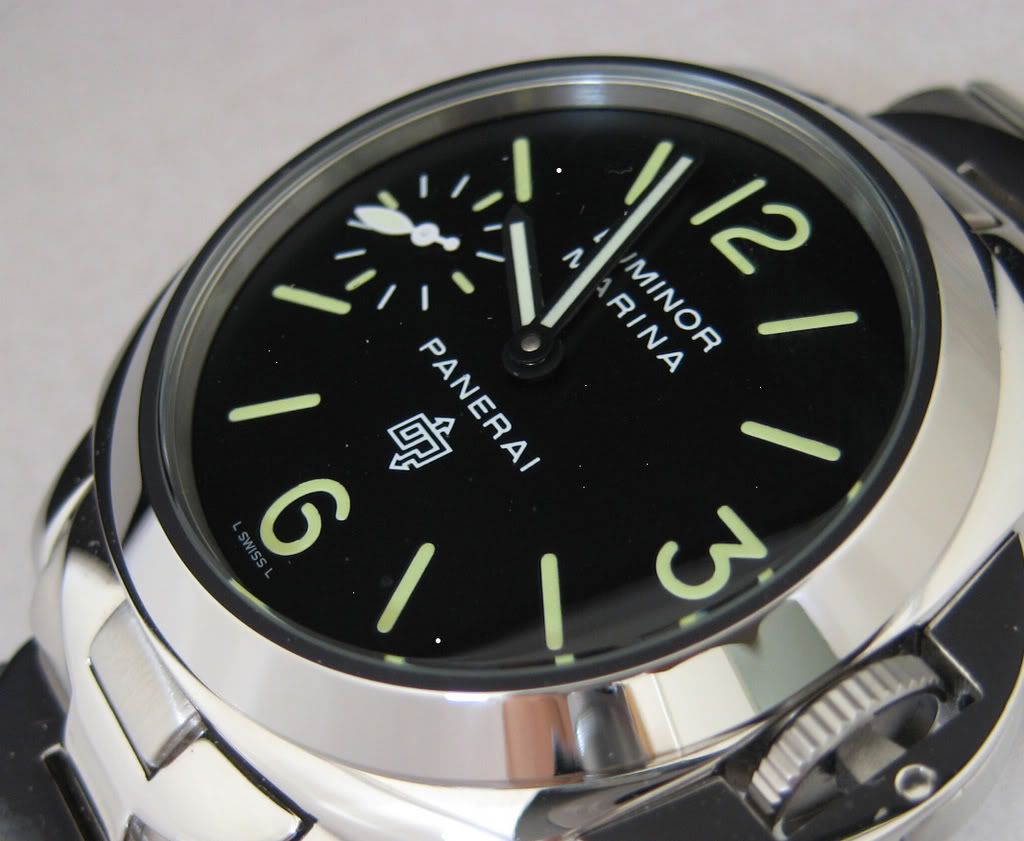
Let's get rid of those annoying bastards! :twisted:
First, select the spot that you want to get rid of....
And go to "Filter" => "Noise" => "Dust&Scratches..."
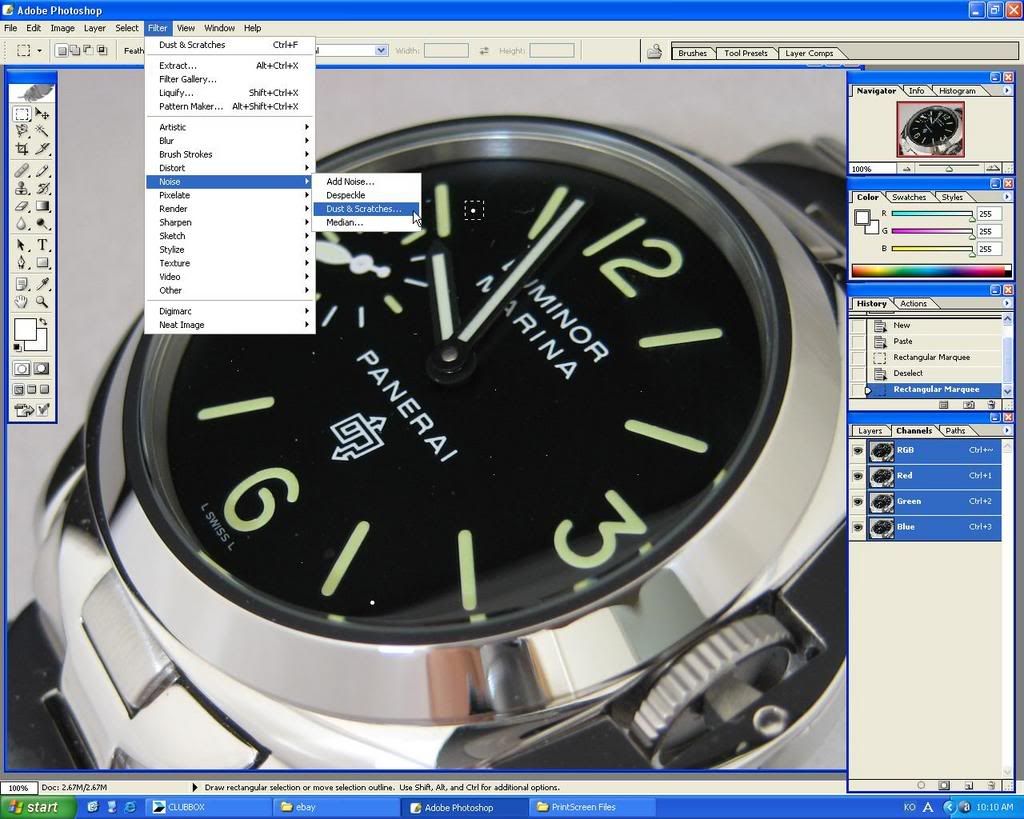
Change the Radius to 5 while leaving the Threshold on zero.

Press OK.
Notice that dust is now gone?
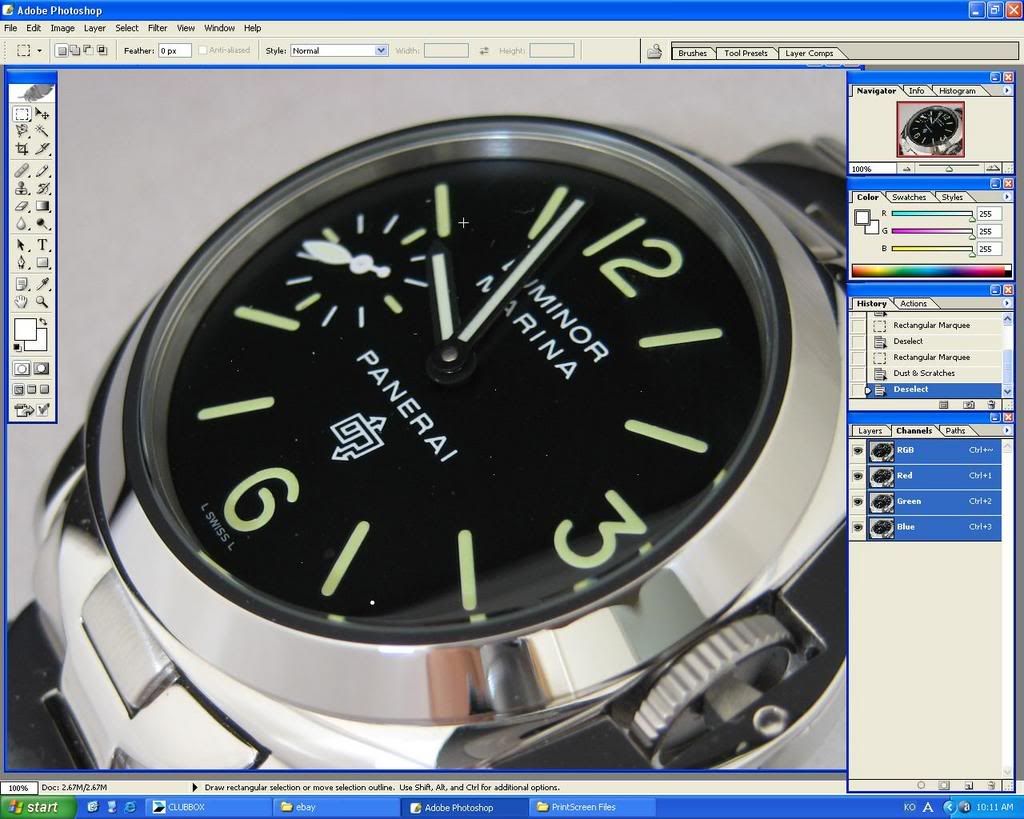
Now, let's repeat the process and apply it onto all the neccessary areas.
But this time, you don't have to click on "Filter" and go through all that....
Just select the area you want and press "Ctrl + F" which will repeat the last "Filter" action! Neat eh~ :wink: It will save you whole lot of time~
And Here's the result of that.....

Nice and clean~~~~ 8)
*Before*
*After*

Next.....
- How to cut through the glare -
Often times we take a picture and there are this glare on the crystal blocking the view of dial.
This tutorial will teach you how to cut through that annoying glare.
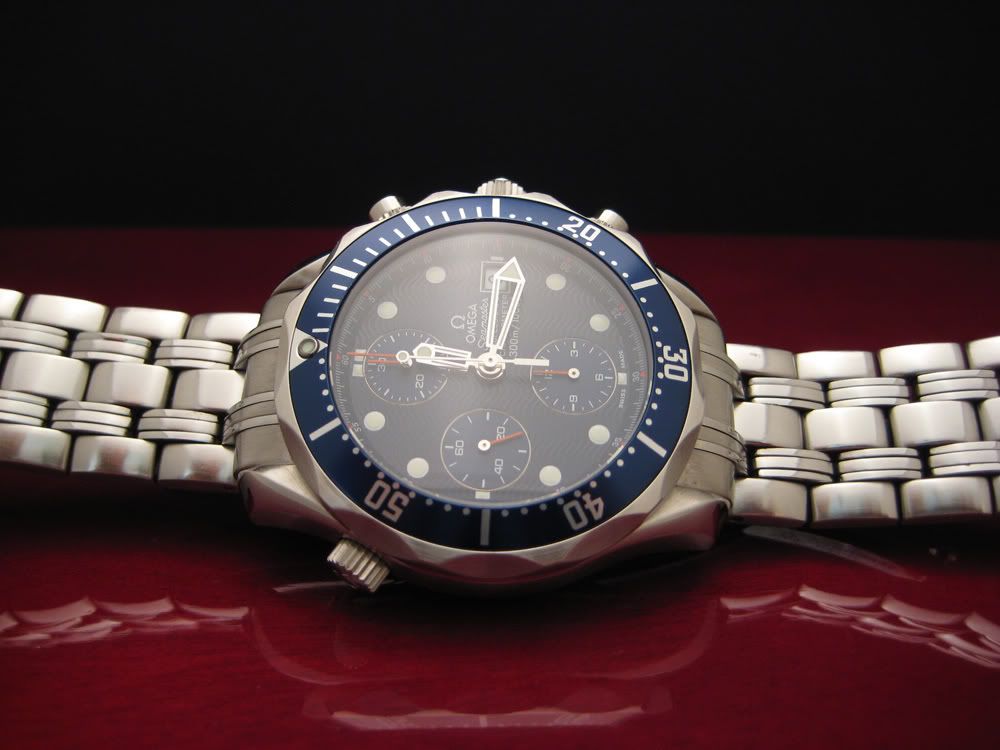
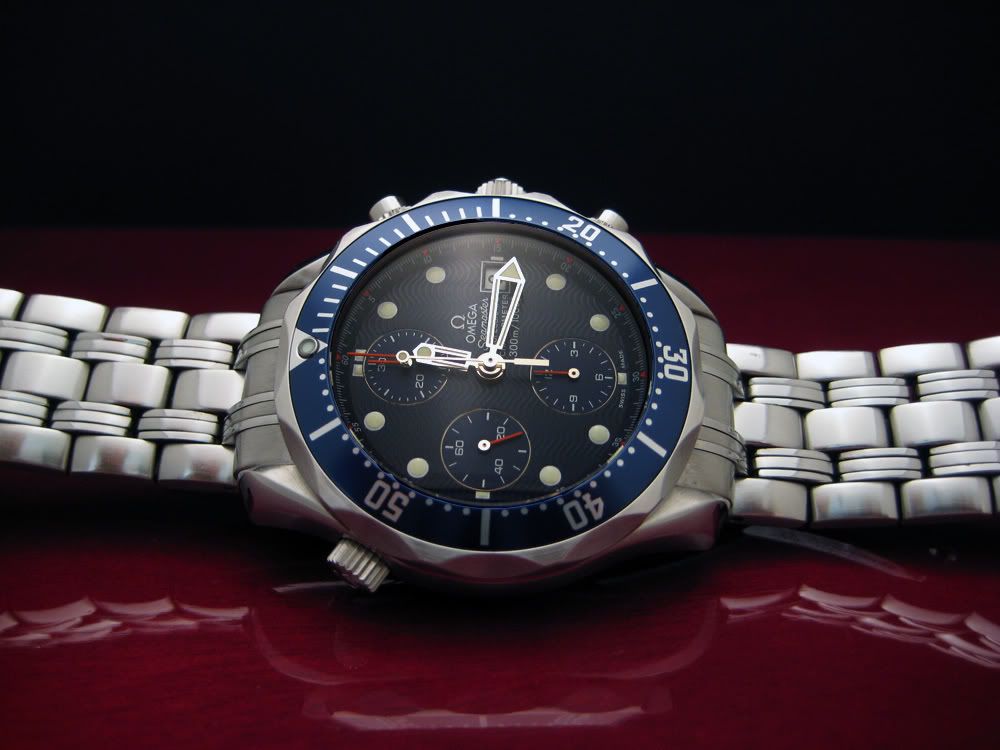
Here, we have a picture of might SMP Chrono.....but it's hard to tell the true texture & color of the dial because of that glare....
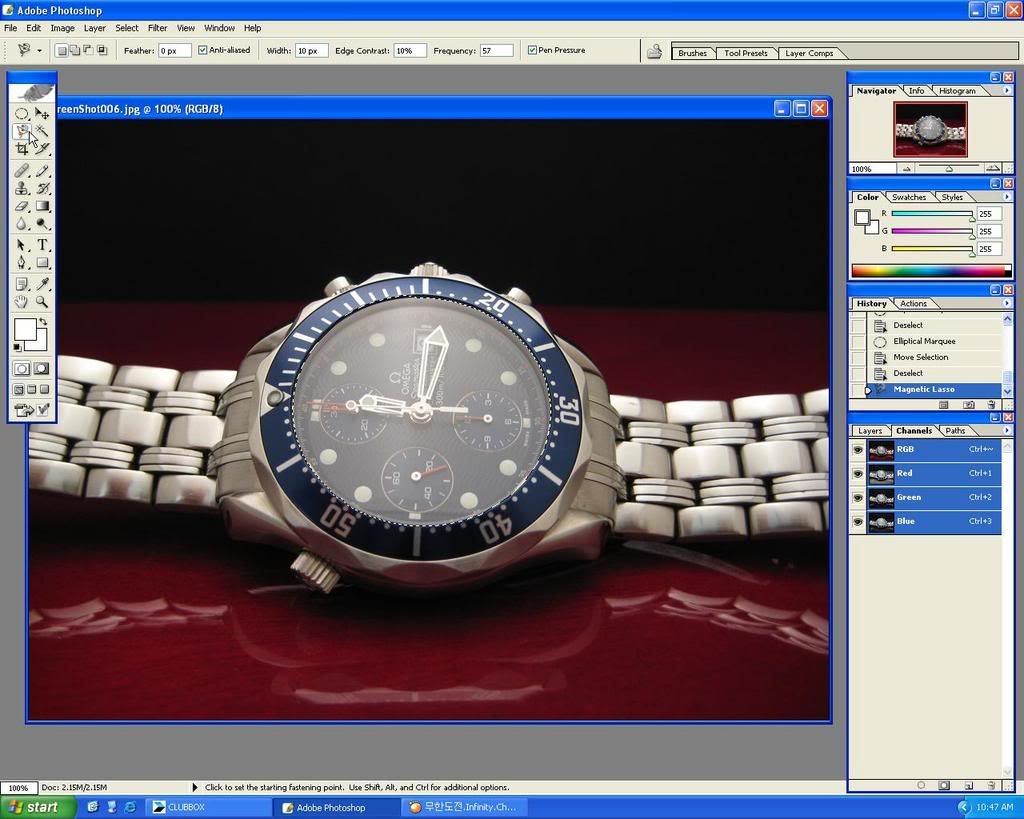
Let's use the Magnetic Lasso tool which was covered in part 1 and go around the whole crystal.
(If you prefer using Elliptical Marquee tool, you can use that too. I just prefer using Magnetic Lasso tool more since I can select any shape of area.)
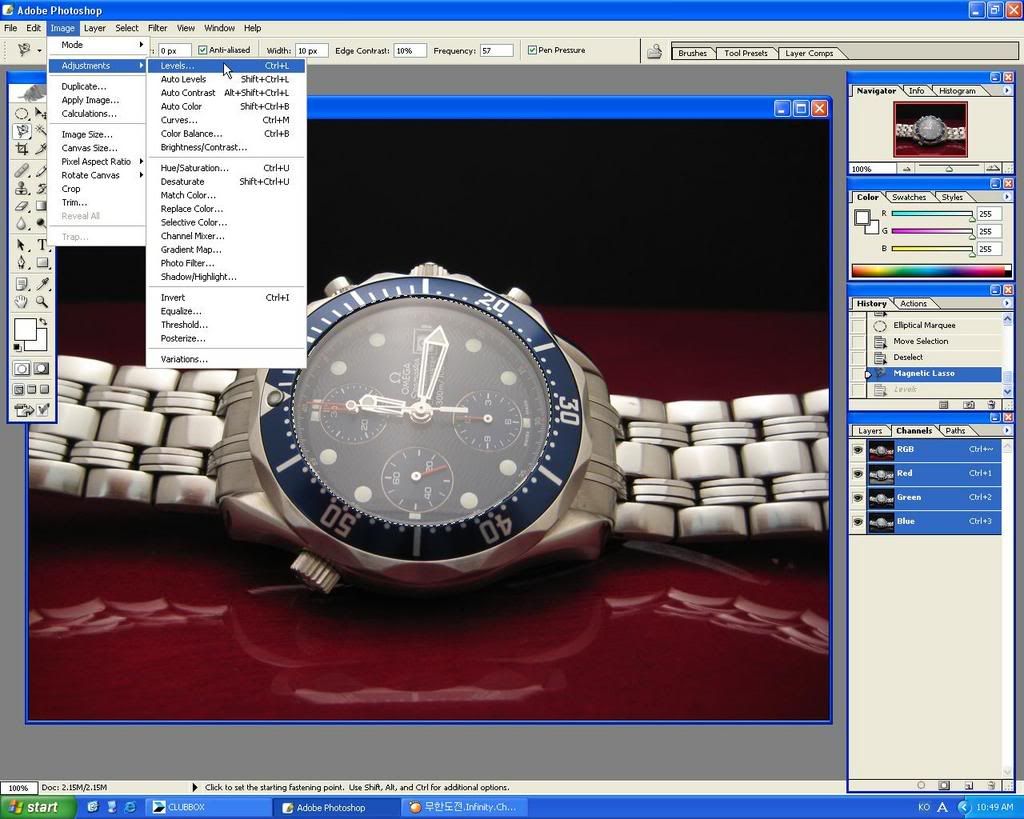
Now, go to "Image" => "Adjustments" => "Levels..."
In part 1, we've learned to use this "Level.." option to adjust color by changing only one of the "Input Level".
But this time, we're going to have to use all 3 "Input Levels" to cut through that glare....
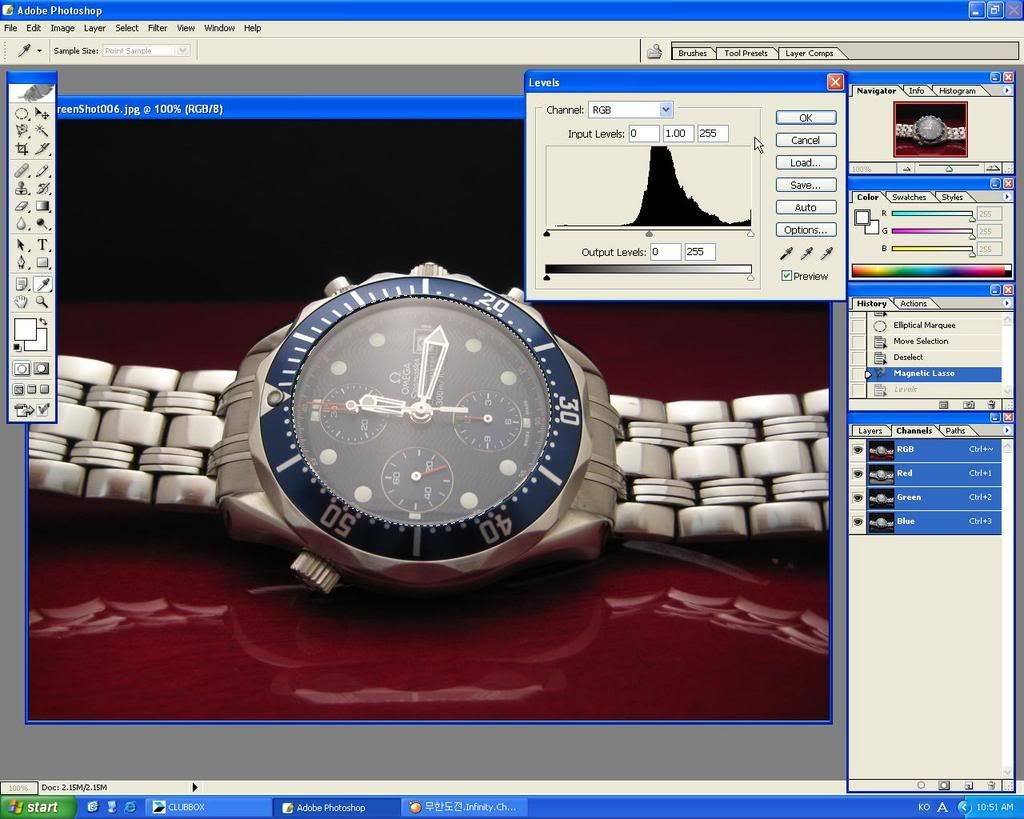
It will require different values depending on your pictures, but here we will use this value to change the input level.
(This is just an example to show you how it's done....you really have to play with this option to get used to it.)
Let's go ahead and change the Input Levels to 60, 0.50, 240

Notice how you can see the dial now?
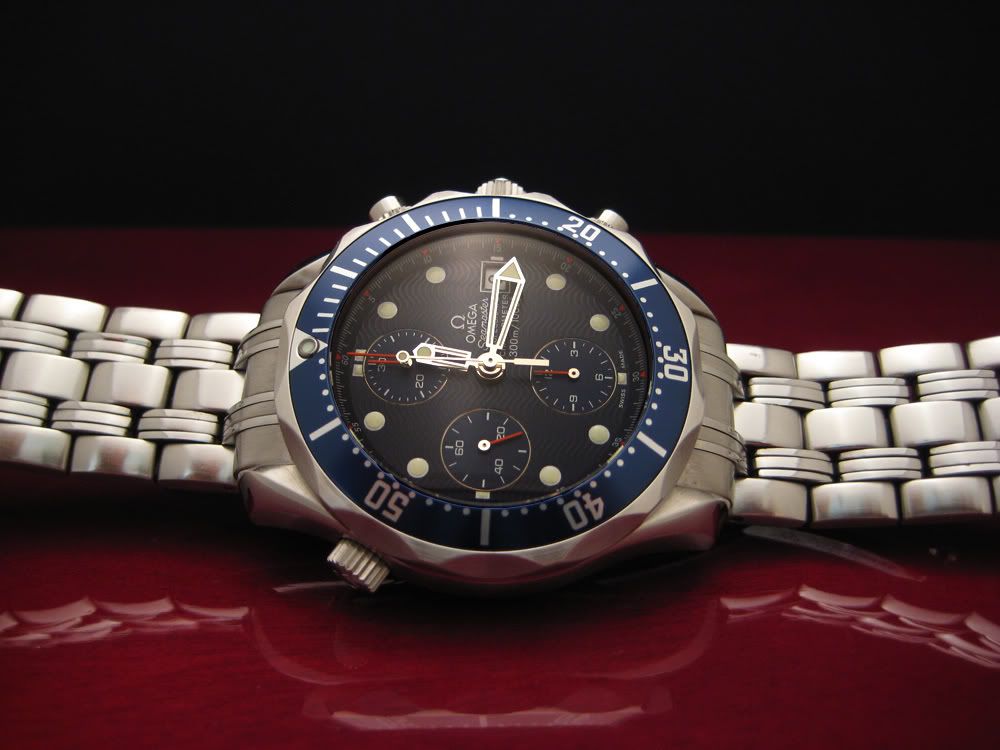
Let's get the right color by using "Auto Color" option. (Refer to Part 1)
Presto~!
*Before*
*After*
Next...
- How to make your picture more sharpe and crisp -
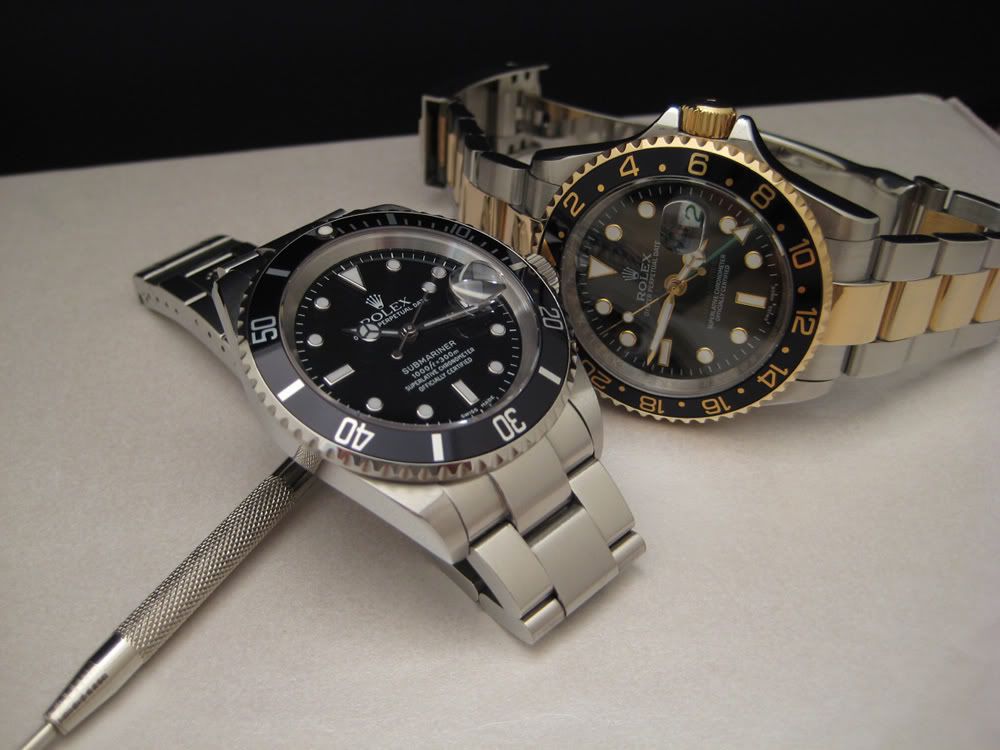
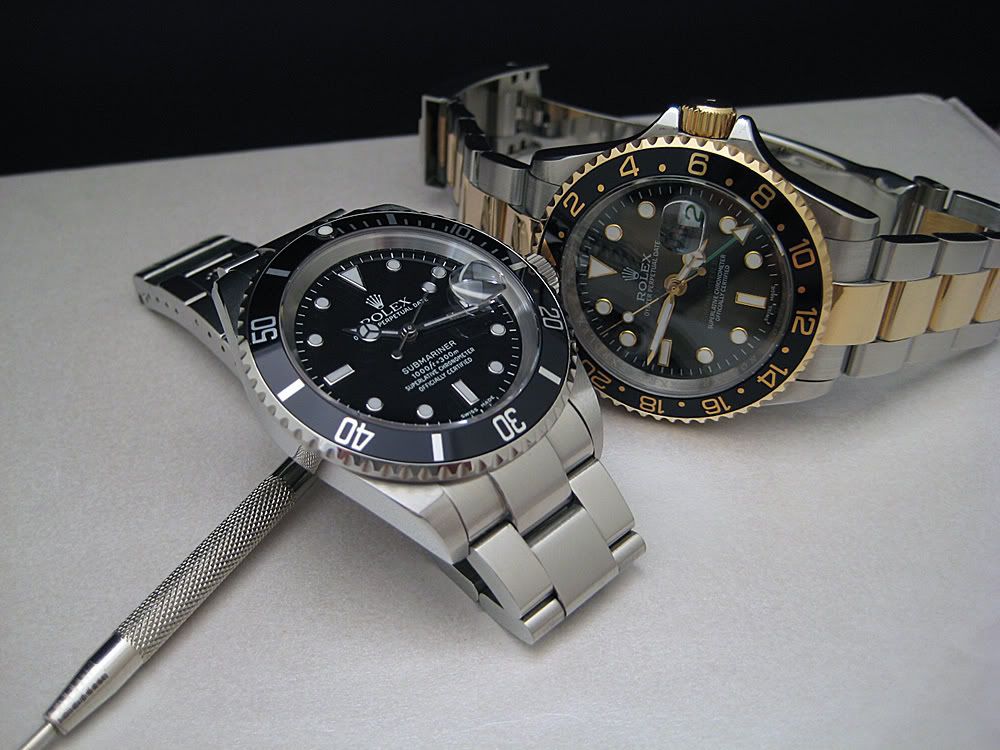
Here, we have a picture of good ol sub and beautiful TT GTM II.
Now, I want this picture to be more sharpe and crisp so that it would pop out to viewer's eye.
Go to "Filter" => "Sharpen" => "Unsharp Mask.."
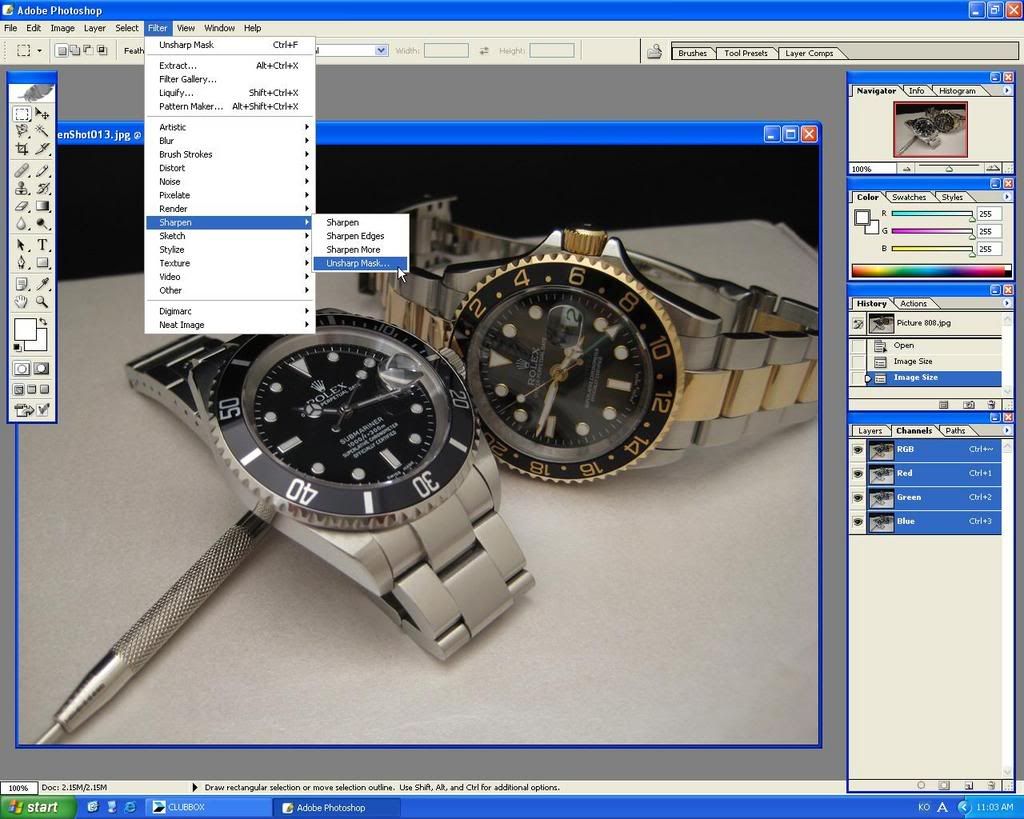
There are three vlaues you can adjust...."Amount", "Radius" and "Threshold".

Again, it will require different amount of values depending on your picture.
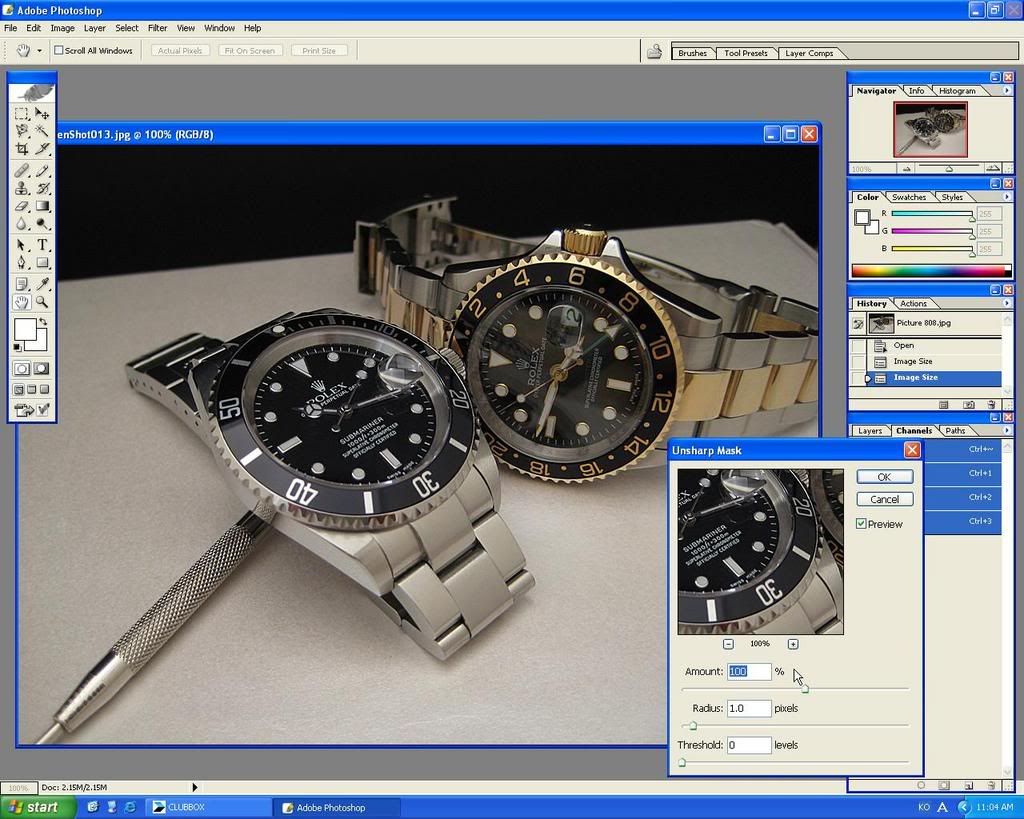
But, here we will use this value to make this picture more sharpe and crisp.
Let's change the "Amount" to 100%, "Radius" to 1.0 and leave the "Threshold" to 0.
Notice how sharpe and crisp the picture became?
Adjust the Color using "Auto Color" and...
Presto~!
We have a winner~~~
*Before*
*After*
And that is all for my "Basic" part of this tutorial~!
Next part will be a Intermediate level which will cover stuffs like "Clone Stamping" and "Noise Reduction", etc....
It will be fun~ Please stay tune~~~ :wink:
And thanks for reading my crappy writing~! :lol:
Welcome to Jiro's How to enhance your picture tutorial part 2 - Basic.
Here in part 2, I will try to show you most of the basic photoshop techniques that will come in handy when enhancing pictures of your watches
so that we can move on to the next intermediate level on upcoming part 3.
- How to get rid of Dust & Scratches -
Here we have a close up shot of PAM005 which has some dust on the dial.
Let's get rid of those annoying bastards! :twisted:
First, select the spot that you want to get rid of....
And go to "Filter" => "Noise" => "Dust&Scratches..."
Change the Radius to 5 while leaving the Threshold on zero.
Press OK.
Notice that dust is now gone?
Now, let's repeat the process and apply it onto all the neccessary areas.
But this time, you don't have to click on "Filter" and go through all that....
Just select the area you want and press "Ctrl + F" which will repeat the last "Filter" action! Neat eh~ :wink: It will save you whole lot of time~
And Here's the result of that.....
Nice and clean~~~~ 8)
*Before*
*After*
Next.....
- How to cut through the glare -
Often times we take a picture and there are this glare on the crystal blocking the view of dial.
This tutorial will teach you how to cut through that annoying glare.
Here, we have a picture of might SMP Chrono.....but it's hard to tell the true texture & color of the dial because of that glare....
Let's use the Magnetic Lasso tool which was covered in part 1 and go around the whole crystal.
(If you prefer using Elliptical Marquee tool, you can use that too. I just prefer using Magnetic Lasso tool more since I can select any shape of area.)
Now, go to "Image" => "Adjustments" => "Levels..."
In part 1, we've learned to use this "Level.." option to adjust color by changing only one of the "Input Level".
But this time, we're going to have to use all 3 "Input Levels" to cut through that glare....
It will require different values depending on your pictures, but here we will use this value to change the input level.
(This is just an example to show you how it's done....you really have to play with this option to get used to it.)
Let's go ahead and change the Input Levels to 60, 0.50, 240
Notice how you can see the dial now?
Let's get the right color by using "Auto Color" option. (Refer to Part 1)
Presto~!
*Before*
*After*
Next...
- How to make your picture more sharpe and crisp -
Here, we have a picture of good ol sub and beautiful TT GTM II.
Now, I want this picture to be more sharpe and crisp so that it would pop out to viewer's eye.
Go to "Filter" => "Sharpen" => "Unsharp Mask.."
There are three vlaues you can adjust...."Amount", "Radius" and "Threshold".
Again, it will require different amount of values depending on your picture.
But, here we will use this value to make this picture more sharpe and crisp.
Let's change the "Amount" to 100%, "Radius" to 1.0 and leave the "Threshold" to 0.
Notice how sharpe and crisp the picture became?
Adjust the Color using "Auto Color" and...
Presto~!
We have a winner~~~
*Before*
*After*
And that is all for my "Basic" part of this tutorial~!
Next part will be a Intermediate level which will cover stuffs like "Clone Stamping" and "Noise Reduction", etc....
It will be fun~ Please stay tune~~~ :wink:
And thanks for reading my crappy writing~! :lol: