The next step
I'm now going to assume that you've done the first two parts and are familiar with your camera and have taken a pile of photos, some of which you're secretly really proud of. If this is where you're at, I hate to say it, but that's it. You can now photograph watches. You're on your own, you don't need my help, you take perfectly good pictures and don't embarrass yourself when posting them to the replica forums.
This was what we set out to do, right? Increase the average quality of photographs on the forums? Well we've done it, and for that I thank everyone that put the effort in. We're done. Carry on, you don't need me any more.
Pardon? You want more? But you're taking pictures of watches. You understand about the importance of light and stability and you may even have bought a light-tent and tripod. What more can I do for you?
Oh, okay, let's see what we can do.
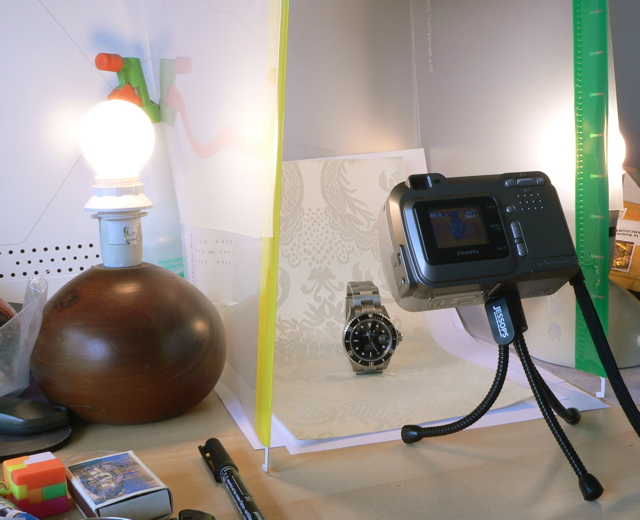
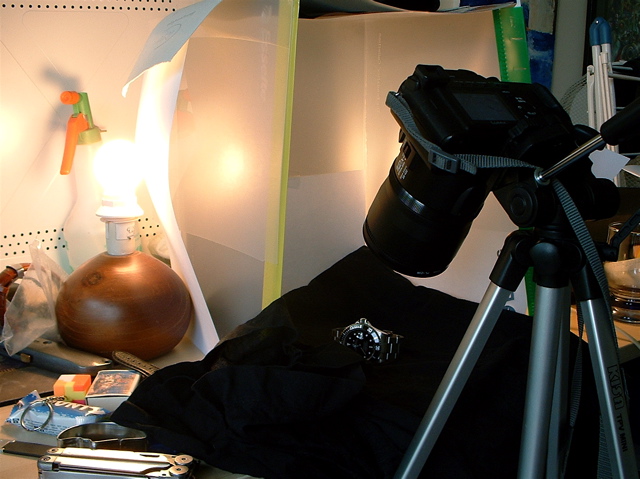
At this point, we're no longer in the crappy camera and pillowcase phase. If you don't have a tripod and a light-box, you should go and get them, even if that means a desk tripod and making a light-box out of translucent folders like I did.
This, however, will be the last tutorial for the cheaper cameras. After this, you'll need a camera that can take filters as we're going to use the miracle that is the Polarising filter. That's for the next lesson, though.
Today, we're doing the last lesson on basic setup that will allow you to take perfectly lit pictures. We're going to discuss White Balance. Go get your camera manual and check how to set the white balance on your particular camera, as you'll need to know how to do this to avoid this kind of picture:
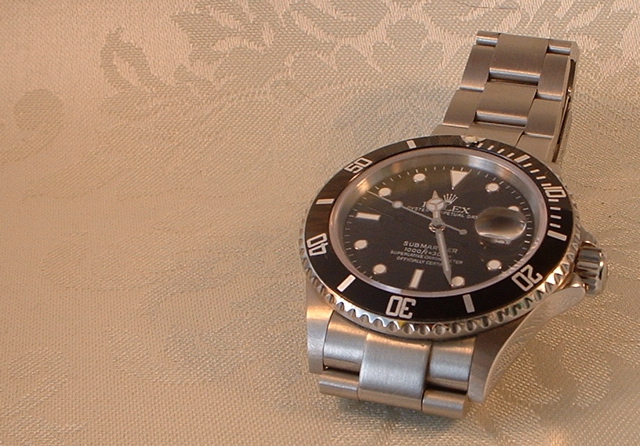
That picture was taken with default white balance settings and indoor lighting. You can fix that in software, as described in my basic Picasa tutorial, as I have done here, although I used iPhoto on the Mac.
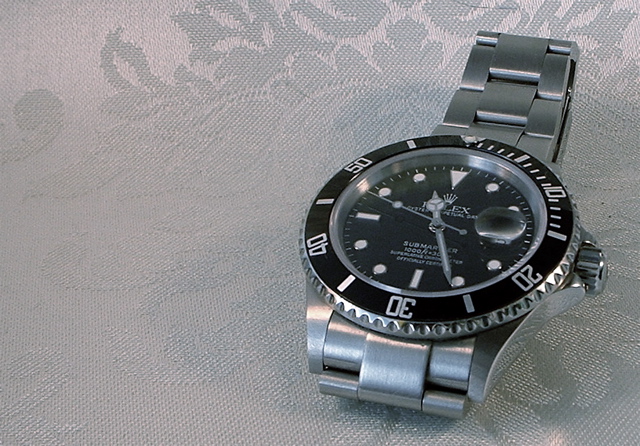
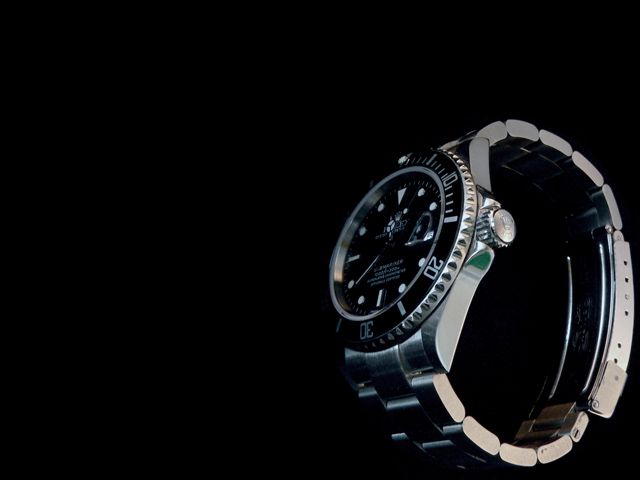
Obviously, if you used your camera's white balance setting beforehand to set it for indoor lighting (usually a picture of a light bulb) your pictures would be lit as follows:
There you go, basic lighting explained. Read about how to set up your white balance. It's very important, and it's different for every camera, so you're on your own at this point.
That's it for the simple stuff. You have it all.
Here's a checklist of how to take a picture the Pugwash way:
If you follow this routine, you'll get useable pics every time. You'll be taking photographs, not snapshots.
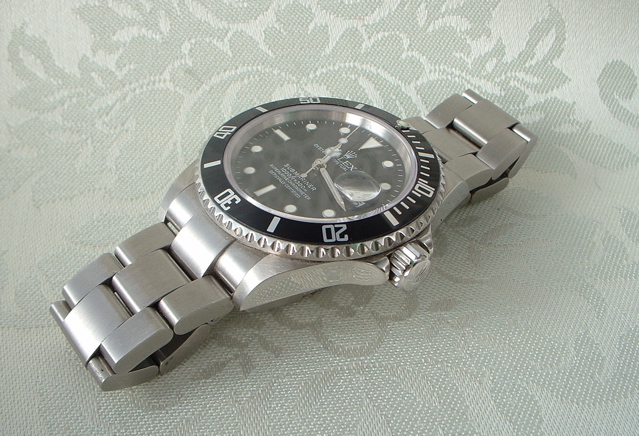
Thank you for taking part in these basic lessons. I hope some of you will be interested enough to go past this and start trying the hard stuff. If this is you, here's a sneak into the next lesson, just to keep you interested:
I'm now going to assume that you've done the first two parts and are familiar with your camera and have taken a pile of photos, some of which you're secretly really proud of. If this is where you're at, I hate to say it, but that's it. You can now photograph watches. You're on your own, you don't need my help, you take perfectly good pictures and don't embarrass yourself when posting them to the replica forums.
This was what we set out to do, right? Increase the average quality of photographs on the forums? Well we've done it, and for that I thank everyone that put the effort in. We're done. Carry on, you don't need me any more.
Pardon? You want more? But you're taking pictures of watches. You understand about the importance of light and stability and you may even have bought a light-tent and tripod. What more can I do for you?
Oh, okay, let's see what we can do.
At this point, we're no longer in the crappy camera and pillowcase phase. If you don't have a tripod and a light-box, you should go and get them, even if that means a desk tripod and making a light-box out of translucent folders like I did.
This, however, will be the last tutorial for the cheaper cameras. After this, you'll need a camera that can take filters as we're going to use the miracle that is the Polarising filter. That's for the next lesson, though.
Today, we're doing the last lesson on basic setup that will allow you to take perfectly lit pictures. We're going to discuss White Balance. Go get your camera manual and check how to set the white balance on your particular camera, as you'll need to know how to do this to avoid this kind of picture:
That picture was taken with default white balance settings and indoor lighting. You can fix that in software, as described in my basic Picasa tutorial, as I have done here, although I used iPhoto on the Mac.
Obviously, if you used your camera's white balance setting beforehand to set it for indoor lighting (usually a picture of a light bulb) your pictures would be lit as follows:
There you go, basic lighting explained. Read about how to set up your white balance. It's very important, and it's different for every camera, so you're on your own at this point.
That's it for the simple stuff. You have it all.
Here's a checklist of how to take a picture the Pugwash way:
- Clean the watch[/*:m:36kkw8ac]
- Light the scene[/*:m:36kkw8ac]
- Set the camera's white balance[/*:m:36kkw8ac]
- Make sure everything is in focus and framed[/*:m:36kkw8ac]
- Stabilise the camera[/*:m:36kkw8ac]
- Turn on the timer[/*:m:36kkw8ac]
- Press the button[/*:m:36kkw8ac]
- Stand well back[/*:m:36kkw8ac]
- click[/*:m:36kkw8ac]
- Import the picture into the computer[/*:m:36kkw8ac]
- Check the levels, colours, etc.[/*:m:36kkw8ac]
- Crop, scale and export[/*:m:36kkw8ac]
If you follow this routine, you'll get useable pics every time. You'll be taking photographs, not snapshots.
Thank you for taking part in these basic lessons. I hope some of you will be interested enough to go past this and start trying the hard stuff. If this is you, here's a sneak into the next lesson, just to keep you interested:
